


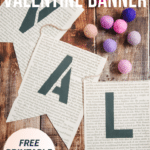
A simple idea for Valentine decorations; here is how to make a DIY book page Valentine banner using stencils! A simple, sweet Valentine's Day garland.
Whether you’ve got a mantle to decorate or just a wall with some command hooks (like me!), a garland or banner is the perfect, simple way to decorate for any holiday in a simple, stress-free way.
I love displaying banners for all holidays. Patriotic ones for the 4th of July, a cute felt ball acorn garland for fall, and a Christmas tassel garland for the Christmas holiday… Easy and fast to make; banners are a craft favorite of mine.
Today, I’m combining my love of old book pages with stencils to make a beautiful Valentine’s Day garland perfect for any mantle or wall!
Jump to:
Why You'll Love This Craft
- A garland or banner is the easiest way to decorate for a new season or holiday!
- This Valentine's Day banner is the perfect mix of rustic chic and trendy stencils.
- This same idea can be adapted for any occasion by changing up the words that are stenciled. You could do Happy Birthday, Merry Christmas, BOO, Halloween, or any other word(s) you want!
Craft Supplies Needed
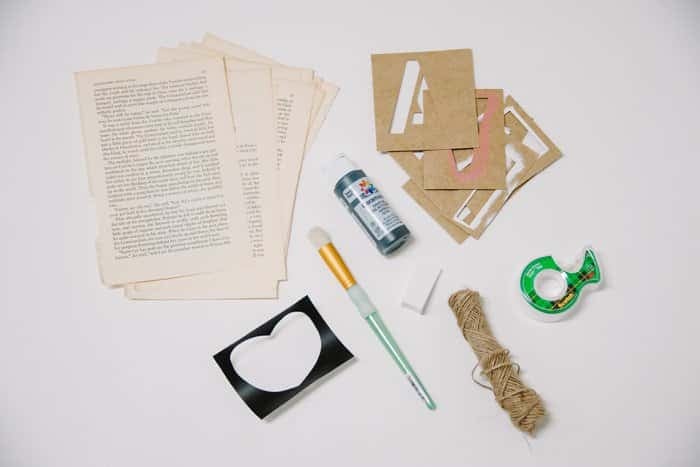
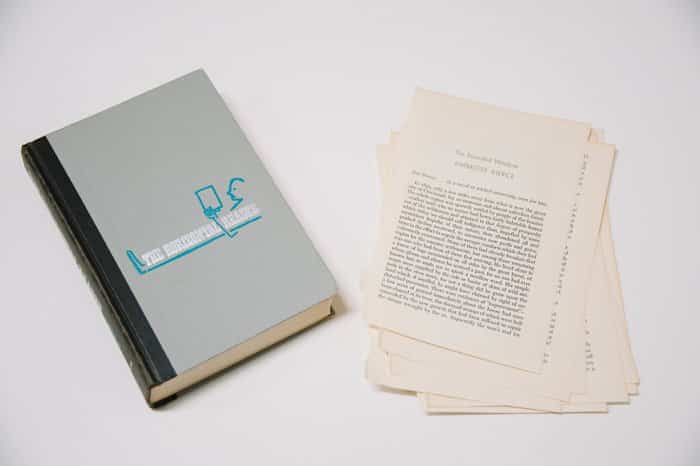
- Book Pages - Check garage sales, thrift stores, or Free sections at libraries or book stores for old books you can repurpose into crafts.
- Alphabet Stencils - To stencil letters into the banner.
- Acrylic Paint - I used black paint so it would show up on the book pages.
- Stencil Brush - You want a stiff brush that lets you stencil properly.
- Twine - My preferred choice of hanging string!
- Scotch Tape - Clear tape for taping the paper flags onto the twine.
- Vinyl, Cardstock, or Paper - To cut out the heart template.
- Scissors - A craft room staple!
- Paper Cutter - This is optional but worth every penny!
- Banner Flag and Heart Shape Templates - Available for free in The Resource Library!
How to Make a DIY Book Page Valentine Banner
Step 1. Print and cut out the banner flag template from the resource library.
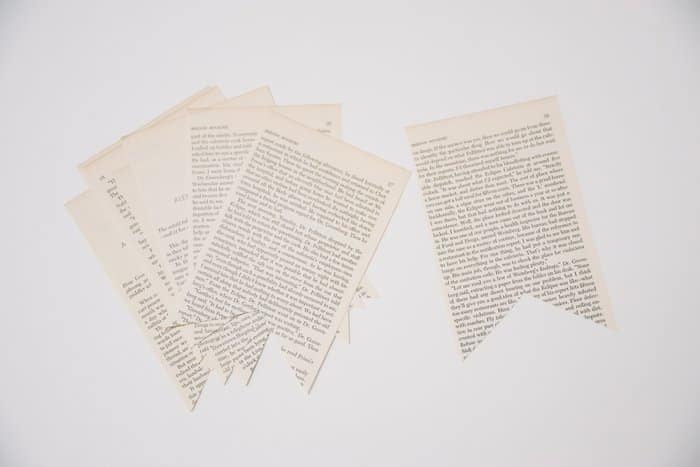
Tear pages from an old book.
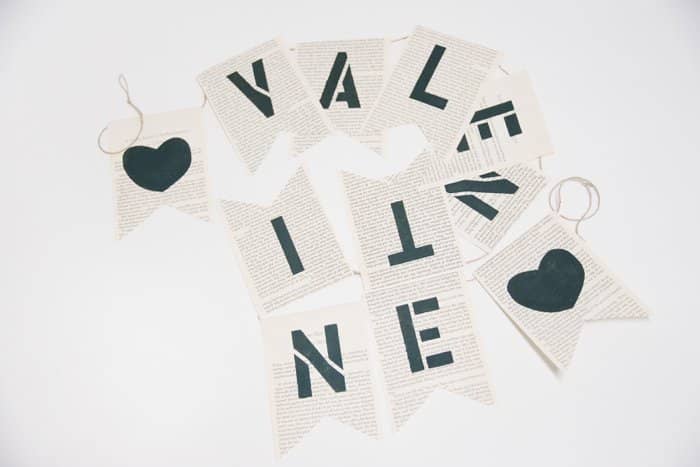
Step 2. Count how many paper flags you need to make your Valentine's banner.
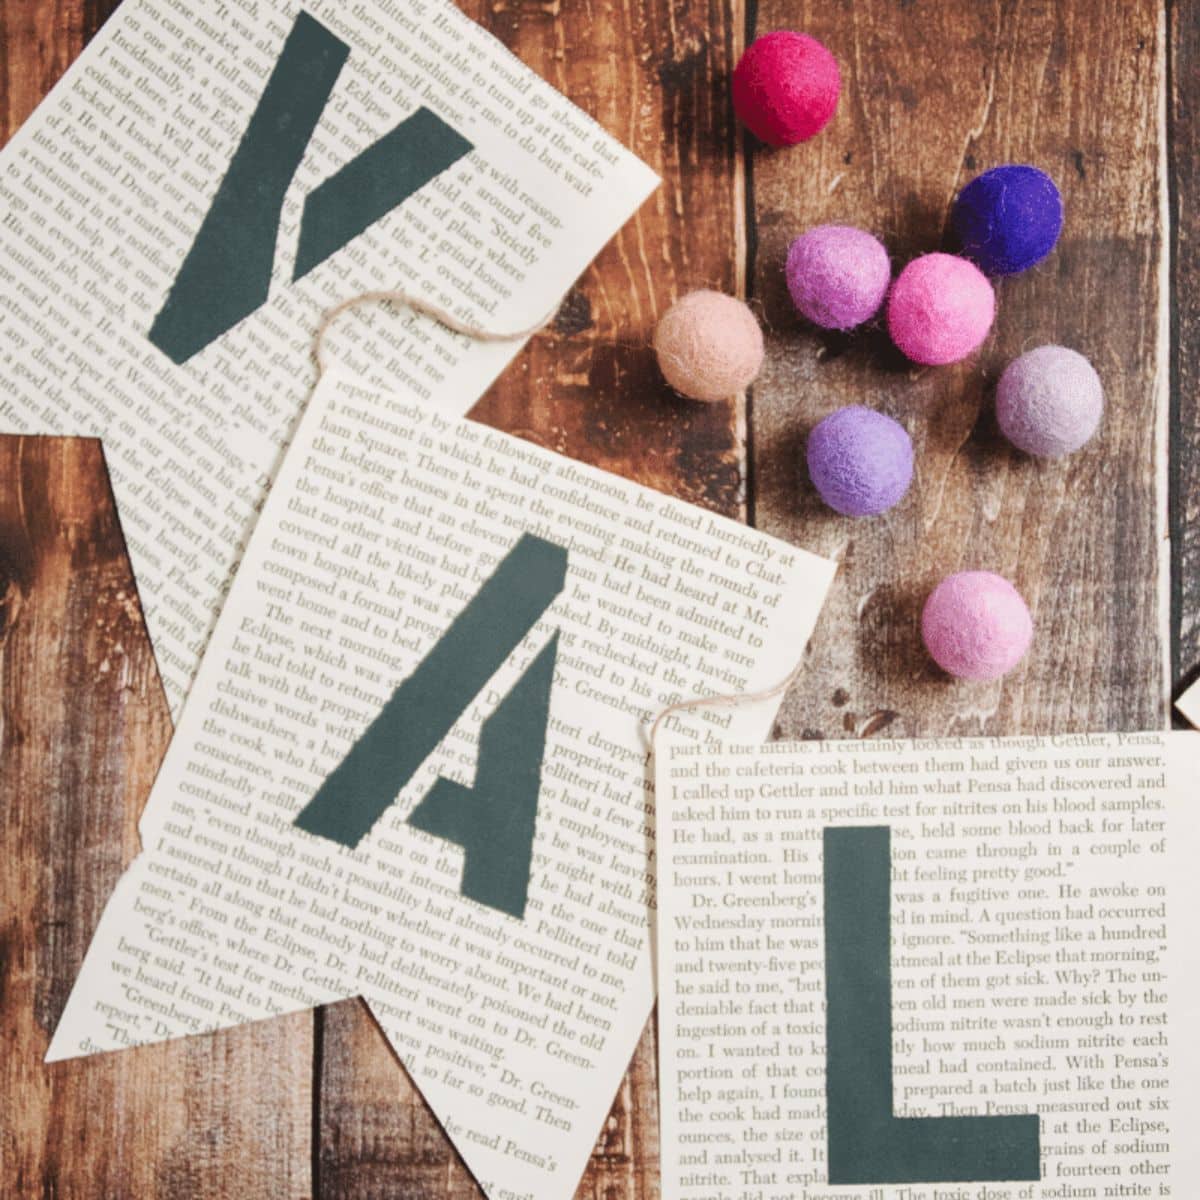
I needed 11 flags total to spell VALENTINE with two hearts, one on either side of the word.
Then, using scissors or a paper cutter, cut the book pages into flag shapes.
I cut the paper into rectangles first with my paper cutter.
Then, I used scissors to cut the notch in the bottom of each flag.
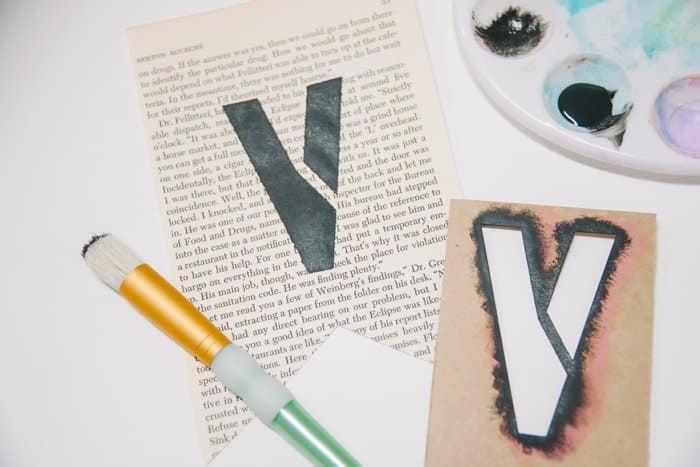
Step 3. Using the how to stencil method I explore here, stencil the letters onto the book page flags.
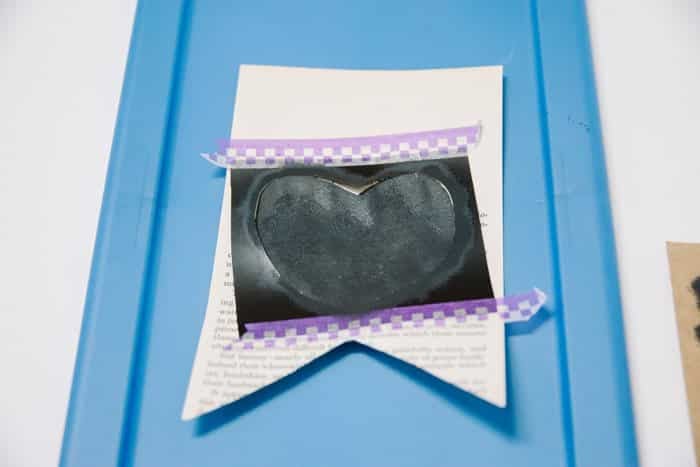
Step 4. Cut out a heart shape using the heart shape template, and stencil it onto the flag(s).
I used vinyl but cardstock or thick paper would work best to make a heart stencil.

Step 5. Repeat, stenciling all the letters and shapes onto the flags.
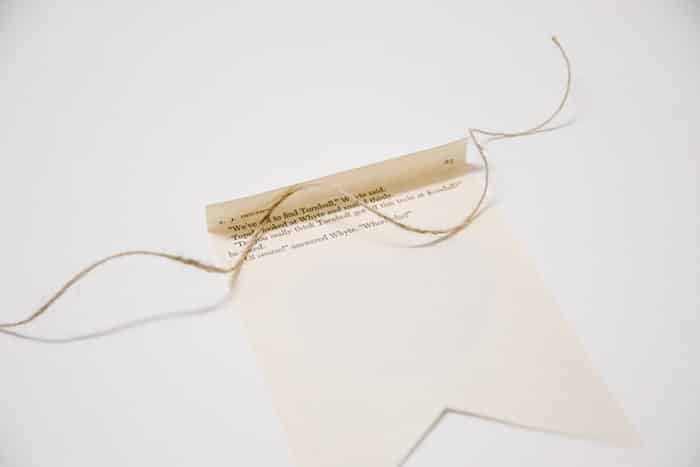
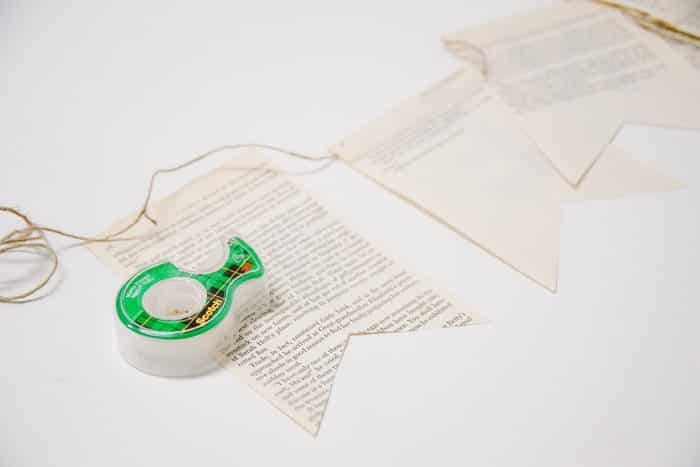
Step 6. Cut a long length of twine as a hanging string.
Arrange the banner's letters and shapes in the correct order.
Then, fold the top part over and tape paper flags onto the twine banner.
PRO TIP: When I made a book page banner in the past, I used a glue stick to attach the flags to the twine, before reinforcing them with scotch tape.
This time, I wanted the freedom to move the flags around to adjust the spacing, so I decided to skip the glue.
Instead, I folded the top of each paper flag over about a half inch and taped it down over the twine with clear tape.
Step 7. Repeat for all of the flags in your banner.

Step 8. Tie loops at the ends of the twine and hang your Valentine's Day banner up!
You can fine-tune the spacing of the flags, and trim off any excess twine from the ends.
Common Questions
My favorite places to look for old books to use in craft projects are to first check out my own bookshelves for any books I know I will never read again, or books that are worn out, ripped, or stained. After that, I like to look for books at garage sales, thrift stores, and I keep my eyes open for "free books" boxes or shelves at libraries or book stores.
I dedicated a whole blog post to explaining the right way to stencil. It breaks it down step by step, with tips to get the cleanest edges to your stenciled letter or shape.
For this project, I simplified the process and simply folded the top of the paper flag over ½" and taped it down on the back side of the flag. The benefit is this allows the flag to slide along the twine, which means you can adjust the spacing of the flags at any time.
If you don't want the flags to move around on the twine, you could use a glue stick first to glue the twine to the back of the paper flag before you fold it over and tape it down. This is what I did in the original book page banner tutorial.
But now that I've made both versions, I like the movable option best - more flexibility to adjust the garland!
Valentine’s Day is a fun opportunity to get creative and add some color to an otherwise long, dreary winter. (It's long and dreary here in Minnesota, anyway!)
This stenciled Valentine’s Day garland made with old book pages is the perfect Valentine's decor idea. You can use supplies you already have and customize it as you like!
More Garland Ideas You'll Love


---
⭐️🧶 Did you enjoy this craft and want to see more like it? ✂️ Join our FREE email community and get inspiring craft ideas sent right to your inbox! 🧵 ⭐️
---

How to Make a DIY Book Page Valentine Banner
Materials
- Book Pages
- Alphabet Stencils
- Acrylic Paint
- Stencil Brush
- Twine
- Scotch Tape
- Vinyl, Paper, or Cardstock
- Scissors
- Paper Cutter
- Banner Flag and Heart Shape Templates Found in the Resource Library
Instructions
- Print and cut out the banner flag template from the resource library.Tear pages from an old book.
- Count how many paper flags you need to make your Valentine's banner.I needed 11 flags total to spell VALENTINE with two hearts, one on either side of the word.Then, using scissors or a paper cutter, cut the book pages into flag shapes.I cut the paper into rectangles first with my paper cutter.Then, I used scissors to cut the notch in the bottom of each flag.
- Using the how to stencil method I explore here, stencil the letters onto the book page flags.
- Cut out a heart shape using the heart shape template, and stencil it onto the flag(s).I used vinyl but cardstock or thick paper would work best to make a heart stencil.
- Repeat, stenciling all the letters and shapes onto the flags.
- Cut a long length of twine as a hanging string.Arrange the banner's letters and shapes in the correct order.Then, fold the top part over and tape paper flags onto the twine banner.PRO TIP: When I made a book page banner in the past, I used a glue stick to attach the flags to the twine, before reinforcing them with scotch tape.This time, I wanted the freedom to move the flags around to adjust the spacing, so I decided to skip the glue.Instead, I folded the top of each paper flag over about a half inch and taped it down over the twine with clear tape.
- Repeat for all of the flags in your banner.
- Tie loops at the ends of the twine and hang your Valentine's Day banner up!You can fine-tune the spacing of the flags, and trim off any excess twine from the ends.
Notes
- Check for old books at garage sales, thrift stores, and free boxes at the library or local book stores.
- Use this how to stencil guide to get the best stenciling results.
- Customize this banner for any occasion or holiday by changing out the word(s) you stencil onto the paper flags!


Leave a Reply