


Learn how to make a heart-shaped salt dough jewelry dish that's perfect for Valentine's Day or as a place to keep your jewelry every day!

Salt dough is an easy-to-make non-toxic dough made with flour, salt, and water.
It can be used as a natural alternative to play doh for kids, and it can be molded into shapes and air-dried or dried in an oven to harden.
We recently made salt dough hearts and turned them into a cute salt dough heart garland.
Today, we will use salt dough to make a heart-shaped jewelry dish that would make a wonderful Valentine's Day gift, or just a handy place to keep your jewelry daily!
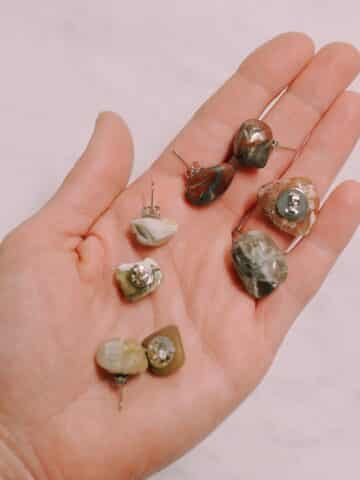
This jewelry dish is a lovely place to store a mini glass bottle necklace or DIY agate earrings.
Jump to:
Why You'll Love This Craft
- Salt dough is super easy to make, with only three household ingredients needed - flour, salt, and water!
- The salt dough can be used as a non-toxic, cheap alternative to play doh, or used to make different shapes for handmade salt dough ornaments.
- This is a fun craft for kids because it's very kid-friendly. The ingredients are non-toxic, there are no dangerous supplies (besides the oven which requires adult help), and kids get to pick their shapes, and use cookie cutters with the dough. Plus, they can paint their finished creations which adds another layer of fun!
Craft Supplies Needed
- Flour - 2 cups
- Salt - 1 cup
- Water - 1 cup
- Mixing Bowl and Spoon - To mix the wet and dry ingredients together in.
- Cutting Board - To roll the dough out on.
- Rolling Pin - Let's you roll the dough flat in preparation for cut out shapes with cookie cutters.
- Heart Cookie Cutter - I used a large heart shape to make this jewelry dish.
- Cookie Sheet - To put the heart-shaped jewelry dish on it.
- Parchment Paper - To protect the cookie sheet, and make clean up easy.
How to Make a Heart-Shaped Salt Dough Jewelry Dish

Step 1. Use this easy salt dough recipe to make up a batch of salt dough.

Step 2. In a mixing bowl, combine 2 cups of flour and 1 cup of salt.
Stir them together.

Step 3. Slowly add in 1 cup of water in small increments, stirring each time water is added.
Stir until the dough is all combined.
Knead the dough for 5 minutes, and let it rest for 10 minutes.
Put the dough into the fridge for 10 minutes before rolling it out, so it's easier to handle.

Step 4. Roll the chilled dough out on a cutting board with a rolling pin.
Dust the cutting board and rolling pin with flour to keep the dough from sticking.
Roll the dough out until it's about ¼" thick.

Step 5. Cut out a large heart from the dough, using a cookie cutter.
If you don't have a cookie cutter in the shape of a large heart, you could create a free-hand heart.

Step 6. Lay the salt dough heart onto a parchment paper-lined cookie sheet.
Use your fingers to push the edges of the heart up to create a lipped edge.
This will create a dish to hold jewelry.

Step 7. Bake the heart jewelry dish in a 250 degree Fahrenheit oven for 2+ hours or until it's hardened.
You can also air dry the heart but it'll take at least 2+ days, depending on the temperature and humidity of your home.

Step 8. You can use the jewelry dish as it is, or you can brush on a sealer like Mod Podge to help protect the jewelry dish.
If kids are making this jewelry dish, you can also have them paint it too.

Common Questions
You need three ingredients to make salt dough: flour, salt, and water!
A standard recipe for salt dough is 2 cups flour, 1 cup salt, and 1 cup water. This makes a good amount of dough that will let you make several jewelry dishes, or a handful of ornaments.
You can also easily double, triple, or halve the recipe to make more or less salt dough.
Double the recipe: 4 cups flour, 2 cups salt, 2 cups water.
Triple the recipe: 6 cups flour, 3 cups salt, 3 cups water.
Half the recipe: 1 cup flour, ½ cup salt, ½ cup water.
If you refrigerate the dough for at least 10 minutes, it will make it easier to handle and much less sticky.
You can re-refrigerate it if it gets too sticky as you're working on it. Do this as many times as needed.
You can also add a little more flour to the dough to decrease the stickiness, and/or add flour to the outside of the rolling pin and cutting board to prevent sticking.
You can either bake the salt dough in the oven, or air dry it.
If you bake it in the oven, use a 275-degree oven, and bake the salt dough for 2+ hours. You can turn the salt dough over halfway through so it can dry the other side.
Air drying will take several days, depending on the temperature and humidity of your home. Again, you can flip the salt dough over to dry the other side halfway through.

Salt dough can be used to make many different types of craft projects. (Like these salt dough Christmas ornaments and winter-inspired salt dough garland.)
You can cut it into any shape imaginable using cookie cutters, or mold it into figures like you would with play-doh or clay.
The best part is it's easy to make, all-natural, and hardens either by air drying or in the oven!
More Jewelry Crafts You'll Love


---
⭐️🧶 Did you enjoy this craft and want to see more like it? ✂️ Join our FREE email community and get inspiring craft ideas sent right to your inbox! 🧵 ⭐️
---

How to Make a Heart-Shaped Salt Dough Jewelry Dish
Materials
- Flour - 2 cups
- Salt - 1 cup
- Water - 1 cup
- Mixing Bowl and Spoon
- Cutting Board
- Rolling Pin
- Heart Cookie Cutter
- Cookie Sheet
- Parchment Paper
Instructions
- Use this easy salt dough recipe to make up a batch of salt dough.
- In a mixing bowl, combine 2 cups of flour and 1 cup of salt.Stir them together.
- Slowly add in 1 cup of water in small increments, stirring each time water is added.Stir until the dough is all combined.Knead the dough for 5 minutes, and let it rest for 10 minutes.Put the dough into the fridge for 10 minutes before rolling it out, so it's easier to handle.
- Roll the chilled dough out on a cutting board with a rolling pin.Dust the cutting board and rolling pin with flour to keep the dough from sticking.Roll the dough out until it's about ¼" thick.
- Cut out a large heart from the dough, using a cookie cutter.If you don't have a cookie cutter in the shape of a large heart, you could create a free-hand heart.
- Lay the salt dough heart onto a parchment paper-lined cookie sheet.Use your fingers to push the edges of the heart up to create a lipped edge.This will create a dish to hold jewelry.
- Bake the heart jewelry dish in a 250 degree Fahrenheit oven for 2+ hours or until it's hardened.You can also air dry the heart but it'll take at least 2+ days, depending on the temperature and humidity of your home.
- You can use the jewelry dish as it is, or you can brush on a sealer like Mod Podge to help protect the jewelry dish.If kids are making this jewelry dish, you can also have them paint it too.
Notes
- The salt dough recipe can be doubled to make a larger batch, or halved if you want to make a small batch of salt dough.
- Refrigerate the dough for 10 minutes before handing it to decrease the stickiness. This makes it easier to roll out and cut with cookie cutters.
- Flip the salt dough dish over, halfway through drying (either in the oven or air drying) to help the other side dry.




Leave a Reply