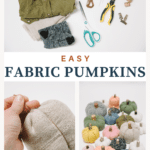
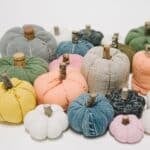
Learn how to make fabric pumpkins out of old, recycled clothes or fabric scraps in this step-by-step photo tutorial! They're perfect for your fall home decor!

Fall decor doesn't have to be spooky or creepy.
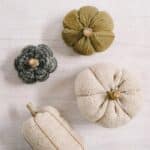
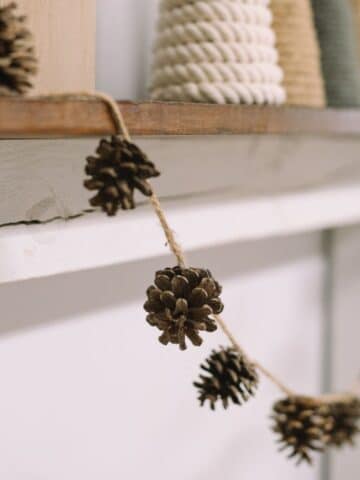
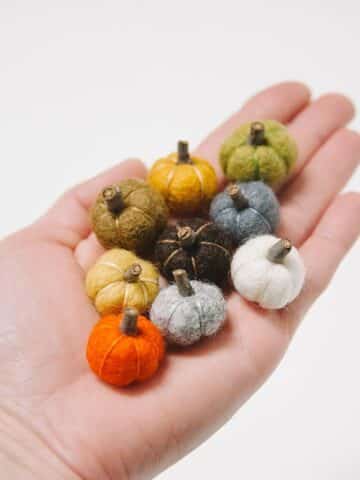
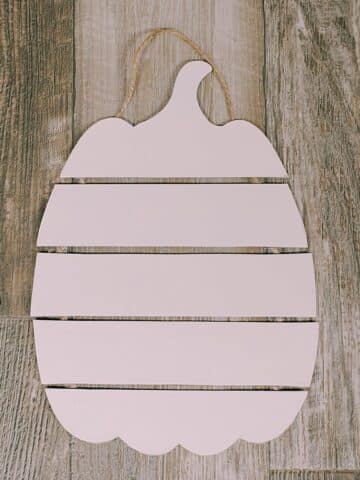
Pumpkins are a staple of fall decorations - (like these cute felt ball pumpkins and DIY wooden pumpkins) - and there's not much cuter than a fabric pumpkin!
We're going to take a look at how to make fabric pumpkins, as well as how to use old clothes to recycle into darling fabric pumpkins you can't wait to display year after year!
Jump to:
Why You'll Love This Craft
- Pumpkins are versatile decorations that can be used for Halloween and Thanksgiving, as well as all throughout the Fall season.
- You can use any type of fabric you want - old favorites, new fabric you spot at the craft store, thrifted fabric you want to upcycle, or your child's old favorite pair of pajama pants with 4 holes in the knees.
- My favorite part of these easy fabric pumpkins is how good they look with little wooden stems on top. There's just something I love about combining fabric with the rustic stick stems.
Craft Supplies Needed
- Fabric or Old Clothes - Clean out your fabric stash or use this as the perfect opportunity to clear your drawers of items you no longer wear or better yet - socks with holes in the bottom!
- Sewing Machine - A needle and thread would work too.
- Embroidery Needle & Floss - It's best to pick embroidery floss in a complementary or coordinating color to the fabric.
- Poly-Fil - I used fluffy poly-fil but you can use anything from fiber fill, shredded paper, or even scraps of old fabric.
- Wooden Stick or Branch - I got a nice straight branch from the ground in the woods around my house.
- Garden Clippers - You need something to cut the branch or stick into smaller pieces; I found a garden clipper to work best for this.
- Scissors, Hot Glue Gun, and Glue
How to Make Fabric Pumpkins
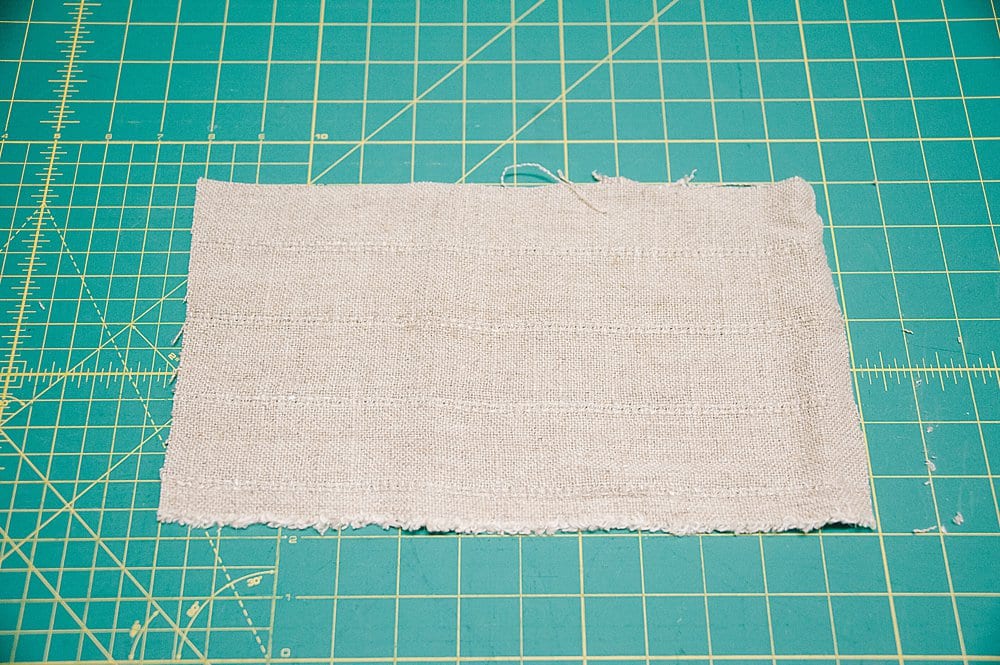
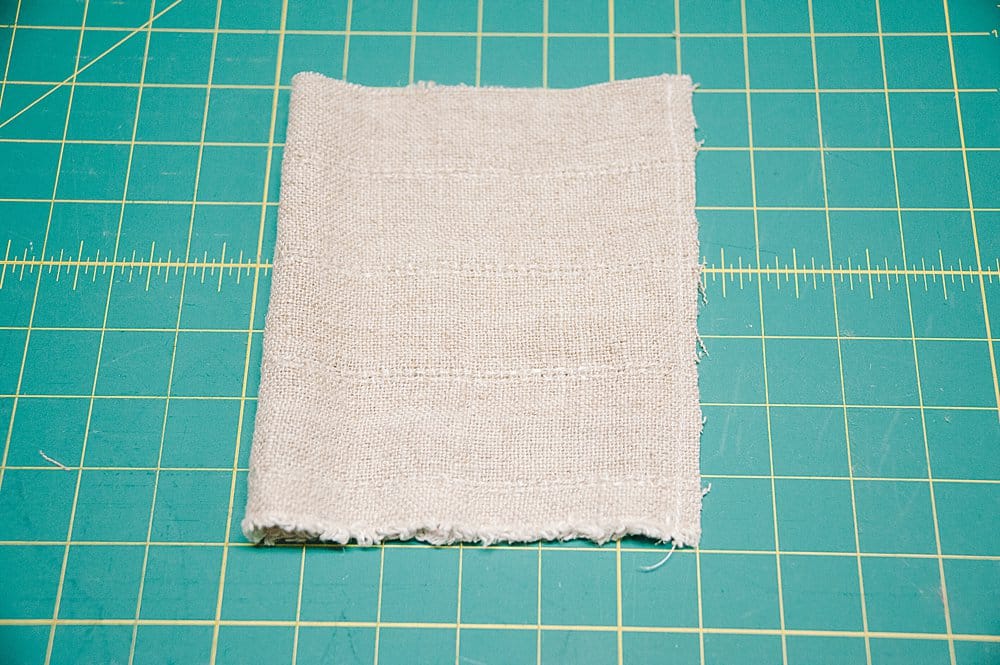
Step 1. Cut fabric into a rectangle.
You can experiment with different-sized rectangles, but the fabric pictured here is 12"x7".
The longer the length of the fabric, the bigger the diameter your pumpkin will have.
The taller the height of your fabric rectangle, the taller your fabric pumpkin will be.
PRO TIP: Make pumpkins with different-sized fabric rectangles so you'll have a variety to display!
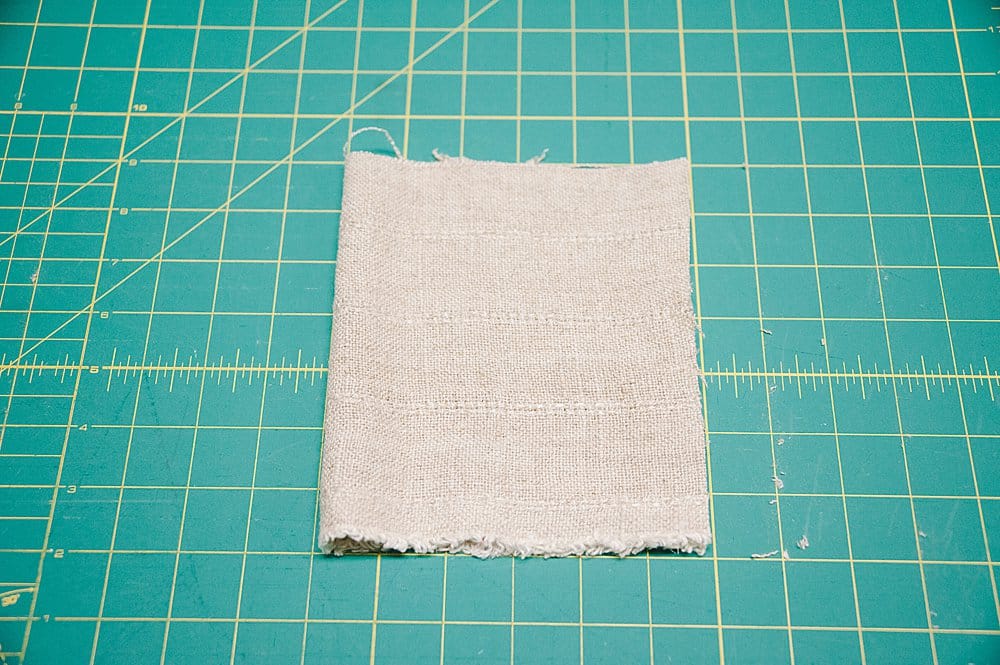
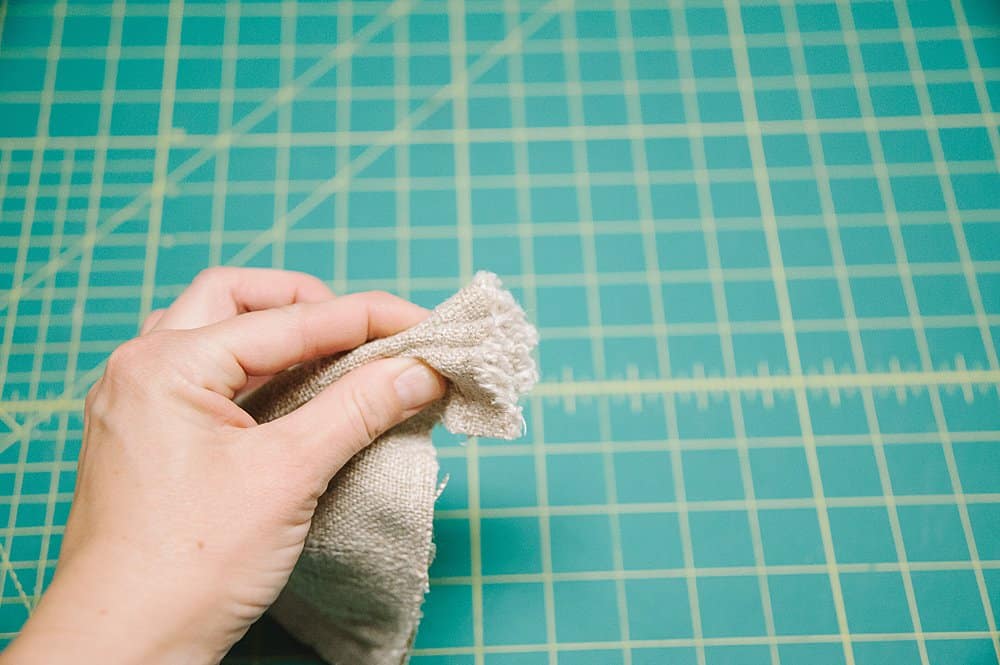
Step 2. Fold the fabric in half, so the right sides are together.
We took the lefthand 7" edge and brought it over to the righthand 7" edge.
Step 3. Sew a vertical line along the raw edges; the white-thread seam runs vertically along the right vertical edge of the fabric.
You now have an inside-out tube.
Step 4. Gather the bottom edge of the tube together, folded like an accordion.
PRO TIP: Before starting this step, if you are using a shirt sleeve or the tube of a sock for your fabric, make sure they are inside out.
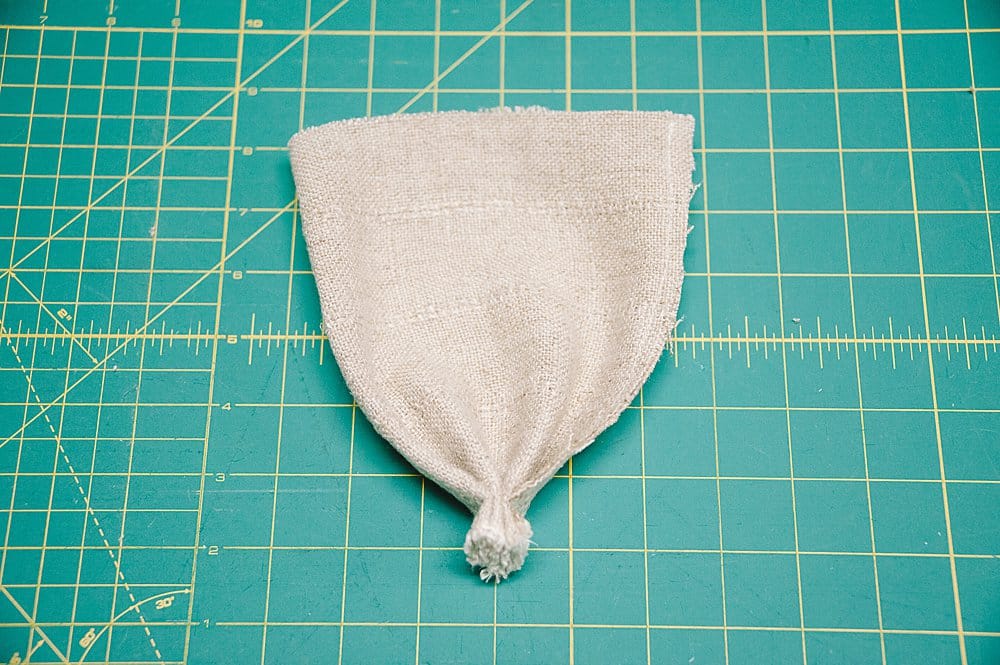
Step 5. Sew along the bottom of the accordion.
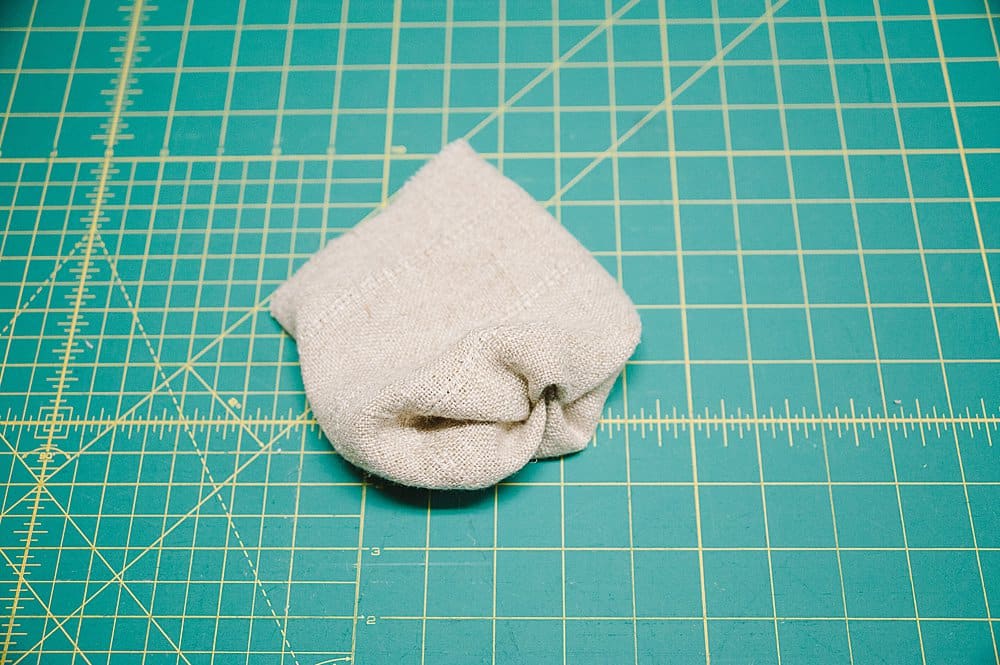
Step 6. Turn the fabric right side out.
This gathered area is the bottom of your pumpkin.
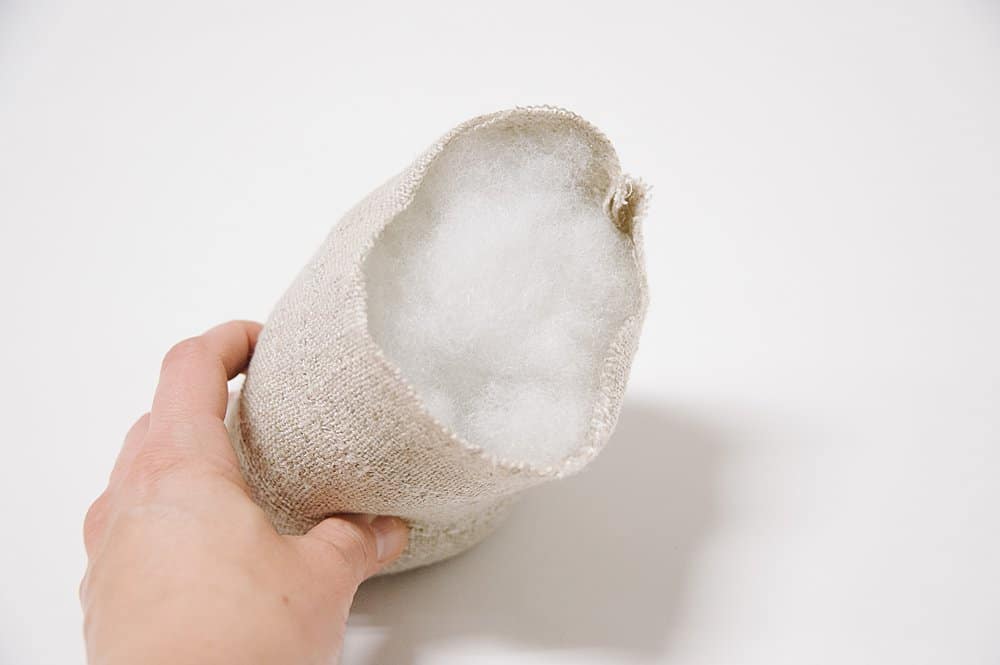
Step 7. Fill the pumpkin up with Poly-fil or other stuffing of choice.
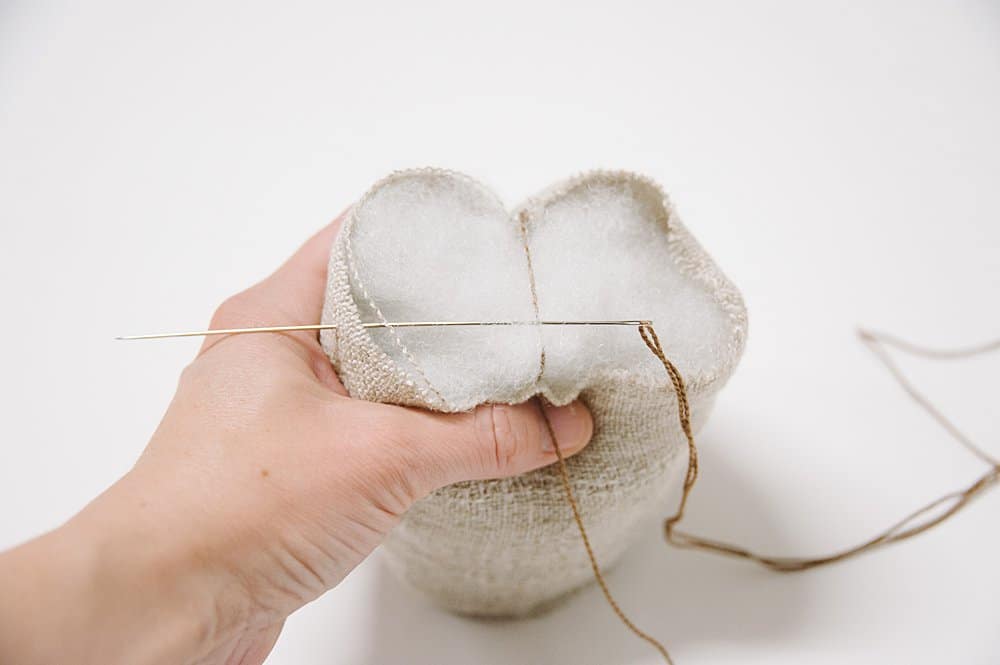
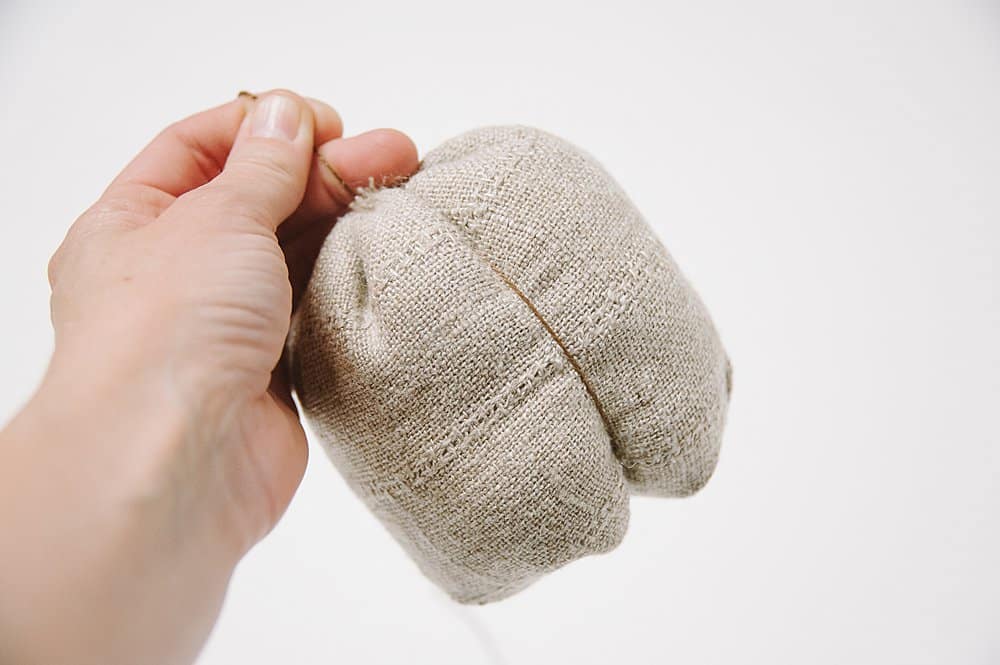
Step 8. Next, you want to close up the top of the pumpkin.
You can do this by stitching a loose running stitch around the outer edge and pulling the strings to cinch it down as we did in this post about embroidery.
Or, you can gather two opposite sides together, then the two opposite ones, and continue bringing folds of the fabric together toward the middle until you've secured them all, as is pictured below.
Step 9. Use whatever method you need to, to close up the top of your pumpkin.
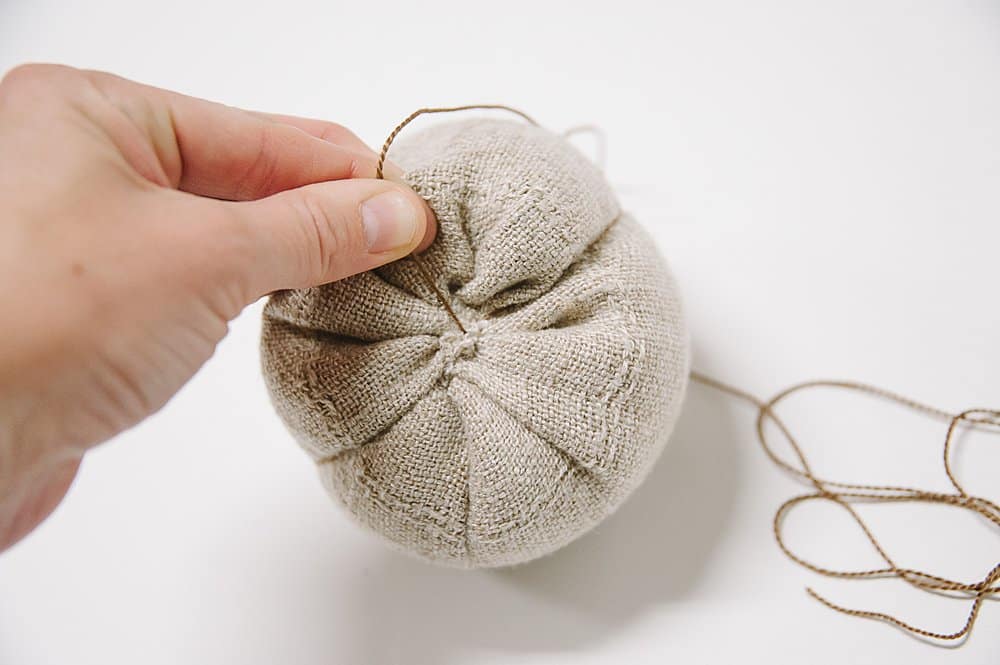
Pull tight so the top is securely closed.
DO NOT tie off your embroidery floss yet.
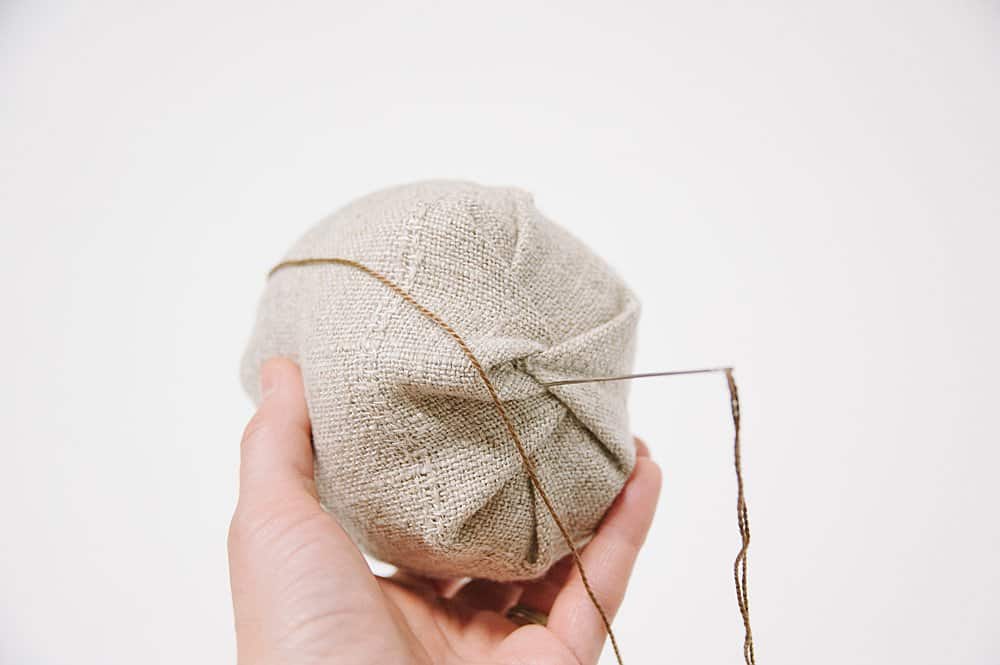
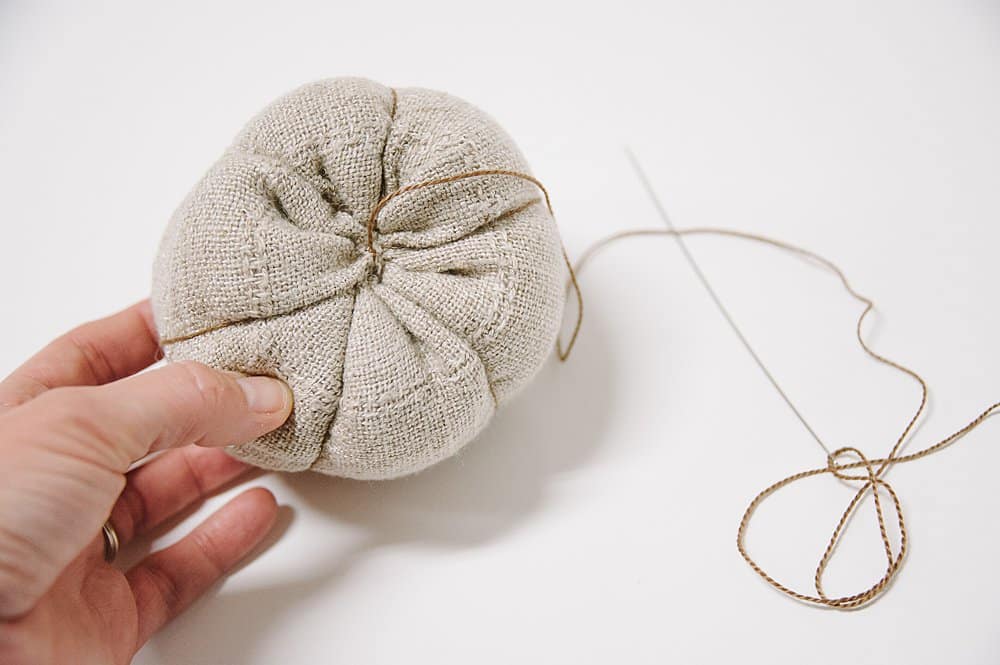
Step 10. Take the needle and floss, and lay it along the outside of the pumpkin.
Push the needle up from the bottom of the pumpkin, and out through the top.
You might need to flatten the pumpkin as you do this, depending on how long of a needle you are using.
Step 11. Pull the needle out the top of the pumpkin, and pull all the slack out from the embroidery floss.
As you pull it tight, the embroidery floss will tighten and create an indented section along the outside of the pumpkin.
These cute indentations are what turn a plain fabric ball into a fabric pumpkin!
Step 12. Go around the pumpkin, to the bottom, and push the needle up through the top of the pumpkin again, this time directly opposite where you did the first one.
Pull it tight, and you should have two indented sections in your pumpkin, across from each other.
Repeat until you have divided the pumpkin into 6 evenly spaced sections with indentations.
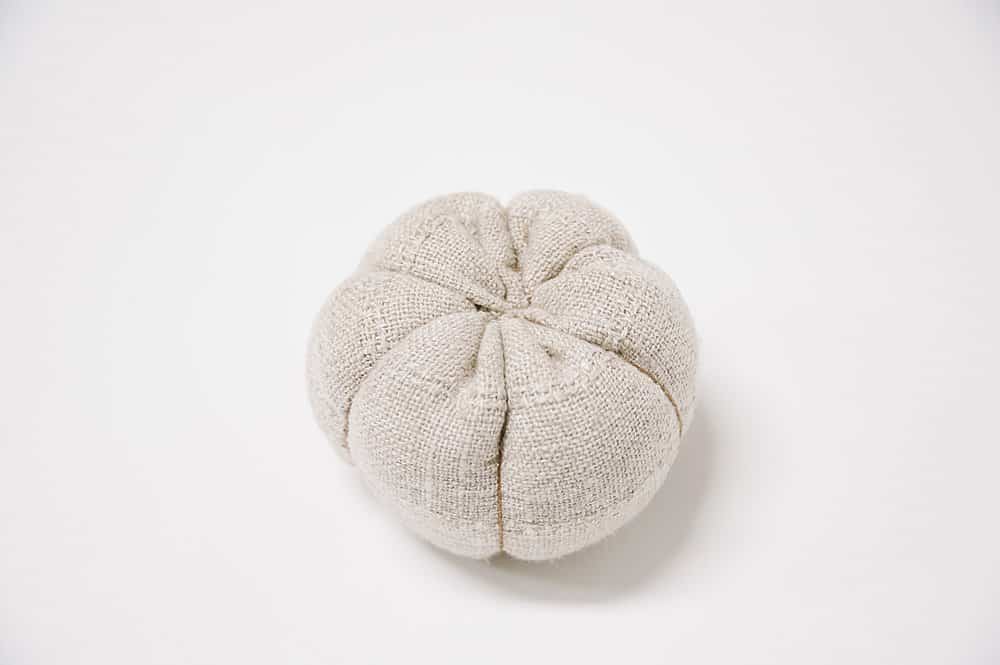
Step 13. Once you have completed all 6 sections, tie a knot in the embroidery floss and clip loose ends.
You have completed the fabric portion of your pumpkin!
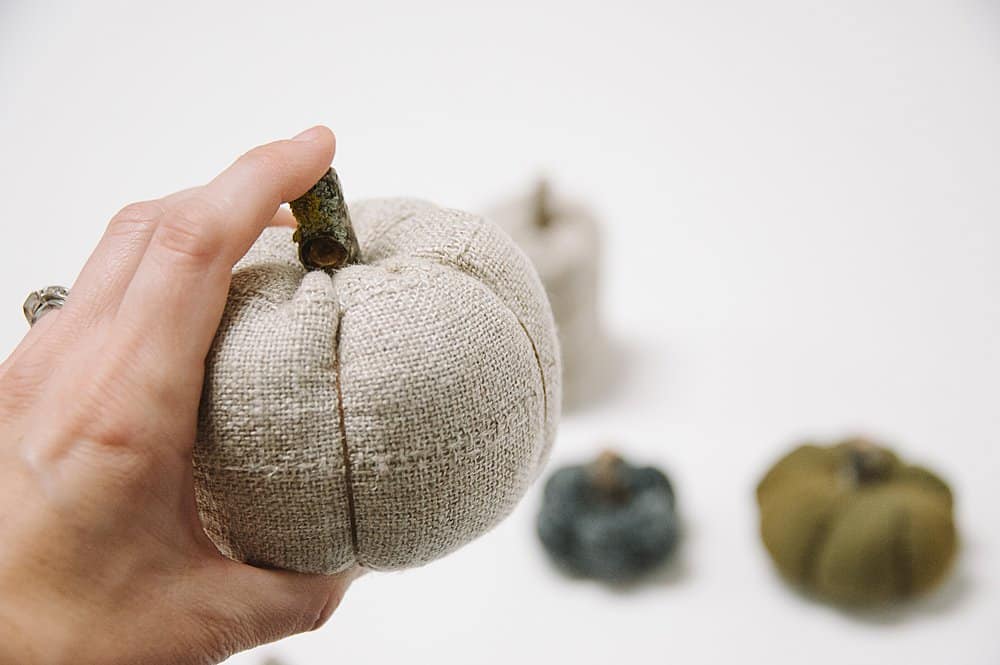
Step 14. Cut a branch or wooden stick into small sections to use as pumpkin stems.
Depending on the thickness of your branch, you can use garden clippers or scissors.
Hot glue the stem onto the fabric pumpkin, and you are done!
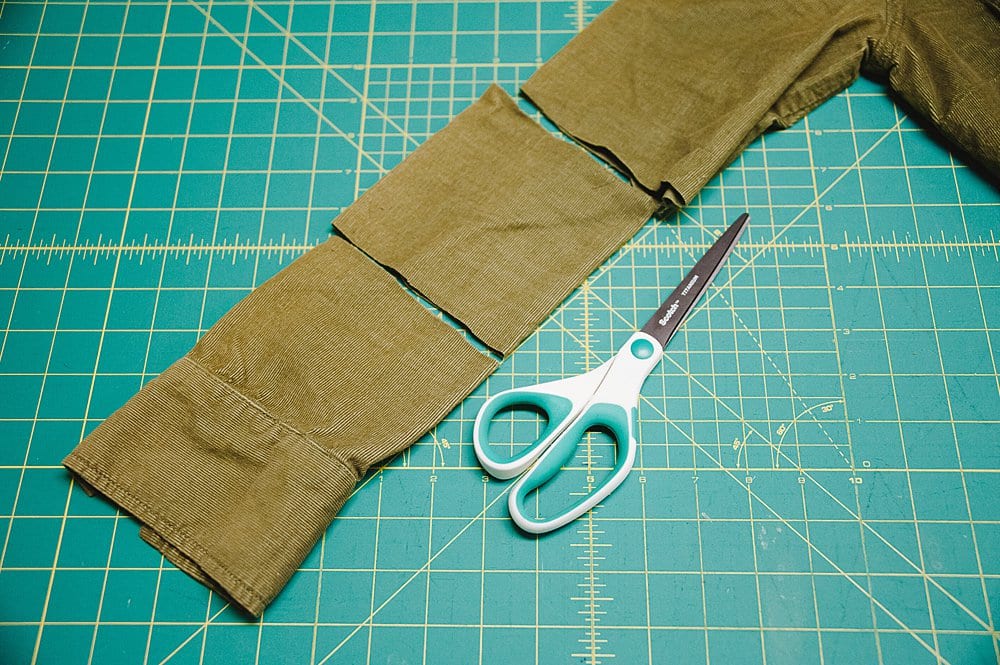
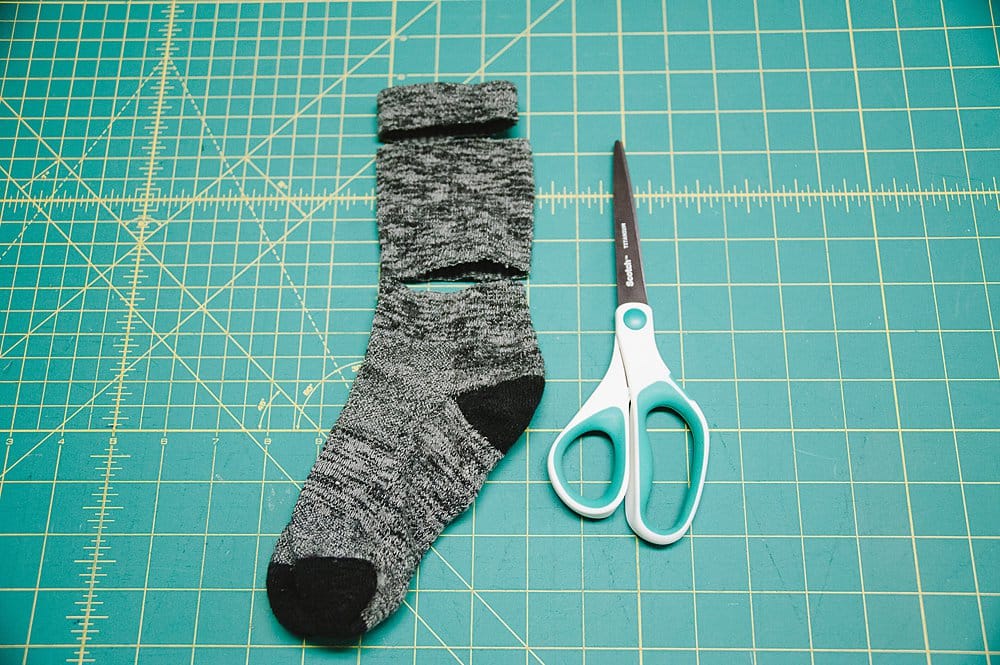
Use Recycled Old Clothing to Make Fabric Pumpkins
You use the same process with old clothing to make upcycled fabric pumpkins.
This is a great way to use worn-out clothing, cute clothes you find at a thrift store, or creatively preserve special items of clothing like your kids' old favorites!
Fabric sleeves and socks make awesome pumpkins because they come in the fabric tube already; that means you can skip the first 3 steps!
Common Questions
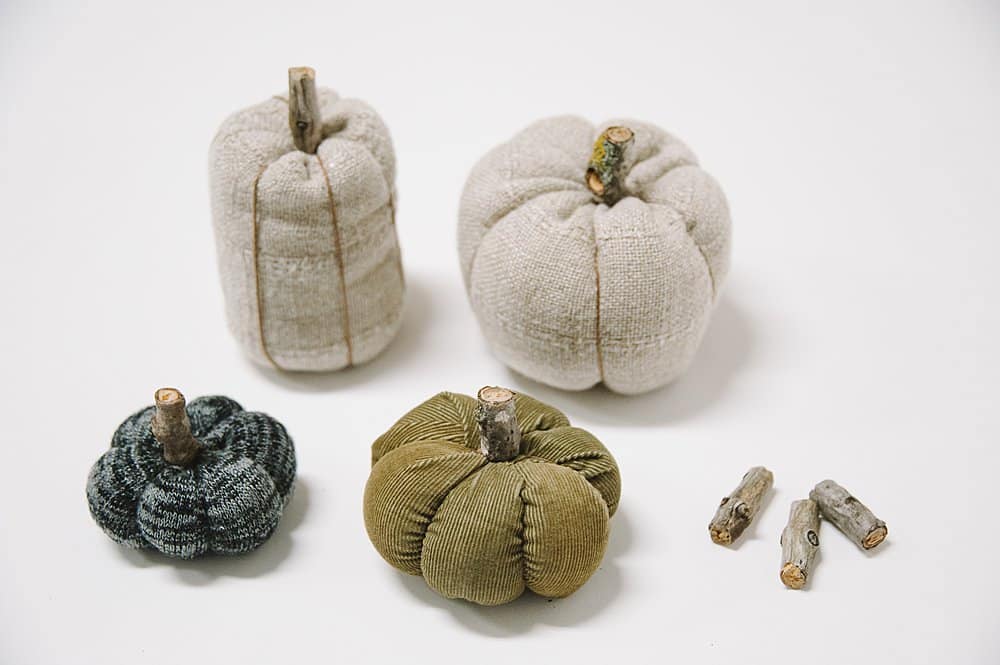
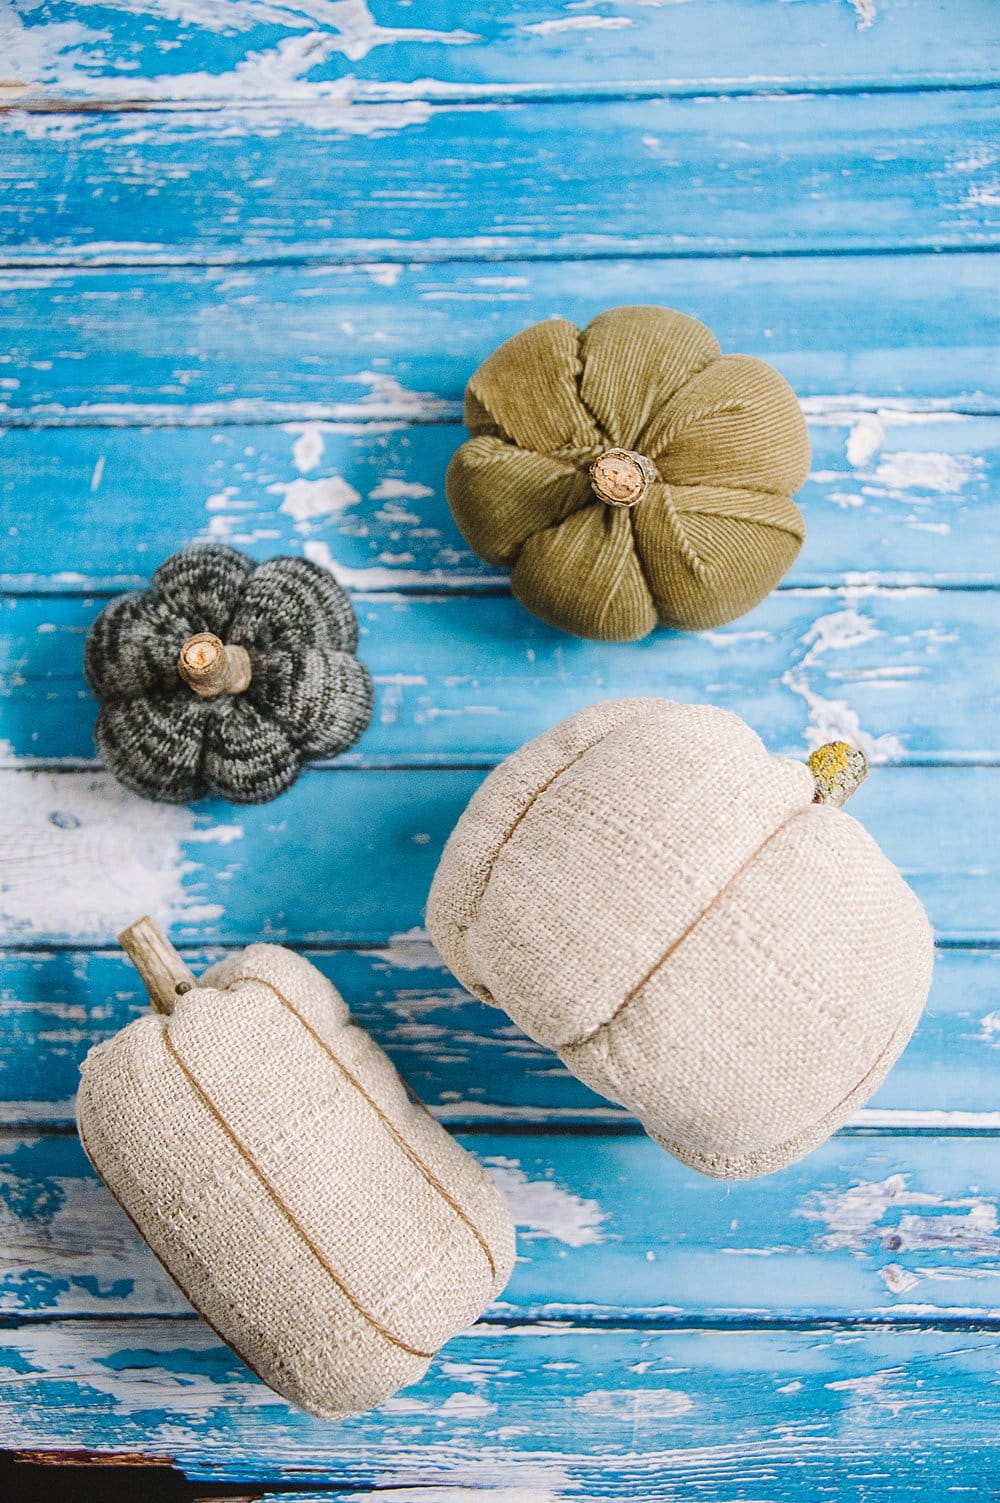
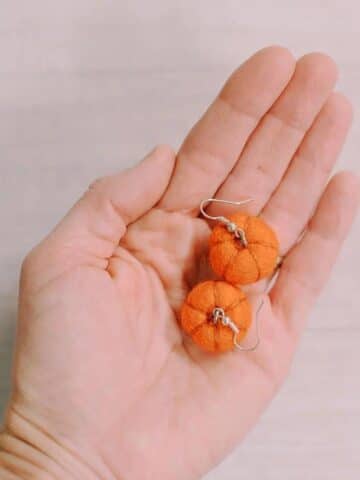
That's the beauty of this project, you can use any type of fabric! I am especially fond of natural fabrics like linen, burlap, and osnaburg. They made lovely rustic chic pumpkins. You can use old clothing like I did with the corduroy shirt, or old socks. Some of the favorite pumpkins I made were from old thermal pants that belonged to my grandpa and even a small pink pumpkin, made from the fleece of one of my daughters' baby sleepers.
While polyfil will give the pumpkins a plush "stuffed animal" feel, you can use different types of stuffing. You can use shredded paper or small scraps of fabric to fill the pumpkins, or even rice or corn (if you are using them indoors.) We even tried using marbles and rocks! (They looked too lumpy though; I prefer the look of something soft and pliable inside them.)
If you don't have access to woods or sticks, you can use corks, wooden dowels, or even rolled and glued cardboard or paper in a pinch. There are also people who sell almost anything on Ebay and Etsy so that might even be sellers who are willing to send you small pieces of sticks in the mail. Craft supply stores like Hobby Lobby also might have something that would work as a stem too.
These easy fabric pumpkins are one of the best projects to use up fabric scraps, repurpose old clothing, or create keepsakes from cherished fabric or clothes.
You can stick to one color scheme, or use different colors like I did.
More Thanksgiving Crafts You'll Love
---
⭐️🧶 Did you enjoy this craft and want to see more like it? ✂️ Join our FREE email community and get inspiring craft ideas sent right to your inbox! 🧵 ⭐️
---
How to Make Fabric Pumpkins
Materials
- Fabric or Old Clothes
- Sewing Machine (or Needle & Thread)
- Embroidery Needle & Floss (in complementary or coordinating colors to the fabric)
- Poly-fil
- Wooden Stick or Branch
- Garden Clippers
- Scissors, Hot Glue Gun
Instructions
- Cut fabric into a rectangle. You can experiment with different-sized rectangles, but the fabric pictured here is 12"x7".The longer the length of the fabric, the bigger the diameter your pumpkin will have. The taller the height of your fabric rectangle, the taller your fabric pumpkin will be.PRO TIP: Make pumpkins with different-sized fabric rectangles so you'll have a variety to display!
- Fold the fabric in half, so the right sides are together.We took the lefthand 7" edge and brought it over to the righthand 7" edge.
- Sew a vertical line along the raw edges; the white-thread seam runs vertically along the right vertical edge of the fabric.You now have an inside-out tube.
- Gather the bottom edge of the tube together, folded like an accordion. PRO TIP: Before starting this step, if you are using a shirt sleeve or the tube of a sock for your fabric, make sure they are inside out.
- Sew along the bottom of the accordion.
- Turn the fabric right side out. This gathered area is the bottom of your pumpkin.
- Fill the pumpkin up with Poly-fil or other stuffing of choice.
- Next, you want to close up the top of the pumpkin. You can do this by stitching a loose running stitch around the outer edge and pulling the strings to cinch it down as we did in this post about embroidery.Or, you can gather two opposite sides together, then the two opposite ones, and continue bringing folds of the fabric together toward the middle until you've secured them all, as is pictured below.
- Use whatever method you need to, to close up the top of your pumpkin. Pull tight so the top is securely closed.DO NOT tie off your embroidery floss yet.
- Take the needle and floss, and lay it along the outside of the pumpkin. Push the needle up from the bottom of the pumpkin, and out through the top.You might need to flatten the pumpkin as you do this, depending on how long of a needle you are using.
- Pull the needle out the top of the pumpkin, and pull all the slack out from the embroidery floss.As you pull it tight, the embroidery floss will tighten and create an indented section along the outside of the pumpkin.These cute indentations are what turn a plain fabric ball into a fabric pumpkin!
- Go around the pumpkin, to the bottom, and push the needle up through the top of the pumpkin again, this time directly opposite where you did the first one.Pull it tight, and you should have two indented sections in your pumpkin, across from each other.Repeat until you have divided the pumpkin into 6 evenly spaced sections with indentations.
- Once you have completed all 6 sections, tie a knot in the embroidery floss and clip loose ends.You have completed the fabric portion of your pumpkin!
- Cut a branch or wooden stick into small sections to use as pumpkin stems.Depending on the thickness of your branch, you can use garden clippers or scissors.Hot glue the stem onto the fabric pumpkin, and you are done!
Notes
- You can use any type of fabric to make these easy DIY fabric pumpkins. You can use old fabric scraps, new fabric from the store, old clothing from your own closet or the thrift store, or even old favorites from your kids or loved ones.
- You can skip steps 1-3 if you use a shirt sleeve or a tube sock to make your pumpkins!
- Experiement with different-sized fabric rectangles to make pumpkins of different shapes and sizes!


Leave a Reply