

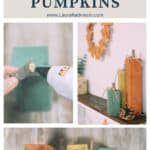


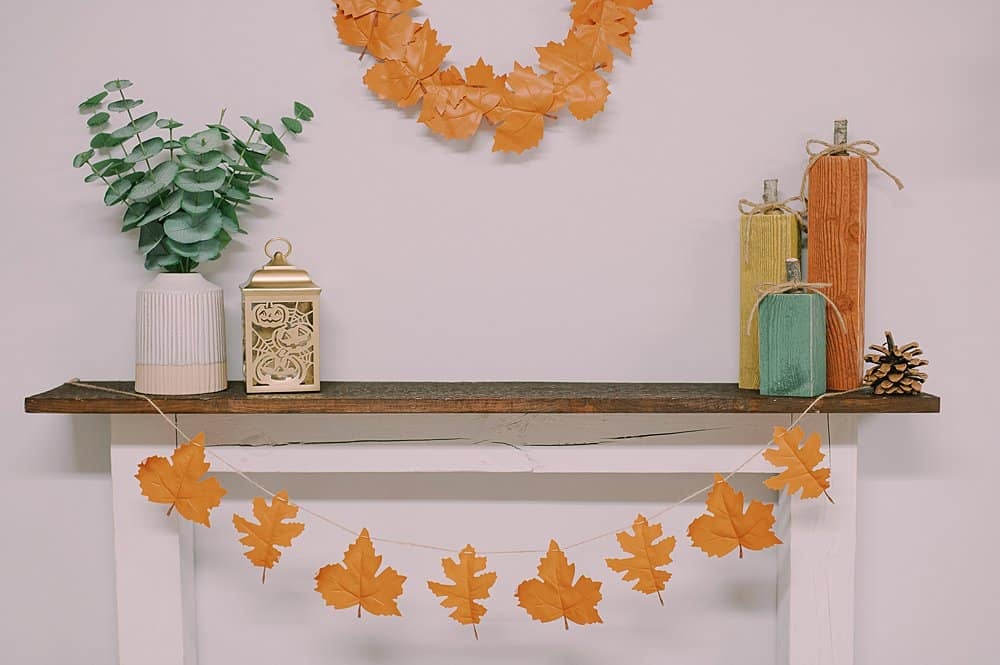
Learn how to make wooden pumpkins for your mantel out of 4x4 lumbar, paint, wooden branches, and twine! They make great fall porch decor too, and are so easy to make!

Wooden pumpkins are a great way to use scrap wood (we've also made scrap wood trees) or repurposed lumber to make beautiful fall decor.
All you need is a section of wood, paint, a branch, and twine. Together, they turn into rustic chic wooden pumpkins that make people stop and take a second look!
Jump to:
Why You'll Love This Craft
- It's an eco-friendly project because old lumbar, posts, or pallets are the perfect type of wood to be upcycled into these wooden pumpkins.
- If you don't have access to a saw to cut the wood, you can buy blocks of wood at the craft store or online and proceed with the project from there.
- You can customize your wooden pumpkins by choosing any paint color(s) you want! Go traditional like I did or classy with white (or white & gold!) wood pumpkins!
Craft Supplies Needed
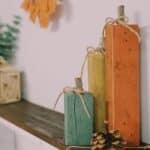
- Wood - You can use a 4x4 or another similar-sized wood post. I used a section of wood from an old pallet; it was slightly larger than 3"x3".
- Saw - To cut the wood into sections.
- Paint - Spray paint or acrylic paint will work too.
- Sandpaper , Palm Sander, or Orbital Sander - This is how you will distress the sides of the pumpkin.
- Wooden Branch - This will be the stem of the pumpkin. The stem should be thick enough that it looks proportional to the size of the wood block you use. For my project, the branch was about as thick as my thumb.
- Garden Clipper - You can use a garden clipper or a hand saw to cut the branch into sections.
- Twine - Use any thickness of twine; mine is a thick jute twine.
- Hot Glue Gun and Glue, and Scissors
How to Make Wooden Pumpkins
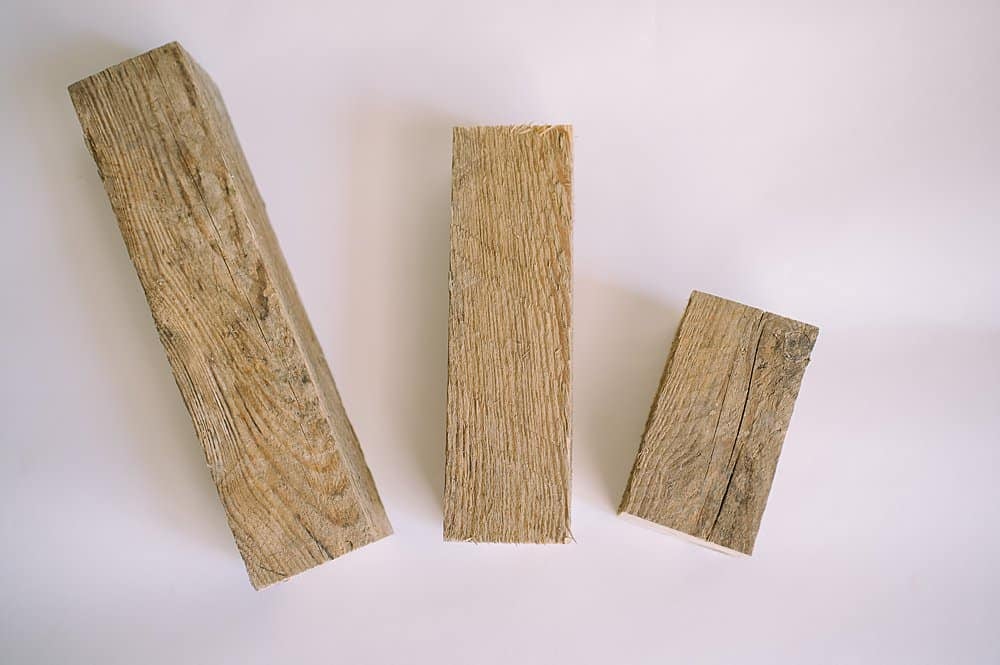
Step 1: Cut the wood into sections.
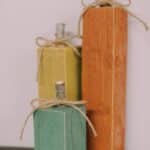
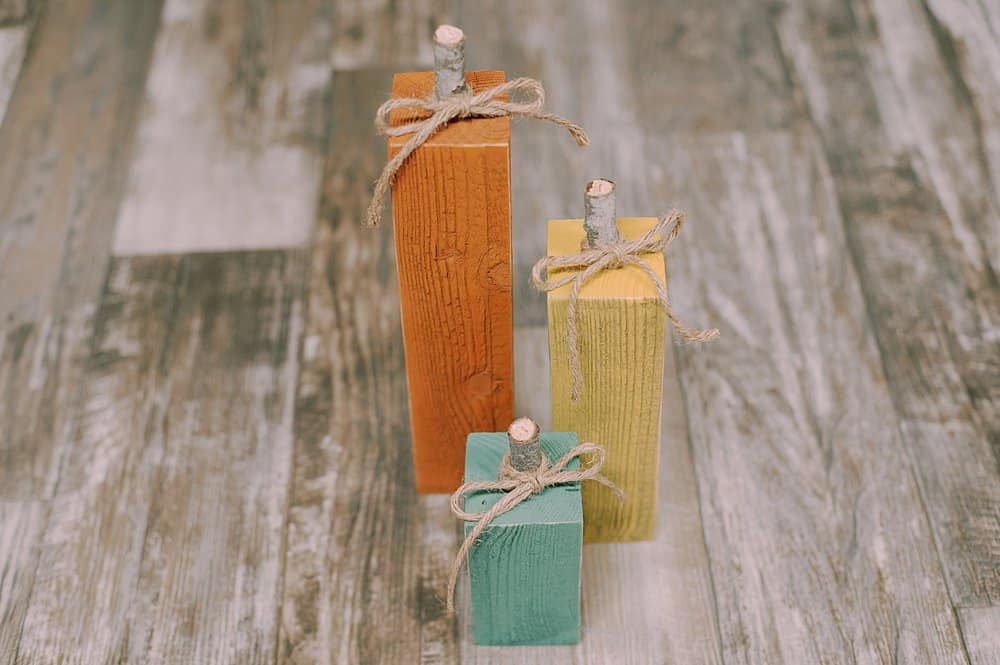
I cut them into three different sections: 12", 9", and 5".
You can adjust the lengths depending on how much wood you have, and how big you'd like them to be.
You can do three different lengths like I did or all of the pumpkins the same if you're going for uniformity.
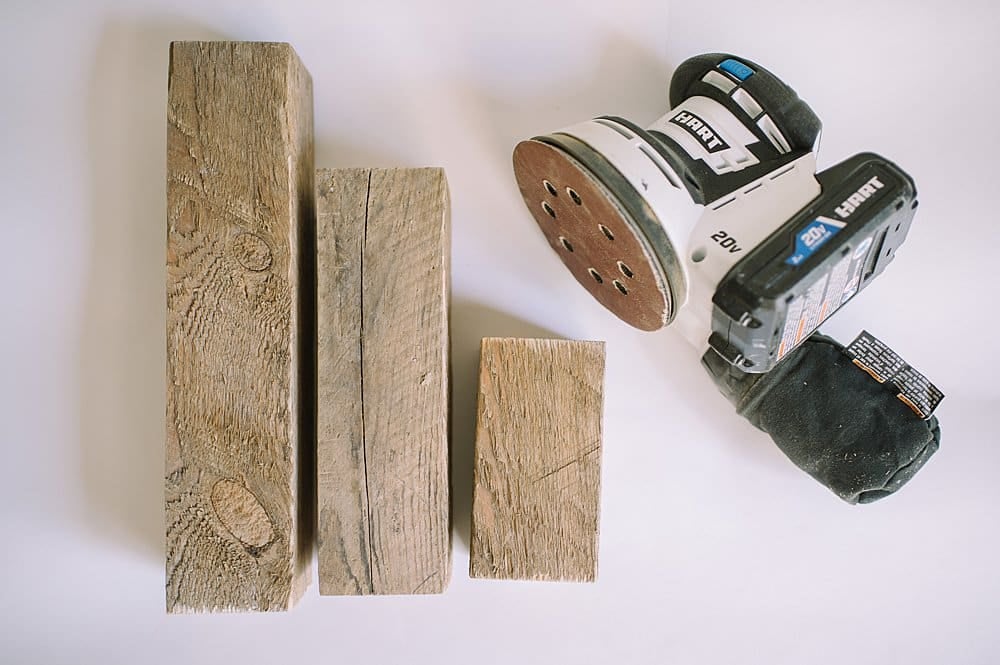
Step 2: Sand the wood with sandpaper, a palm sander, or an orbital sander to smooth out the surfaces and edges.
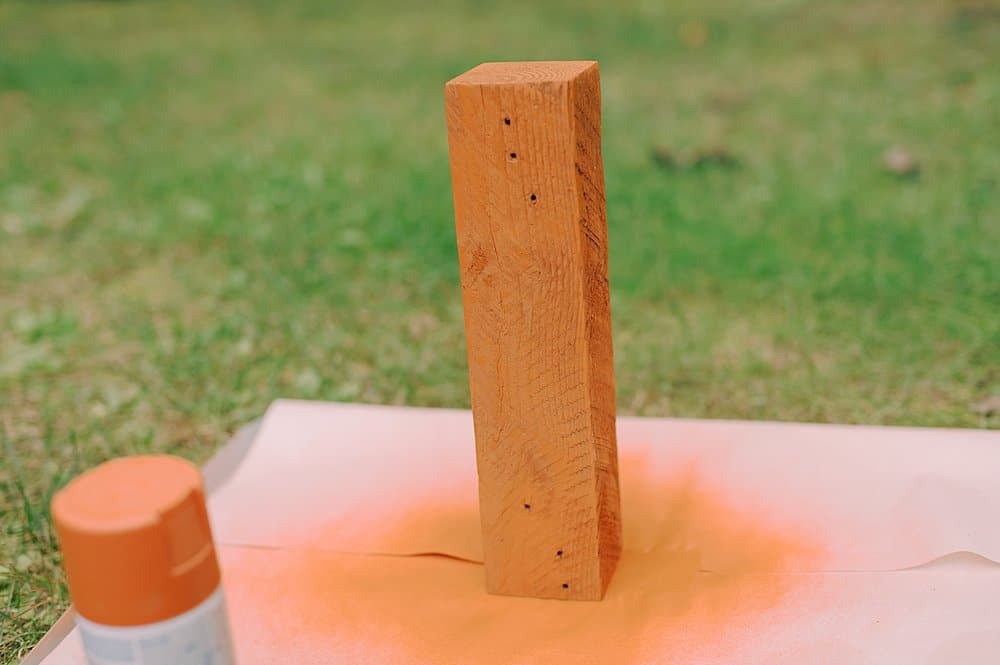
Step 3: Paint the wood blocks in the colors of your choice, and let dry.
I chose burnt orange, golden yellow, and sage green, and used spray paint.
You could also use acrylic paint or samples of house paint too.

Step 4: Sand the edges of the dry wooden blocks to distress them if desired.
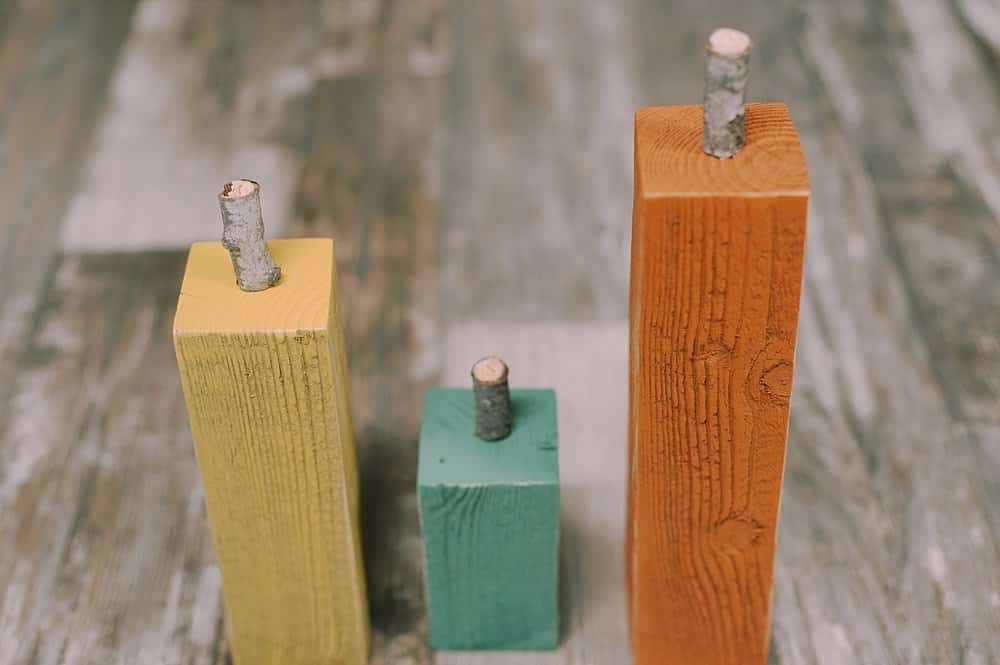
Step 5: Cut a wooden branch into sections for stems.
I chose a branch that was about the thickness of my thumb and used a garden clipper to cut it into sections.
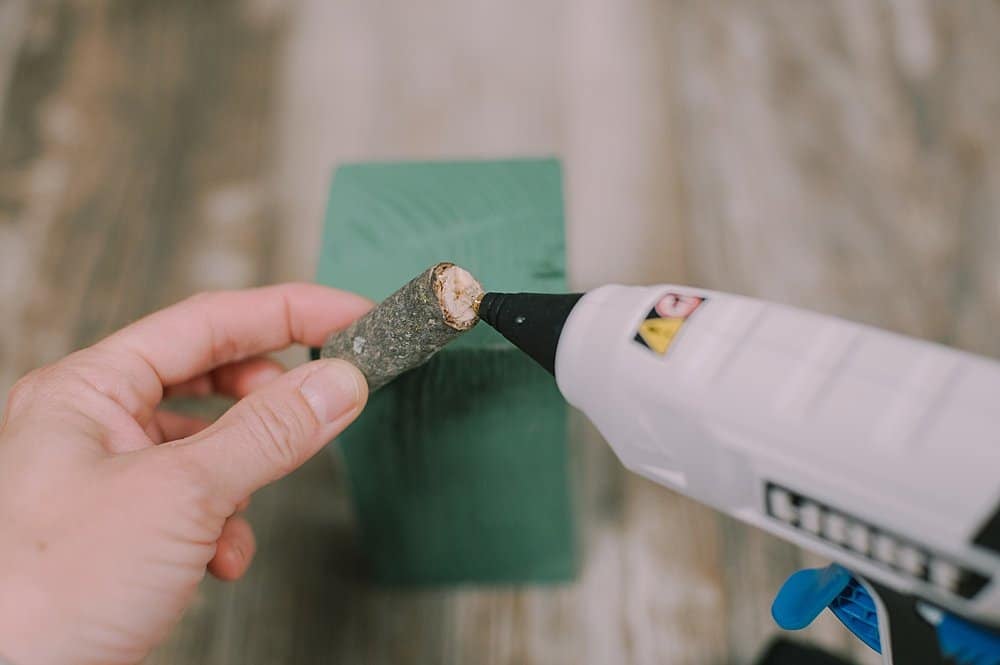
Step 6: Hot glue a wooden stem onto the top of each wooden block.
Hold it in place until the glue is fully dry.
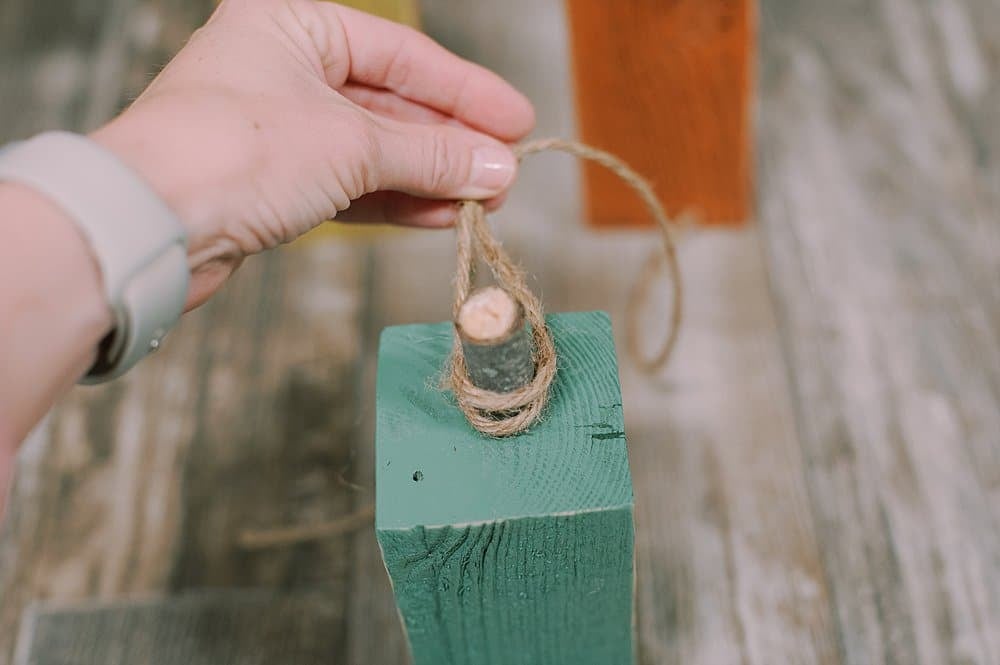
Step 7: Tie twine around the base of the wooden stem on each pumpkin.
Wrap the twine around the front of the stem, cross it around the backside, and bring it back to the front.
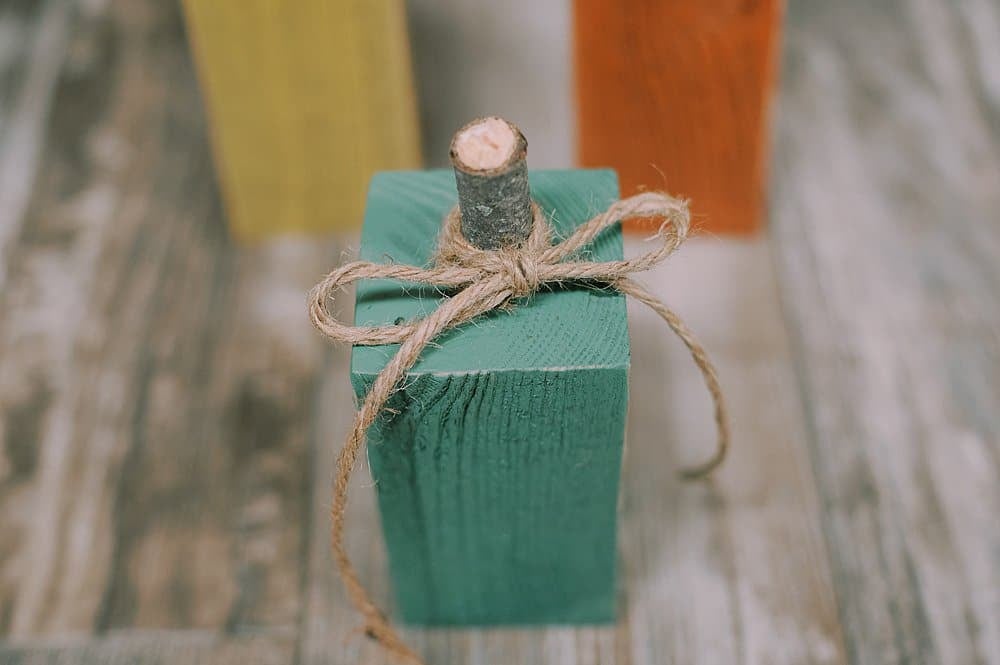
Step 8. Tie it into a bow at the front of the pumpkin.
Trim the tails of the bow to your desired length.
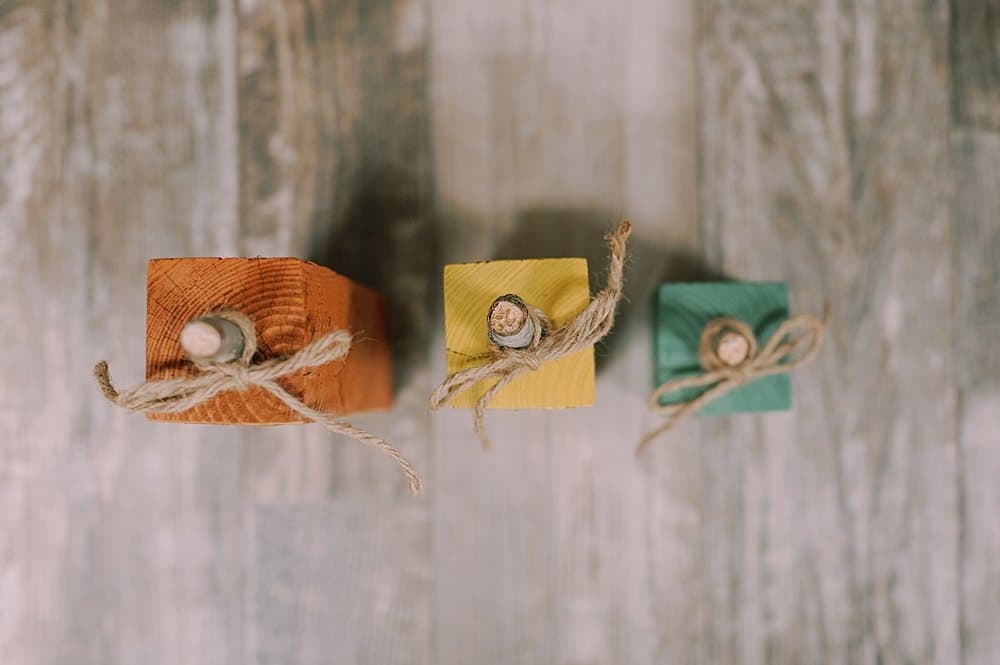
Repeat for all of the DIY wooden pumpkins!
Common Questions
You can use any type of wood for this project. You can buy 4x4's or repurpose old posts or parts of old pallets as I did. (I used old pallet wood so my blocks were a little larger than 3"x3".) You can also buy pre-cut wooden blocks at craft stores or online to speed up the project.
I cut my wooden pumpkins into three varying lengths - 12" long, 9" long, and 5" long. I wanted to make three different pumpkins that could be displayed as a set of various heights. You can cut them following these measurements or something similar.
Another option is to make a set of wooden pumpkins that are all the same height. This would give a uniform look to your fall decor.
If you don't have a wooden tree branch or stick, you can use wine corks as pumpkin stems. Or you can check out your local craft store or buy sticks online.
If you're searching for rustic fall home decor, look no further!
These DIY wooden pumpkins are beautiful and easy to make; all you need is wood, a way to cut the wood, paint, and then a branch and twine for the stem.
You can paint them any color you choose, and the best part? They last forever!
They can last well past Halloween, through Thanksgiving, and will be ready to go the following year too. Win-win! You can even combine them with other decorations like a faux leather leaf wreath, a white spray-painted pumpkin sign, or a burlap wreath for Halloween!
More Fall Crafts You'll Love


---
⭐️🧶 Did you enjoy this craft and want to see more like it? ✂️ Join our FREE email community and get inspiring craft ideas sent right to your inbox! 🧵 ⭐️
---
How to Make Wooden Pumpkins
Materials
- Wood 4"x4" or something similar
- Saw
- Paint Spray Paint, Acrylic, or Latex
- Sandpaper, Palm Sander, or Orbital Sander
- Wooden Branch
- Garden Clippers
- Twine
- Hot Glue Gun, Glue, Scissors
Instructions
- Step 1: Cut the wood into sections.I cut them into three different sections: 12", 9", and 5".You can adjust the lengths depending on how much wood you have, and how big you'd like them to be.You can do three different lengths like I did or all of the pumpkins the same if you're going for uniformity.
- Step 2: Sand the wood with sandpaper, a palm sander, or an orbital sander to smooth out the surfaces and edges.
- Step 3: Paint the wood blocks in the colors of your choice, and let dry.I chose burnt orange, golden yellow, and sage green, and used spray paint.You could also use acrylic paint or samples of house paint too.
- Step 4: Sand the edges of the dry wooden blocks to distress them if desired.
- Step 5: Cut a wooden branch into sections for stems.I chose a branch that was about the thickness of my thumb and used a garden clipper to cut it into sections.
- Step 6: Hot glue a wooden stem onto the top of each wooden block.Hold it in place until the glue is fully dry.
- Step 7: Tie twine around the base of the wooden stem on each pumpkin.Wrap the twine around the front of the stem, cross it around the backside, and bring it back to the front.
- Step 8. Tie it into a bow at the front of the pumpkin.Trim the tails of the bow to your desired length.Repeat for all of the DIY wooden pumpkins!
Notes
- Use any type of wood such as 4x4's, old posts, or pieces of pallets.
- You can cut them in varying lengths like I did (12", 9" and 5") or go for a uniform look and cut them into blocks that are all the same size.
- Paint them any color you want! Go with traditional Fall colors or paint them all white for a classy, modern look!
Leave a Reply