
Learn how to make easy wooden painted Easter eggs in this DIY craft tutorial. If you are looking for an alternative to traditional easter eggs this spring, check out this simple way to paint wood eggs. It's the perfect craft for kids this season!

I am a sucker for wooden items to use in my craft projects.
Wooden peg people are the cornerstone of our DIY Nativity Set craft project, wood beads and thread spools make a beautiful garland, and I love using wood rings in crafts like twine wreath ornaments and felt ball dreamcatchers.
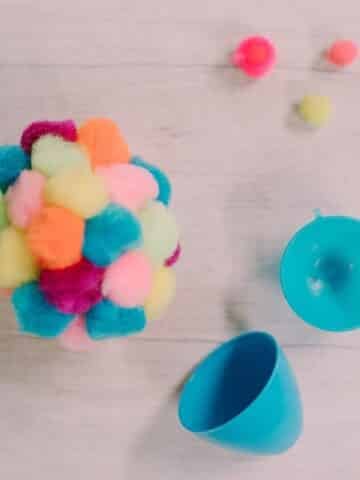
I love wood eggs, so I decided to find a way to use them in Easter crafts and spring decorations. (You could even use them instead of plastic easter eggs to make this cute pompom egg craft idea!)
Today, we’re taking a simple (and mess-free!) approach to making painted wooden Easter eggs. We are going to do the shake-and-roll painting method!
Jump to:
Why You'll Love This Craft
- Customize the look of your eggs with different paint colors - you can choose any colors you like!
- The paint stays inside the container so it's mess-free!
- If you don't have wooden eggs, you could try the same project using plastic easter eggs instead!
Craft Supplies Needed
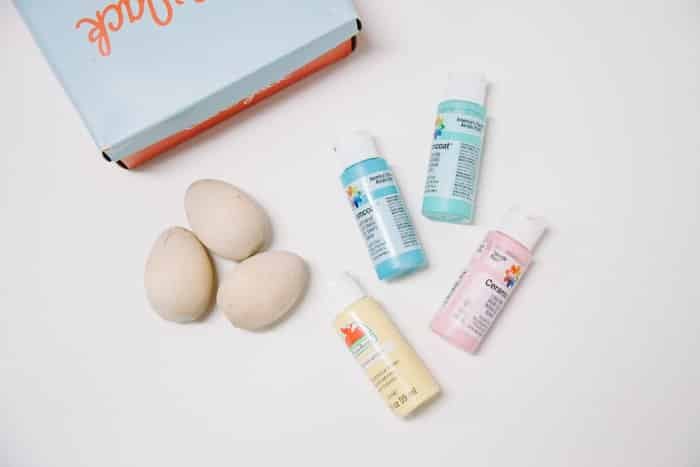
- Wooden Easter Eggs - These wood eggs have a flat bottom so they can stand up on their own. This is convenient when the eggs are drying, and also great for displaying the eggs in your Easter decorations.
- Paint - I used acrylic paint in pastel spring colors for these eggs, but you can use any colors you want.
- A Container with a Lid - I used an old shoe box with a lid for my container. You could use any container or box as long as it has a lid and is clean inside.
- Googly Eyes (optional) - If you want to turn these pretty eggs into quirky egg buddies for your kids, all you need are googly eyes and glue.
How to Make Wooden DIY Painted Easter Eggs
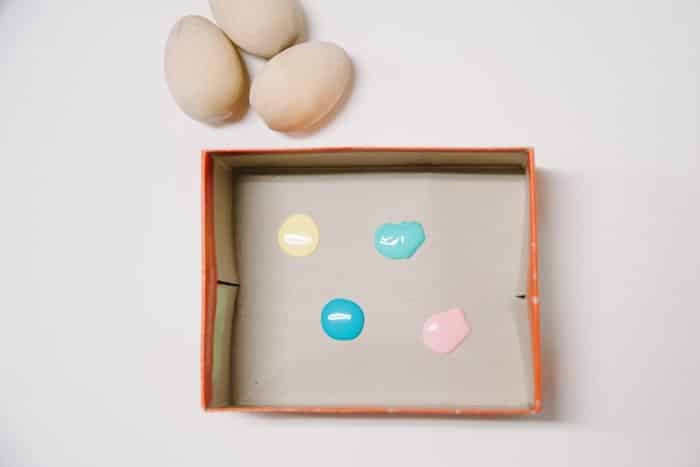
Step 1. Remove the lid from the container and set it aside. Add paint in your desired colors to the container.
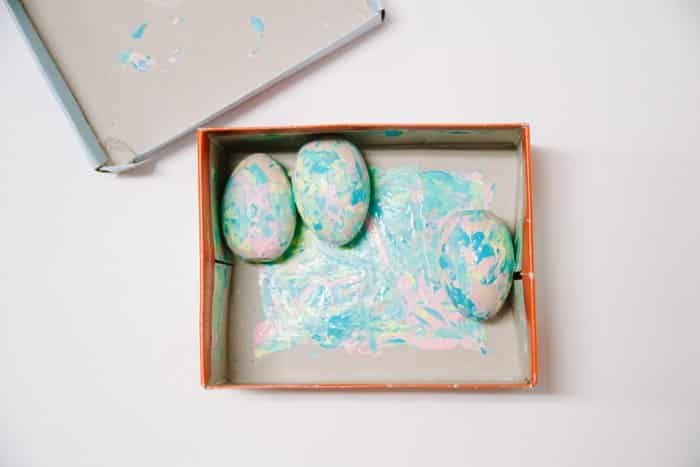
Step 2. Add the wooden eggs to the container, put the lid back on, and (while holding the lid securely in place) carefully roll and shake the eggs inside the container for 10 seconds.
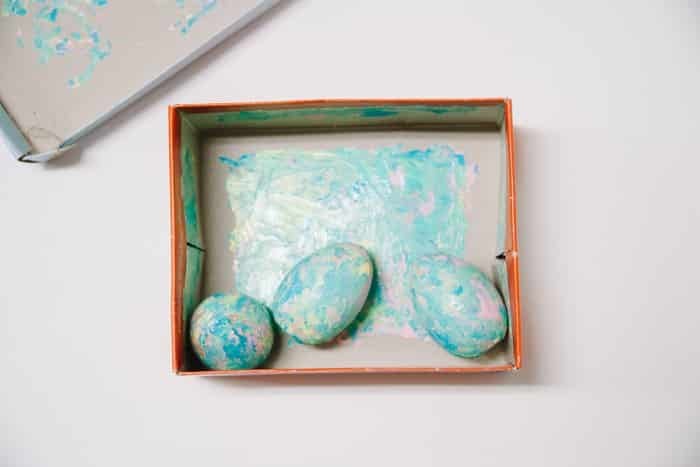
Step 3. Open the lid and check on the eggs. If there are still many areas without paint, replace the lid and roll/shake for another 10 seconds.
PRO TIP: You don't want to roll the eggs around for too long or the colors will mix too much and you'll get gray eggs. We want multi-colored, marbled eggs that are mostly coated so shake and check often until they're done.

Step 4. Let the eggs dry completely. (These wooden eggs have a flat bottom so they can dry upright.) Once the eggs are dry, you could coat them with clear acrylic sealer for extra protection if you want.
That's it - the painted eggs are done!

(Optional) Step 5. You can glue googly eyes onto the dry eggs to make silly egg buddies as a fun Easter craft for kids!
Common Questions
You can use any container as long as it has a lid, is clean, and the eggs fit inside. Some good options are old shoe boxes, cleaned out yogurt or oatmeal containers, tupperware containers, or shipping boxes.
The paint may not stick as well to plastic as it will to wood, but yes, you can do the same process with plastic easter eggs! Make sure to hot glue the two pieces of the plastic eggs together first before you begin so they don't come apart while you're painting.
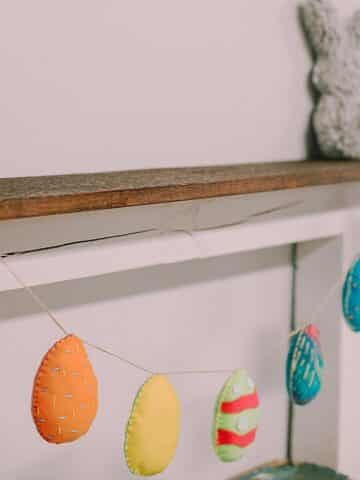
These eggs are beautiful on a shelf or displayed on an Easter brunch table by themselves! You can also add them to a spring display on your mantel, along with a felt Easter egg garland or cute DIY bunny stuffed animal to welcome the season!

Try different paint color combinations (using fresh, clean containers for each color combo) and see what you can make!
Easter crafts don't get much faster and easier than this.
More Easter Crafts You'll Love


---
⭐️🧶 Did you enjoy this craft and want to see more like it? ✂️ Join our FREE email community and get inspiring craft ideas sent right to your inbox! 🧵 ⭐️
---

Easy Wooden DIY Painted Easter Eggs
Materials
- Wooden Easter Eggs
- Acrylic Paint
- A Container with a Lid
- Googly Eyes (optional)
Instructions
- Remove the lid from the container and set it aside. Add paint in your desired colors to the container.
- Add the wooden eggs to the container, put the lid back on, and (while holding the lid securely in place) carefully roll and shake the eggs inside the container for 10 seconds.
- Open the lid and check on the eggs. If there are still many areas without paint, replace the lid and roll/shake for another 10 seconds.PRO TIP: You don't want to roll the eggs around for too long or the colors will mix too much and you'll get gray eggs. We want multi-colored, marbled eggs that are mostly coated so shake and check often until they're done.
- Let the eggs dry completely. (These wooden eggs have a flat bottom so they can dry upright.) Once the eggs are dry, you could coat them with clear acrylic sealer for extra protection if you want.
- (Optional) - You can glue googly eyes onto the dry eggs to make silly egg buddies as a fun Easter craft for kids!
Notes
- You can use any type of container as long as it has a lid, is clean, and your eggs fit inside. Some options include old shoe boxes, yogurt or oatmeal containers, tupperware containers, or shipping boxes.
- If you don't have wooden eggs, you can use plastic easter eggs. Make sure to hot glue the two parts of the eggs together first so they don't come apart when you're shaking them in the container.


GWYNETH PRICE-O'BRIEN
Dear Laura,
Thank you so much for the idea of the wooden Easter eggs! Because of the current conditions I was able to FaceTime with four lovely young ladies that were to be my step daughters from a previous relationship. It is extremely difficult, as I’m sure you know, to be distant from the ones we care about for everyone’s safety. I had a delivery made of the supplies the girls would need and plenty of containers! (Although it should have occurred to me that using Tupperware such as the kind that are considered single, if I recall correctly the brand was Betty Crocker available at the dollar tree, Dollar General, and other supermarkets. Which ironically worked out famously since the girls wanted to do each egg in a different combination of colors therefore acrylic paint that could be washed out of a plastic container permitted the girls to express their creative side just by wiping out and rinsing the disposable Tupperware LOL) Each of us even their father took his turn choosing their colors and shaking one egg at a time which turned out to be a fabulous group activity. It was a wonderful bonding experience that I had been very much missing with the girls. Thank you again for your wonderful idea which helped reduce stress on the girls not that they’re taking all their classes remotely and still being able to express their creative side at the same time.
It occurred to me that play groups that used to meet in person could do this via FaceTime or other online visual medium. Allowing youngsters to still interact with their peers maintaining some semblance of normalcy and forgetting what’s going on in the world for even a short period of time well enjoying fellowship.
Thank you from the bottom of my heart!
Laura
Hi Gwyneth!
Oh gosh, thank you so much for that awesome message. It warmed my heart to hear of your experience with the wooden Easter eggs, and I am so glad it brought you closer together with your loved ones during this incredibly hard and weird time. Anything that makes things feel somewhat normal and connected is so important right now.
I appreciate you taking the time to write to me so much!
Laura