


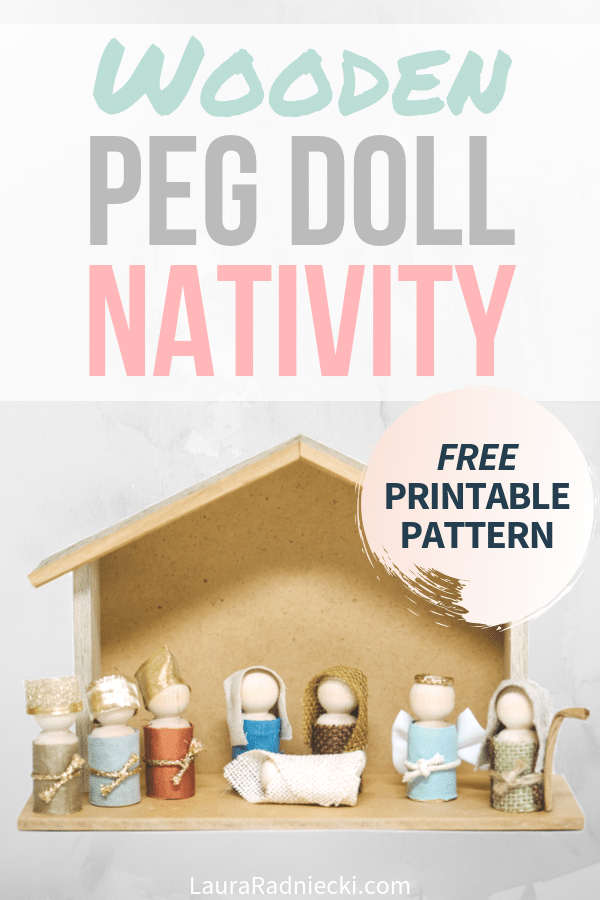
A step-by-step tutorial (with free printable patterns!) on how to make a wooden peg doll nativity set. A simple DIY nativity scene that is perfect for kids, and beautiful for your home too!
Nativity scenes are a Christmas decor staple, so I started looking around for DIY nativity ideas.
My criteria were easy, cute, and not breakable. (Must-haves with kids.)
I decided to try out one of the ideas: a rustic, Willow Tree People-inspired Nativity scene made from wooden peg dolls and fabric scraps.
I loved the wooden peg doll nativity set I made so much, that I made several more to give as Christmas presents!
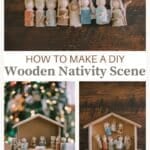
Here's how to make a simple, rustic DIY wooden Nativity scene out of fabric scraps and wooden peg people!
Jump to:
- Video of Wooden Peg Doll Nativity Set
- How to Make a Wooden Peg Doll Nativity Set
- Step 1. Gather Supplies
- Step 2. Gather and Prepare the Fabric Pieces
- Step 3. How to Make Mary - for the Nativity Scene
- Step 4. How to Make Joseph
- Step 5. How to Make the Shepherd
- Step 6. How to Make Baby Jesus
- Step 7. How to Make the Angel
- Step 8. How to Make the Three Wise Men
- Step 9. How to Make the Stable or Creche:
- Common Questions
- More Fabric Crafts You'll Love
Video of Wooden Peg Doll Nativity Set
Here's a video overview, or keep reading for a detailed step-by-step tutorial.
How to Make a Wooden Peg Doll Nativity Set
Step 1. Gather Supplies
Supplies Needed:
- Wooden Peg Dolls:
- Large size [2 ⅜"] - 7 bodies
- Small size [1 11/16"] - 1 body
- Fabric Scraps
- Ribbon Scraps
- Twine
- Hot Glue Gun and Glue
- Scissors
- Wooden Creche or Stable - buy one on Amazon or make your own with the template in the resource library.
- Nativity Scene Clothing Pattern, Stable Patterns and Nativity Checklist (free in my resource library!)

Step 2. Gather and Prepare the Fabric Pieces
I looked at the fabric in my craft room, and chose natural, rustic fabrics. I wanted everything to have a humble, rustic, natural feel to it.
I also used metallic ribbons for the wise men crowns, as well as twine, string and thin rope for the belts.
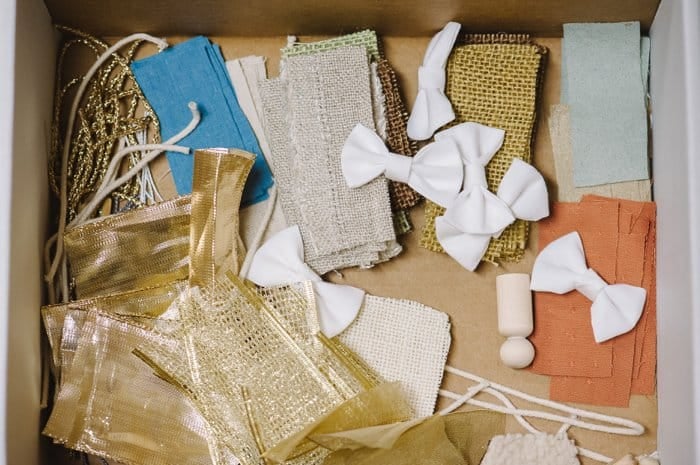
As you'll see below, all of the clothing is created from fabric that is cut into simple rectangles.
I made a printable pattern to help with making the clothing. You can access that pattern in my free resource library.
Step 3. How to Make Mary - for the Nativity Scene
Let's start with Mary.
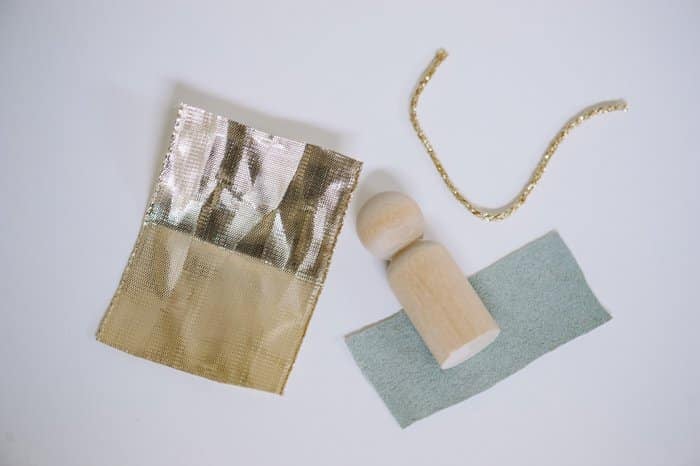
Here are the pieces needed to create Mary. I also used hot glue as my adhesive.
A PRO TIP note about the hot glue - I found that the hot glue isn't super durable if you try to pull the fabric off of the wooden body. It WILL come off. It doesn't seem to stick very hard to the wood. But I also tried super glue, Elmers and E6000 glue, and none of them worked much better. So, I decided to continue using hot glue because it was the easiest. I also figured that if the clothes come off, I could easily re-glue them back on.
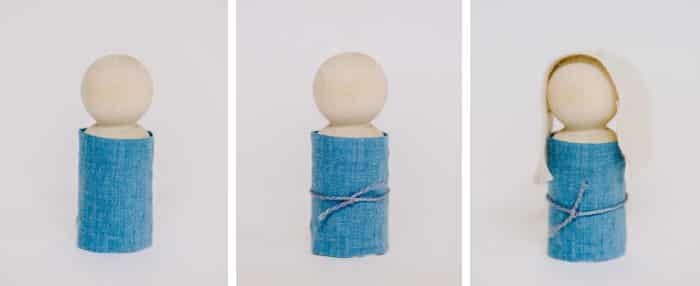
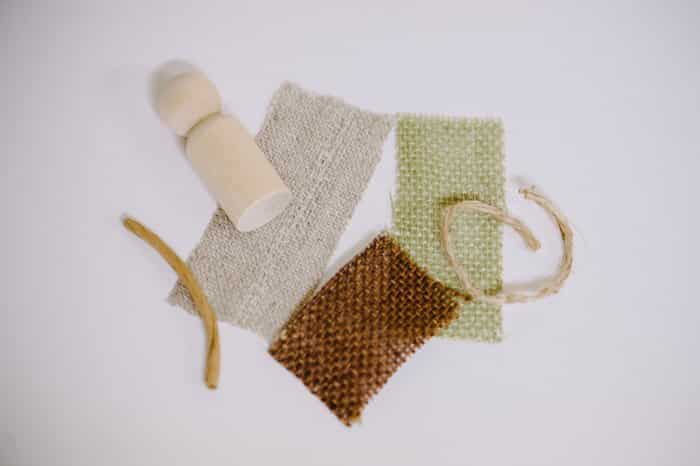
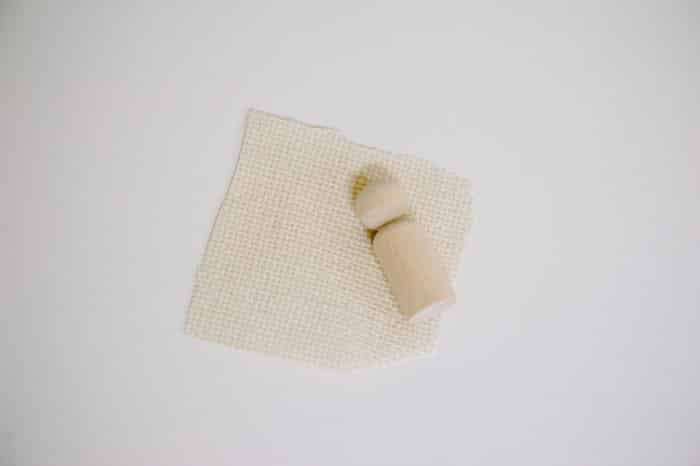
Step 3a. Pieces Needed to Make Mary:
- Body fabric - I used blue linen
- Head covering fabric - I used tan osnaburg
- Belt - I used embroidery floss
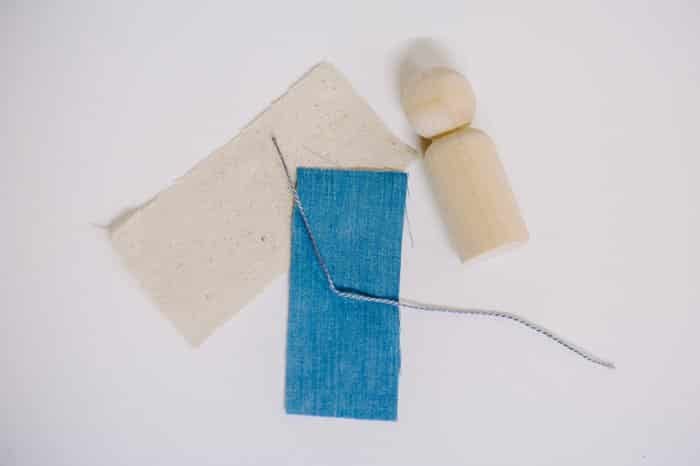
The body fabric should be a rectangle that is as tall as the body section of the wooden peg doll.
The length isn't as critical because you can trim it if it's too long. You want it to be at least long enough to wrap all the way around and overlap a little on the back for gluing purposes.
Use the printable pattern pieces to make this easy.
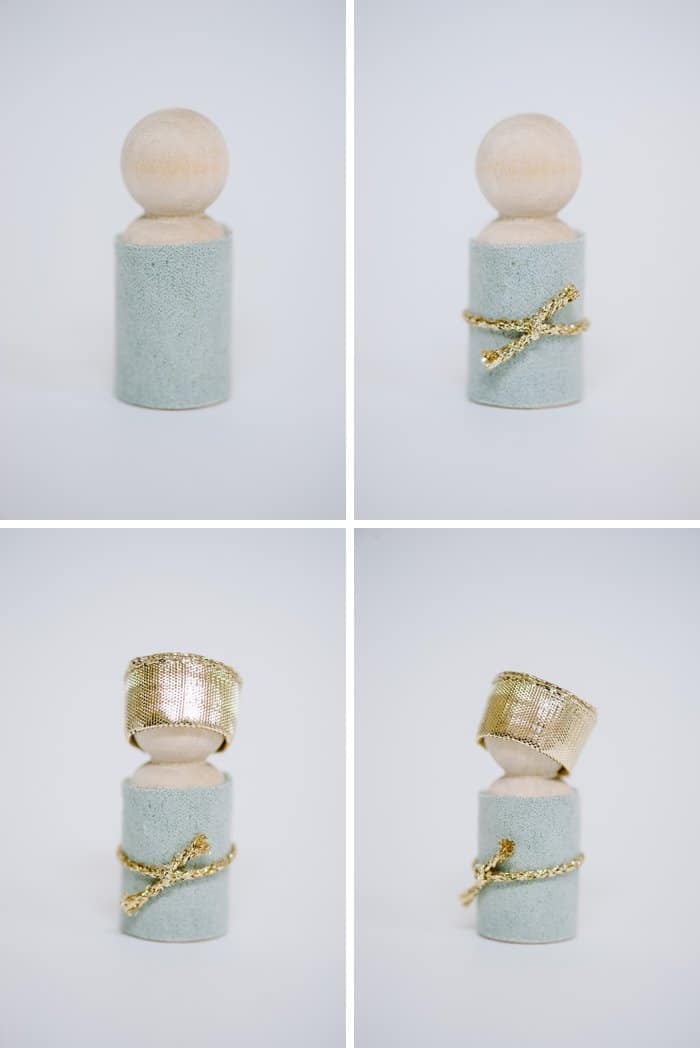
Step 3b: Glue the body fabric around the body, and glue the seam down in the back.
Step 3c: Wrap the belt around the body and knot it.
I put a tiny dab of glue behind the knot to secure it.
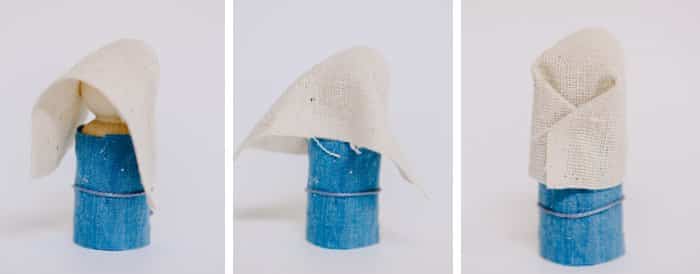
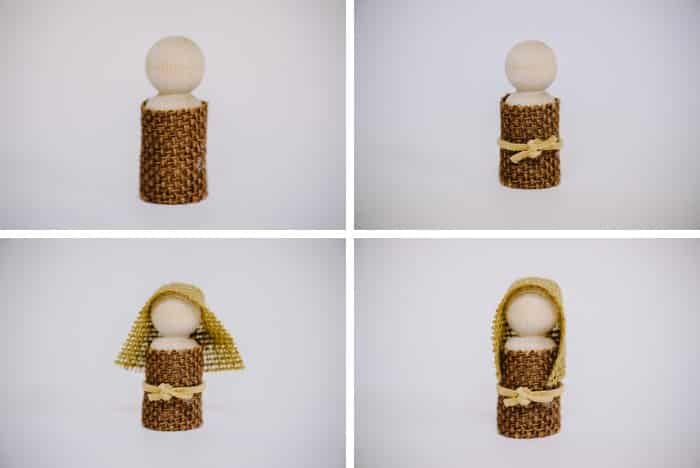
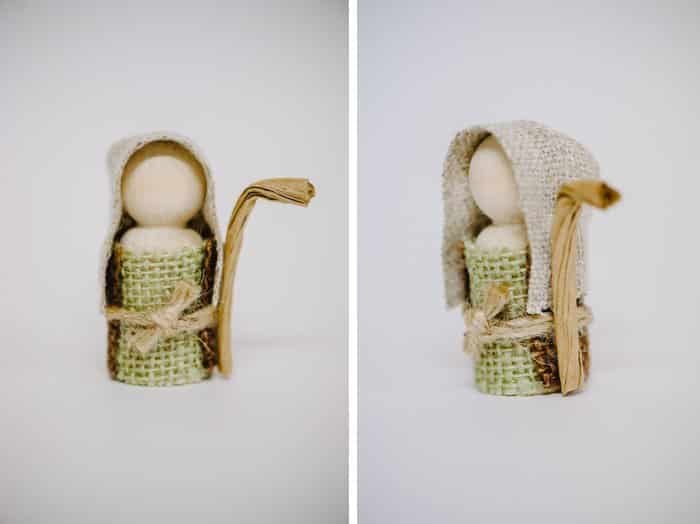
Step 3d: Attach the head covering.
- Part 1: First, cut a rectangular piece of fabric that is slightly bigger than the body piece you used. (Use the printable pattern.) Put a thin line of glue across the top of the head as if going from one ear, up over the top of the head and down to the other ear, like a headband. Press the fabric down with the edge in the glue line. [The above-right photo shows this from the front side. The below-left photo shows this from the backside.]
- Part 2: Next, put a dab of glue in the middle of the back of the head. Press the fabric down into the glue, as shown in the below-middle photo.
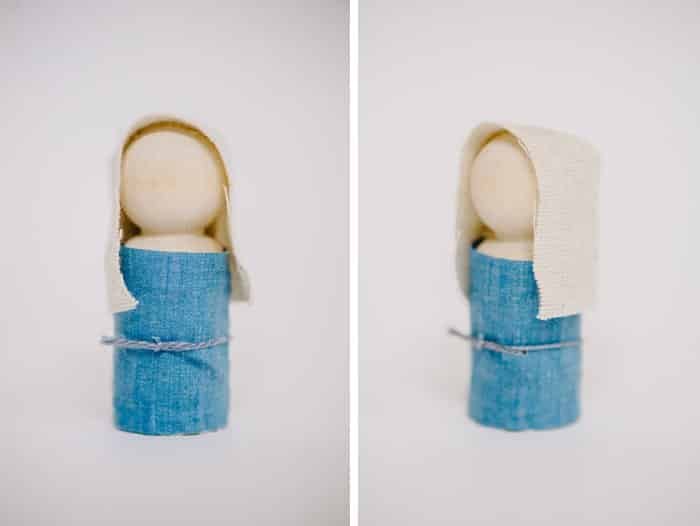
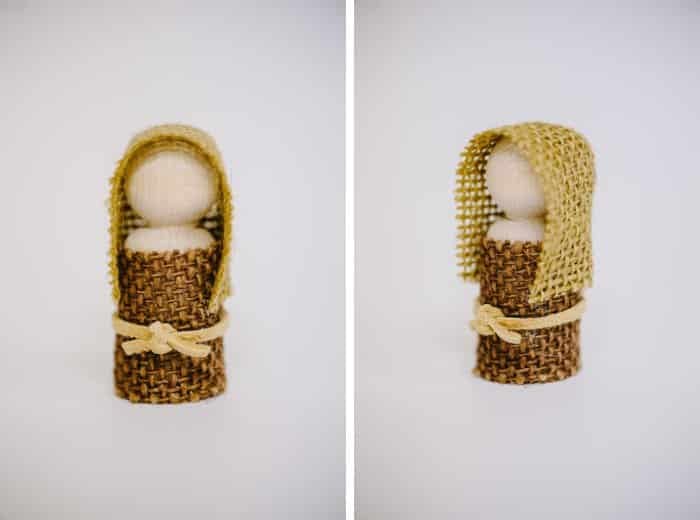
- Part 3: Finally, put a vertical line of glue down the middle of the back of the head/shoulders. Take one corner of the back of the head covering, fold it in, and push it into the glue. Put another vertical line of glue down the middle and fold the other corner in, securing it into the glue. [Pictured in the lower-right photo.] The finished product should have the head covering wrapped around the back and secured with glue.
That's it for Mary! Simple and yet just the sweetest.
Step 4. How to Make Joseph
The process of making the rest of the people is largely the same as it was for making Mary.
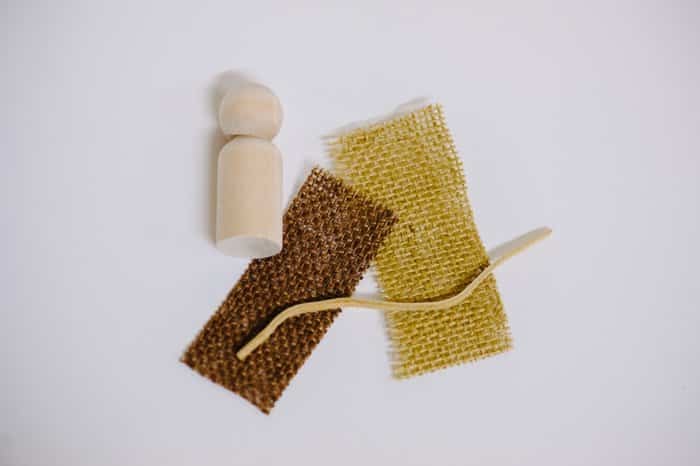
4a. Pieces Needed for Joseph:
- Body piece - I used dark brown burlap
- Head covering - I used a light brown, golden burlap
- Belt - I used a thin strip of leather
I cut them into similar sizes as the pieces for Mary, and they are glued on the same way. I made the head coverings not quite as long for Joseph and the Shepherd, but it doesn't really matter.
Step 4b. Glue on the body fabric.
Step 4c. Tie on the belt.
Glue beneath the knot if desired.
Step 4d. Attach the head covering the same way as Mary's.
You'll notice in the above-left photo that the corners of the head covering flare out. Because the burlap is so much stiffer than the fabric I used for Mary's head covering, it didn't lay flat like Mary's did.
Step 4e. Glue down the two edges of the head covering.
I put a small dot of glue on the inside of the two corners of the head covering, and pressed them against the sides of Joseph's body.
That allowed the head covering to lay nice as shown in the above-right photo.
There's Joseph!
I liked the leather belt combined with the rustic burlap. Twine would have worked well too.
Step 5. How to Make the Shepherd
The pieces needed for the shepherd are the same as Joseph, but I added a robe to his outfit.
I also added a curved staff so it would be clear what he was, and to help differentiate him from Joseph.
5a. Pieces Needed for the Shepherd:
- Body piece - I used green burlap
- Robe - brown burlap
- Head covering - oatmeal-colored fabric
- Belt - twine
- Shepherd's staff - I used a twisted piece of brown paper-like material I had in my craft supplies. You could use a small piece of wood, a stick or branch, cardboard, or even soak twine in glue or some other substance like Mod Podge and let it dry and harden into a curved shape.
Step 5b. Glue on body fabric.
Step 5c. Glue on robe over body fabric.
Step 5d. Attach belt and glue behind the knot if desired.
Step 5e. Attach the head covering.
Step 5f. Glue shepherd staff to the side of the body.
**PRO TIP: You can download the printable patterns to make all of the clothing by getting access to my free resource library!
Step 6. How to Make Baby Jesus
For Baby Jesus, I used a 1 11/16" wooden peg body instead of the larger 2 ⅜" wooden bodies I used for the rest of the people.
Step 6a. Pieces Needed for Baby Jesus:
- Smaller 1 11/16" wooden body
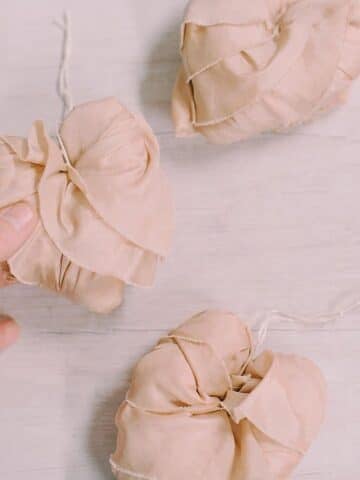
- Blanket - Cream burlap cut into a square
I tried several different fabrics and wrapping techniques for Baby Jesus' swaddle and most of them looked lumpy and ugly. I finally settled on the cream burlap because it matched the rest of the pieces and was the easiest to wrap.
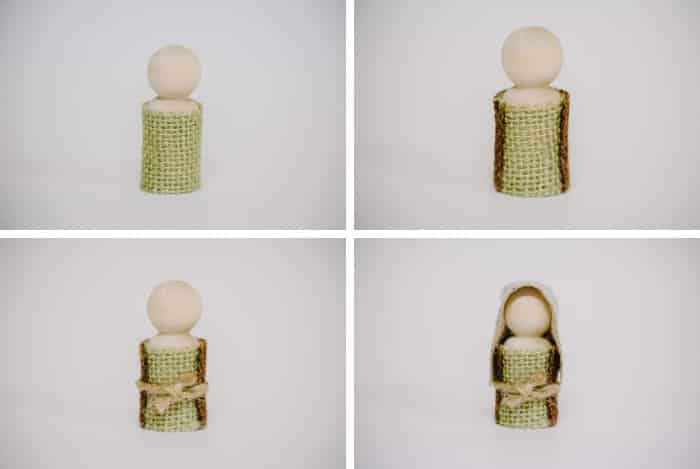
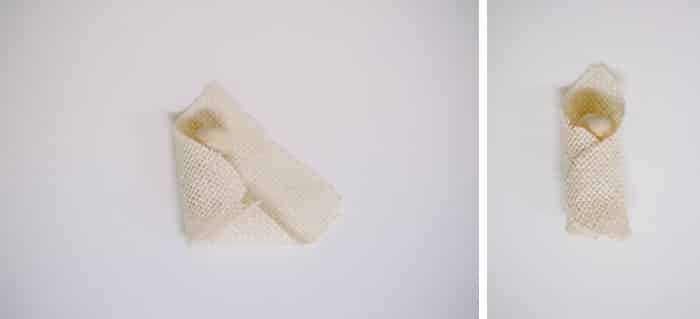
Step 6b. Prepare the blanket fabric.
Cut the blanket burlap into a square (per the pattern specs) and trim the bottom corner off to make the swaddle fit better.
You can also fold the bottom corner under if you don't want to trim it off.
Step 6c. Lay the wooden peg in the middle of the fabric and put a bit of glue on the belly.
Fold up the bottom corner you trimmed off and secure it in the glue.
Step 6d. Put more glue in the center of the body.
Take the left corner of the blanket and wrap it around the peg body, securing it into the glue. [See the lower-left photo.]
Step 6e. Add more glue to the middle of the body.
Take the right corner and wrap it around the body, securing it in the glue. [Lower-right photo.]
Make sure the corner of the blanket is glued well around the side of Baby Jesus so that it won't come undone.
I love the way Baby Jesus turned out! For some reason, these humble, rustic peg people make me feel really emotional.
Step 7. How to Make the Angel
The next part of the scene is the Angel.
I experimented with the best way to make the wings. My first try was using a slippery, silky fabric I had leftover from my wedding decor. It didn't work out well because it made uneven wings.
I decided to try to make a simple bow out of white cotton fabric.
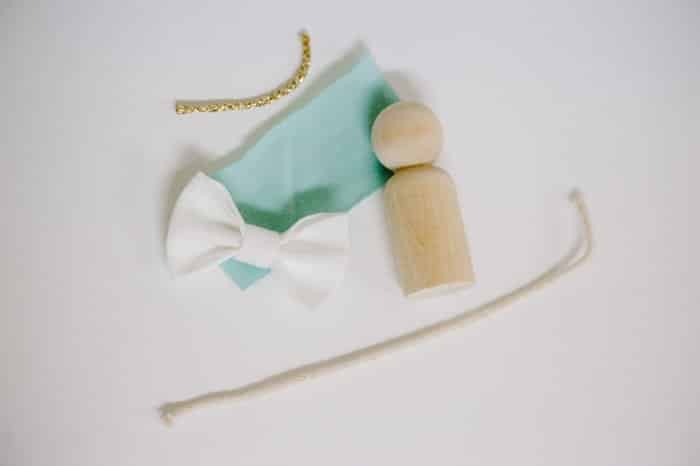
7a. Pieces Needed for the Angel:
- Body piece - teal knit fabric
- Belt - thin cream rope
- Wings - I made a bow out of white cotton to use as wings
- Halo - gold string
Step 7b. Glue on the body piece.
Step 7c. Attach the belt.
Glue behind the knot if desired.
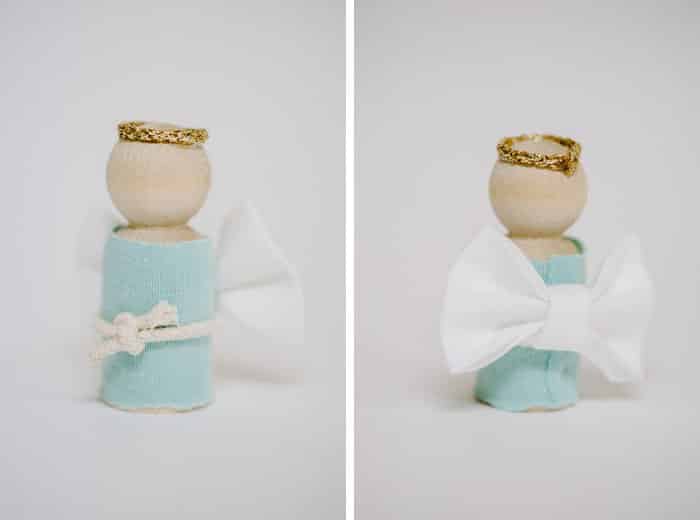
Step 7d. Glue on the bow wings.
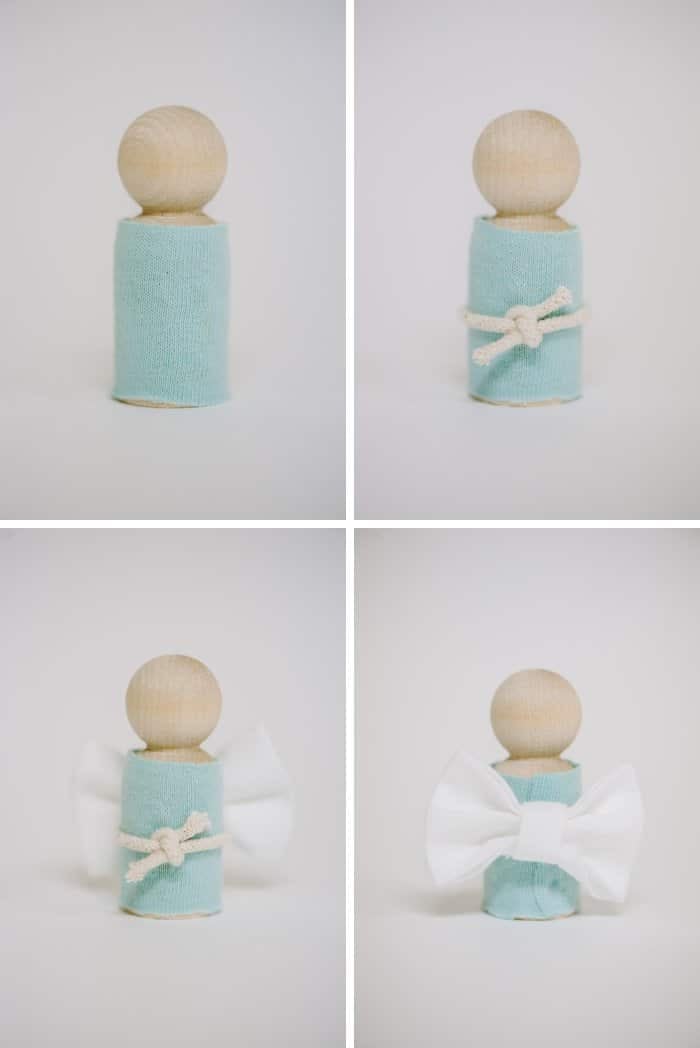
Step 7e. Attach a halo in a circle on top of the head.
I placed a thin line of glue and laid the string in it, making sure the ends met in the back.
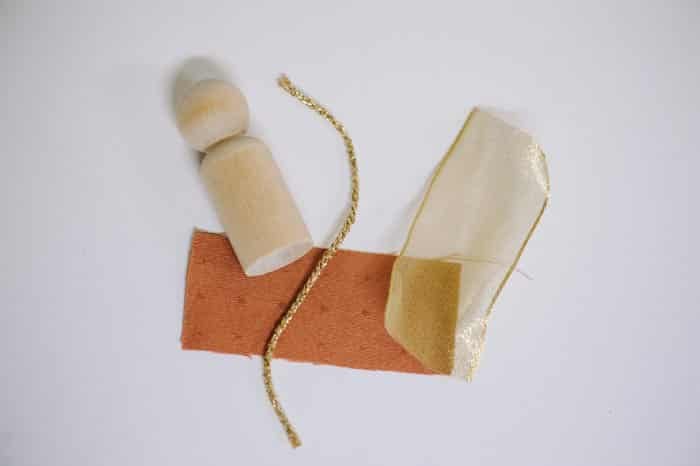
Step 8. How to Make the Three Wise Men
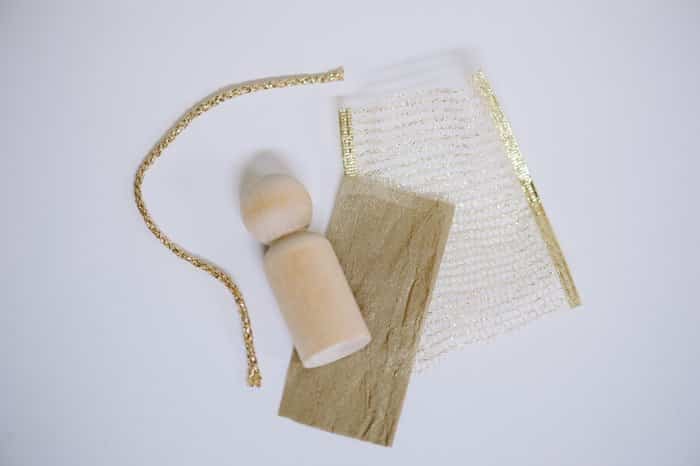
The pieces for the three wise men are similar to the rest, except the head coverings are different. I made crowns for them out of pieces of metallic ribbon.
8a. Pieces Needed for the Three Wise Men:
- Body fabric
- Belt
- Crown material
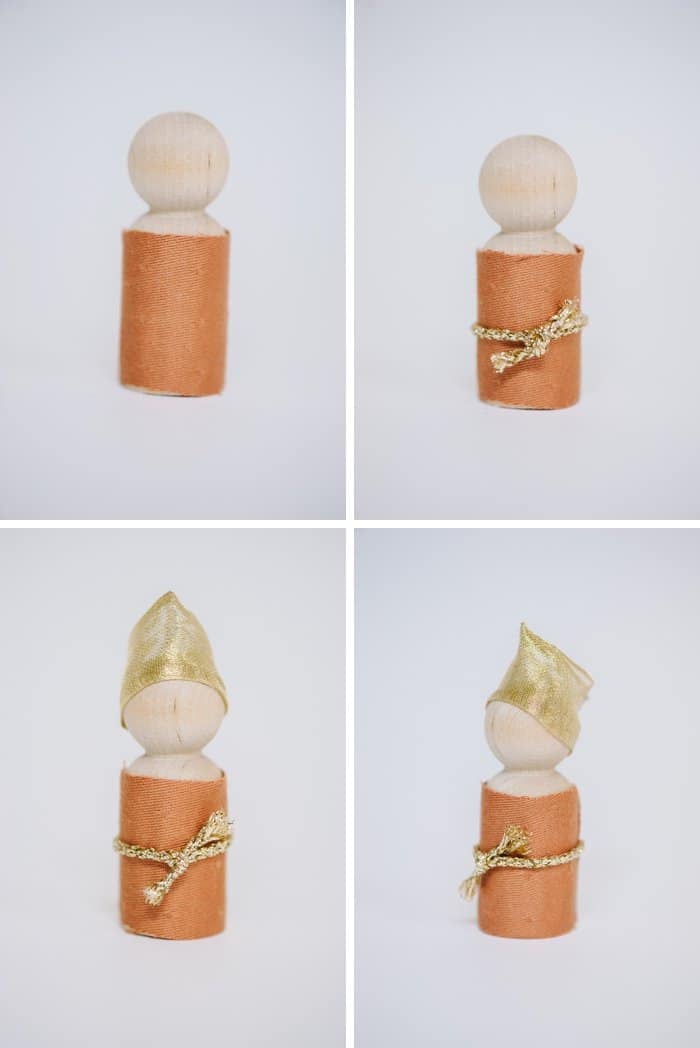
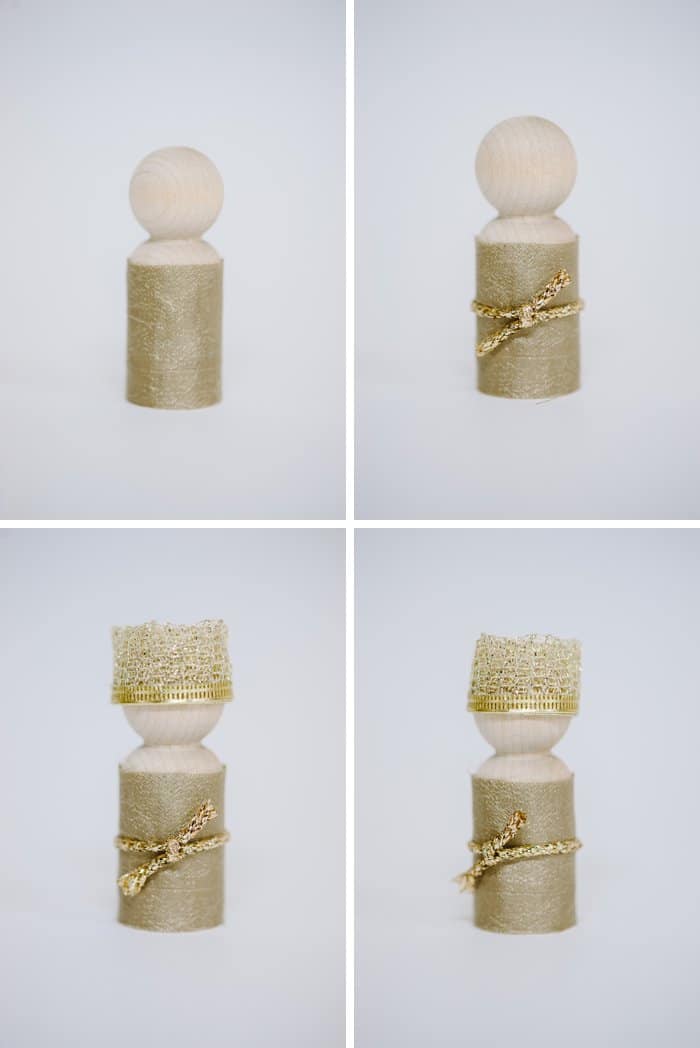
Step 8b. Glue on the body fabric.
Step 8c. Attach the belt.
Step 8d. Glue on the crown.
For the first wise man's crown, I folded a piece of ribbon in half and wrapped it around the head so that it was higher in front and lower in the back.
The ribbon had wire in it along the edges, so it held it's shape when I pinched it into a point on top. (See below.)
For the second wise man, I folded the ribbon in 4th's because it was a wide ribbon. I wanted to make a simple crown that would wrap around the top of the wise man's head.
I glued it in place. (See below.)
I used the same method for the third wise man's crown, just with different ribbon.
And that's it!!!
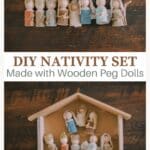
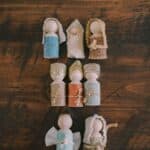
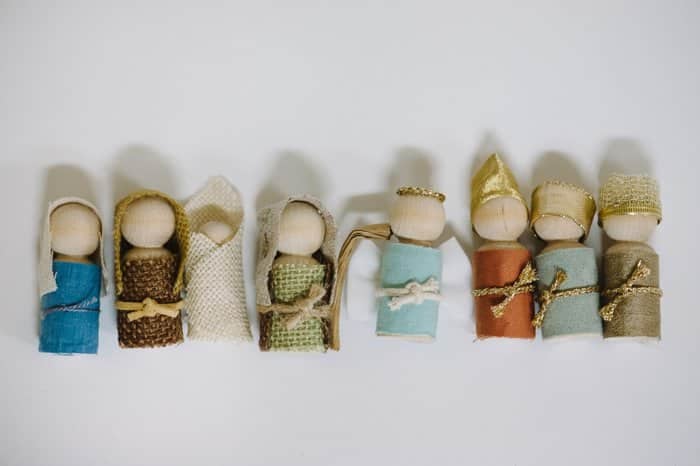
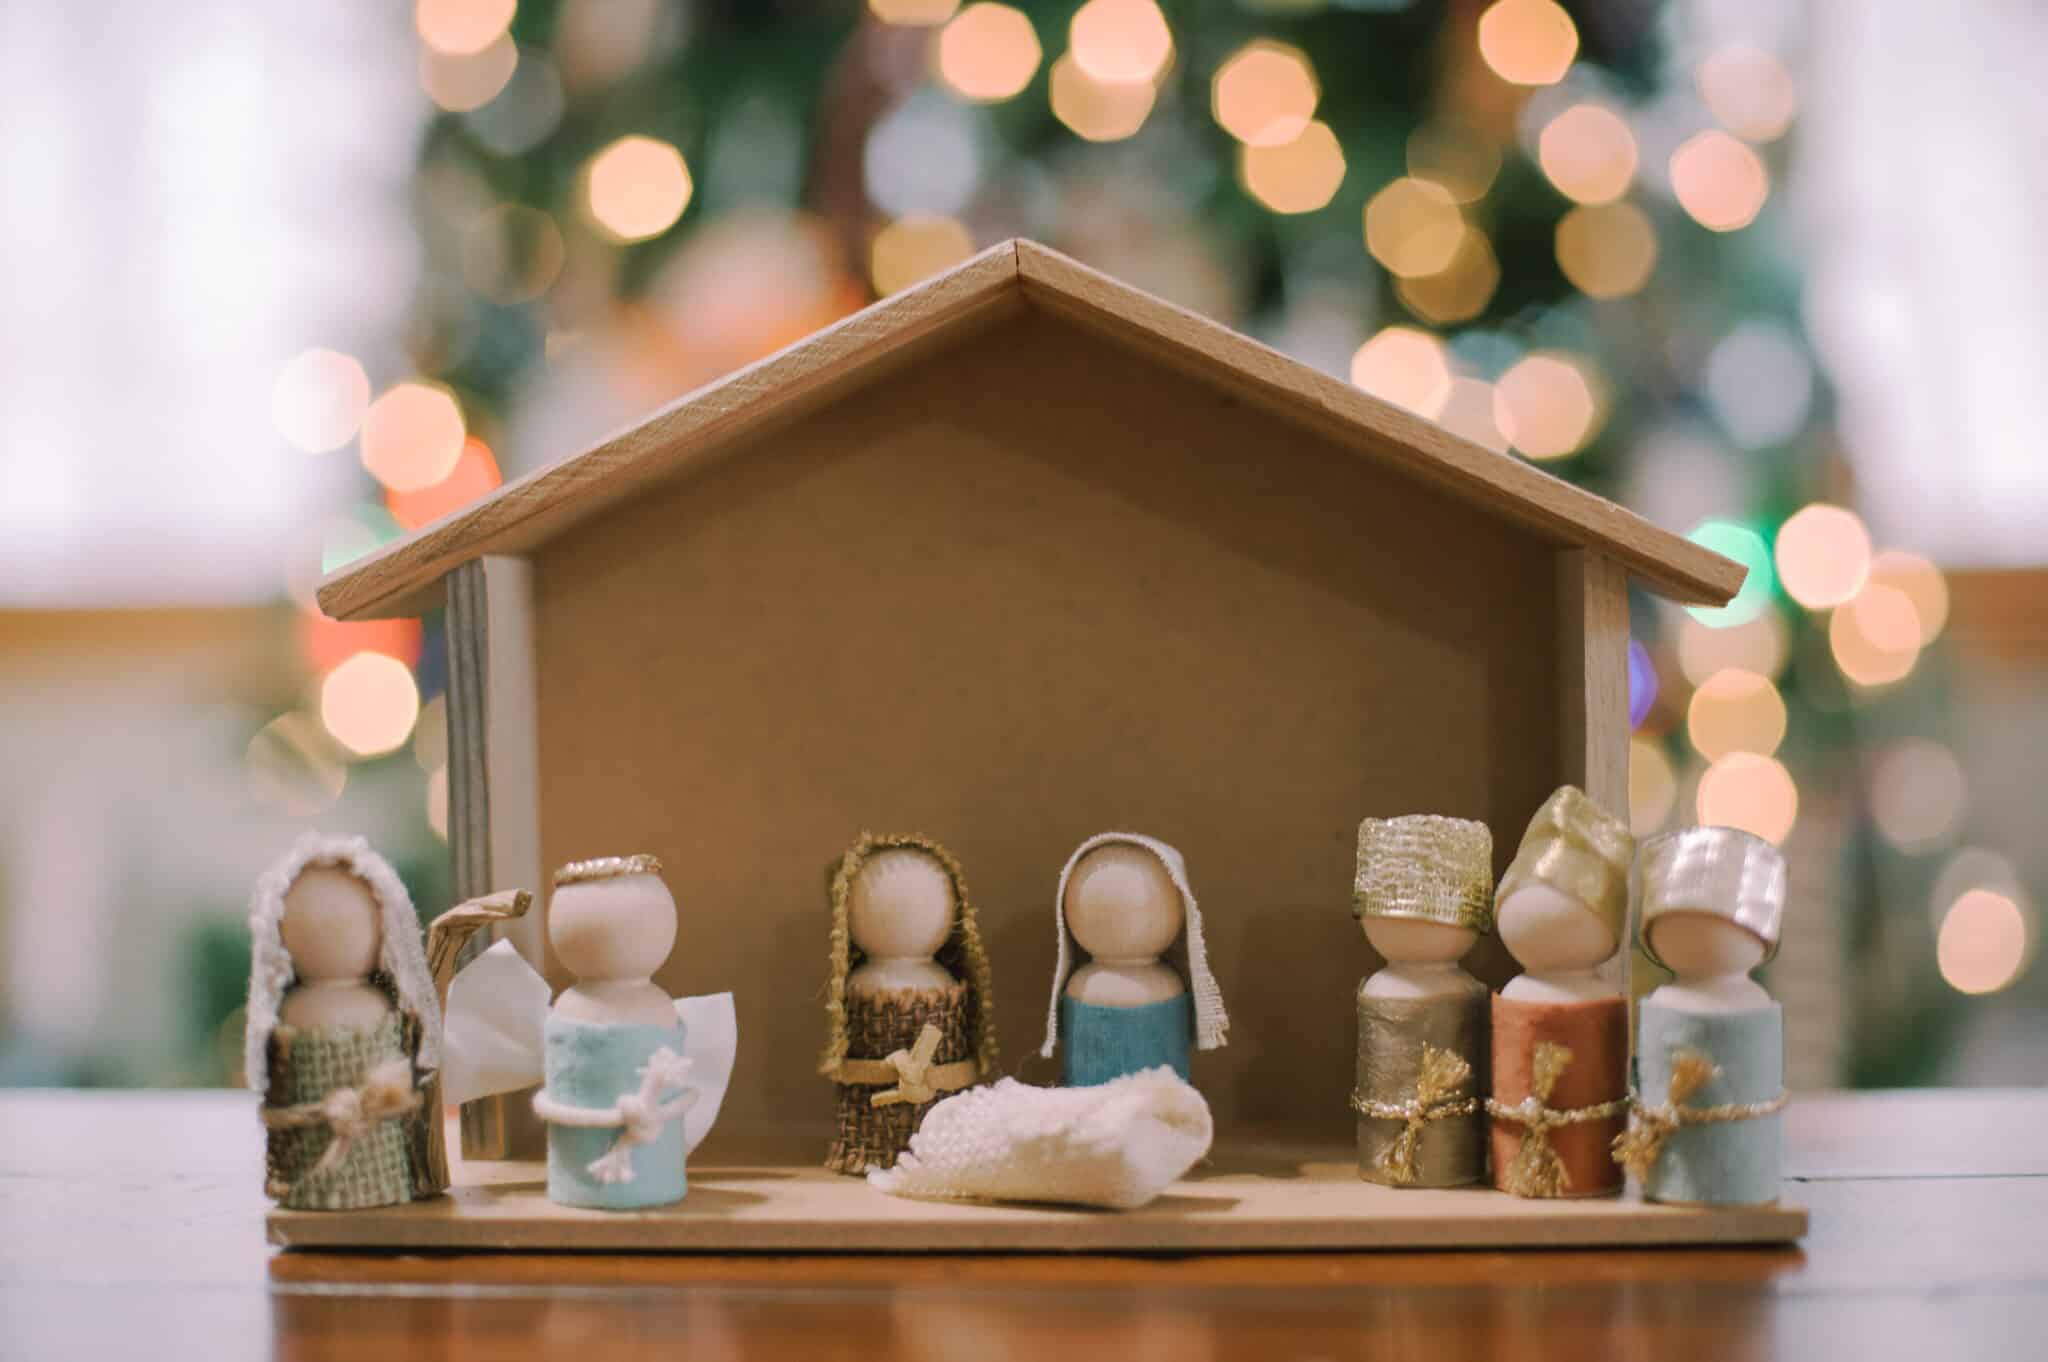
When I was done, I had:
Mary, Joseph, Baby Jesus, The Shepherd, The Angel, and the Three Wise Men.
I LOVE THEM SO MUCH!
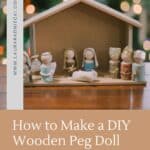
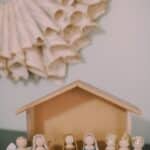
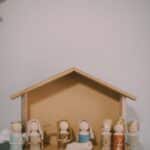
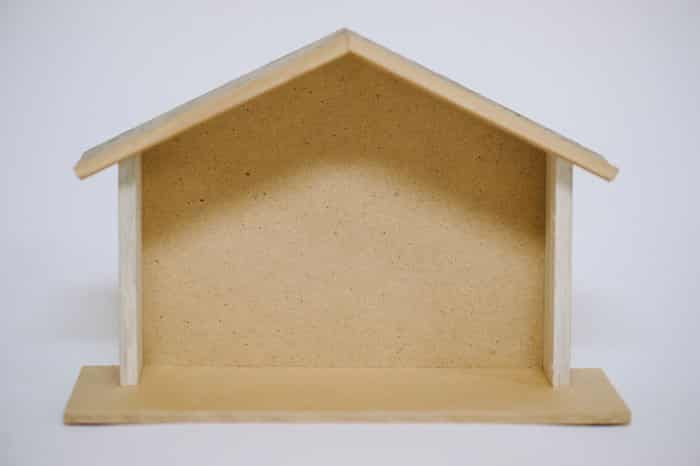
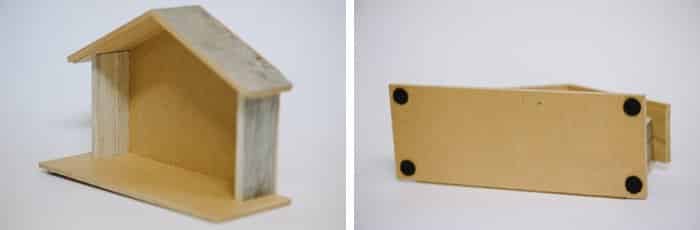
Step 9. How to Make the Stable or Creche:
With my engineer dad's help, we made our own stables for my Nativity scenes.
**PRO TIP: You can download the printable patterns to make a stable of your own by getting access to my free resource library!
If you want to make one of your own but can't make it out of wood, you can also make a stable out of cardboard or foam board.
Wood looks the best.
But if wood isn't an option, it's simple to make a stable out of cardboard and hot glue, and I guarantee your kids won't mind one bit!
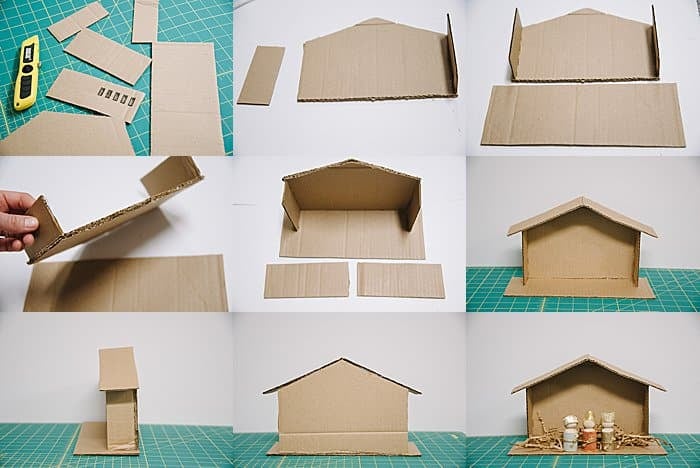
**Download the FREE PRINTABLE PATTERN to make a stable of your own by getting access to my free resource library!
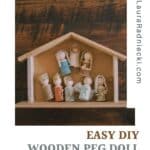
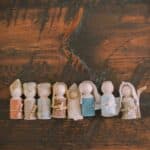
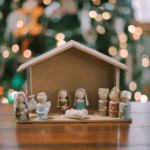
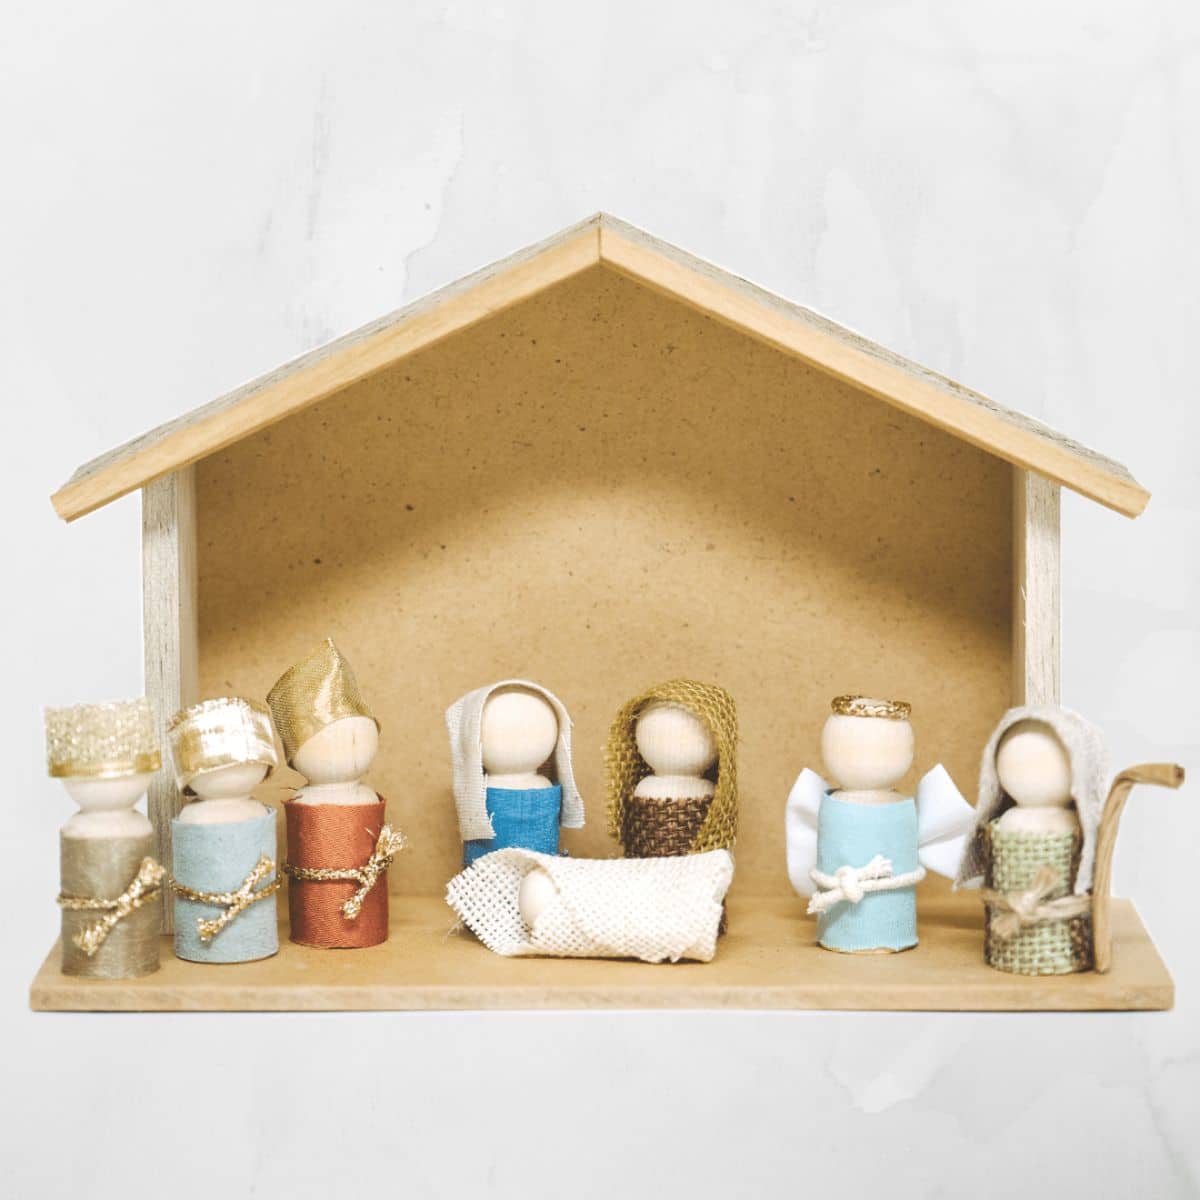
Here's the finished handmade wooden peg doll nativity set:
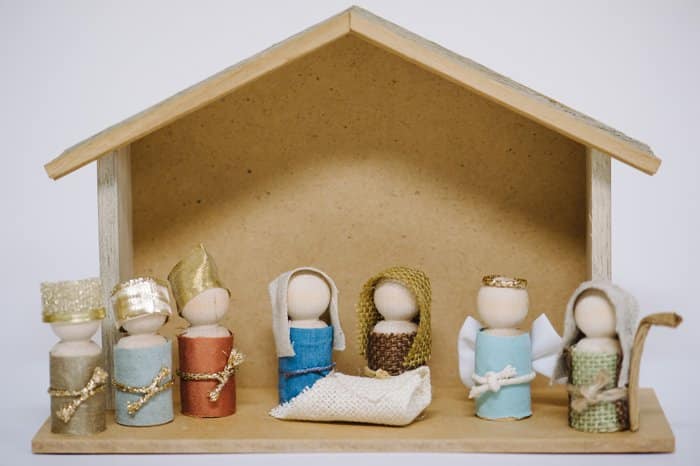
I love it.
It's rustic, humble, emotionally sentimental, and yet so classic and cute.
I envision my kids playing with it during Christmas time, rearranging the people into different orders. I also hope to use it to teach them about the Christmas story and the birth of Baby Jesus.
Plus, I think it makes a great piece of timeless Christmas decor too.
I put the wooden people in a 5x7" drawstring bag, and laid the bag inside the stable for storage. It's not that big; the stable is less than a foot wide. It fits easily into my tub of Christmas decor.
Common Questions
For my nativity project, I used seven Large 2 ⅜" peg dolls and one small 1 11/16" doll. I bought mine on Amazon. You can also find them at craft stores, Etsy, and Ebay.
You don't have to use the exact same sized dolls as I did. The important thing is you have 7 of one size, and 1 smaller version for Baby Jesus.
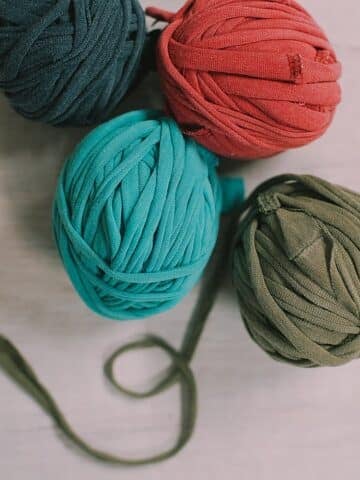
Use whatever fabric scraps you have on hand! That's my favorite way to do a project - use what you've got!
I had many scraps of burlap, linen, muslin, and other cotton fabrics that worked perfectly to make my nativity set. Natural fabrics pair very well with the wooden peg dolls, and earth-toned colors give it a classic, humble vibe that will never go out of style.
But the true answer to this question is... use whatever type, kind, and color of fabric you want!
Again, this is up to you - you get to decide what your nativity set will look like. If you are a great painter, maybe you can paint beautiful faces onto your peg dolls.
In my case, I chose to leave the wooden faces blank because I like the timeless elegance the set has with the wooden peg dolls and the natural fabrics.
If I had drawn faces onto the peg dolls, they would have looked silly because I am not great at drawing. They wouldn't look nearly as classy and "Willow-people-esque" as they do with blank faces.
Display it! Front and center - display your beautiful nativity set all season long!
They also make amazing gifts. You can make several sets at once by making each person in multiples. (Make five Marys, and then 5 Baby Jesus' etc.)
I have even heard from people who have used this tutorial to lead craft projects for camps and church groups. It's a crowd favorite, and the nativity sets turn out gorgeous every single time!
Using fabric scraps, hot glue, and a few wooden peg dolls, a masterpiece is born with this DIY Nativity Scene.
I had high hopes for this wooden peg doll nativity set, but there is something about the finished product that is even better than I hoped it would be.
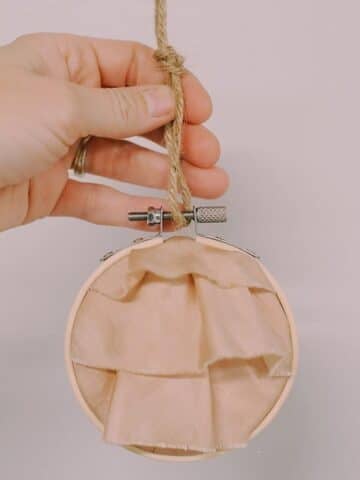
P.S. I also made a Holy Family Nativity Set that is Willow-Tree-People-inspired, as well as a baby Jesus ornament. If you liked this DIY Nativity tutorial, you'll love those as well!
More Fabric Crafts You'll Love
---
⭐️🧶 Did you enjoy this craft and want to see more like it? ✂️ Join our FREE email community and get inspiring craft ideas sent right to your inbox! 🧵 ⭐️
---

Gabriel
Hello Laura, do you have the angle cuts for the wood version? I would like to try to make it in wood, but I'm very bad with numbers,
Laura
Hi Gabriel! Thanks for the comment. I'm sorry - I don't have that information. It was more of a DIY creation with my dad at the helm. I'm sorry I can't be of more help there!
GTA SA MOD
What a wonderful idea! I love how this wooden peg doll nativity set adds a personal touch to Christmas decor. The step-by-step instructions are super helpful, and I can't wait to try making this with my kids. It looks like such a fun project to share together! Thank you for the inspiration, Laura!
Laura
I'm so happy to hear you like it! I hope it's a fun, memorable project!
minecraft apk
This is such a lovely idea! I can’t wait to try making my own wooden peg doll nativity set. The step-by-step instructions are so helpful, and I love how you incorporated tradition with a personal touch. Thanks for sharing this adorable project!
Laura
Glad you liked it! Enjoy! <3
91 Club
What a delightful project, Laura! I love the idea of making a wooden peg doll nativity set. Your step-by-step instructions are so clear and easy to follow. Can't wait to try this with my kids for a more meaningful Christmas decoration! Thanks for sharing!
Laura
Thanks for commenting - I am glad you love the nativity project! It's a fun one to make and kids love it too!
My Free MP3
I absolutely love this idea! The wooden peg doll nativity set is such a charming way to celebrate Christmas. Your step-by-step instructions are so helpful, and I can't wait to create my own set with my kids! Thank you for sharing this wonderful project!
Laura
I'm thrilled to hear you like it!
Bev Myslinski
I appreciate your well balanced method to this topic.
George
Thank you so much for putting together this brilliant tutorial! I'm so happy with how my version turned out, thanks to all of your instructions, photos and tips 🙂
Laura
I am so glad it helped you make something you love! If you care to share, I would love to see a photo of yours - you can email it to me!
Steve
Wonderdul thankyou
Joy hammerschmidt
Love this ! In our little town of Fairview we partner with another church in town to host "Gems" a weekly
group of young girls that come to learn songs, stories and I do a weekly craft with the. At the Christmas time comes upon I was very interested in making a nativity. This one really caught my eve and would love to have the pattern for the stable and the costumes. Would be so appreciated! Great work
Laura
Hi Joy!
Thank you so much! I'm so happy you love the nativity idea!
Yes, you can absolutely have the pattern for the stable and costumes. You can get them by signing up for the free resource library; all the patterns are in there available for free download. You can unsubscribe after, if you're not interested in staying a part of the group. You can find more info at https://www.lauraradniecki.com/library
Let me know if you have any other questions! Good luck with the nativity craft! That sounds like a wonderful ministry to be a part of!
Laura
Lorena
I can't say how beautiful this nativity is to me! I adore the simple way it calls out to me in such a big way. Thank you for sharing your set, I am going to work on this with the kids tonight!
Laura Radniecki
Hi Lorena!
Thank you so much for sharing your thoughts on the nativity set with me! I appreciate your sweet words so much!
Did you start making your own set with your kids? Let me know how it turns out!
xo!
Laura
Kristen
Hey Laura,
This tutorial was so helpful and incredible. And much like you, I found I loved it even more than I thought I would! So simple, yet beautiful.
I was wondering if there’s any chance I could get the measurements for the stable? I love your stable and my friend was going to make me one similar to the one you posted, but don’t have a clue as to how big it should be 🙂
Thank you!
Kristen.
Laura Radniecki
Hi Kristen!
I'm so happy to hear you love the nativity just like I do! I completely agree on it's simplicity and beauty!
I looked at my stable and took some measurements for you, and drew them on a piece of paper. I added them into the tutorial in the section on the Stable.
I hope that helps your friend make your stable! I'd love to see your finished product!
xo,
Laura
Chris Salman
Your way of describing the things step by step is really nice. I have a collection of nativity sets which I bought from http://holylandimports.net/, they have a huge collection of nativity scenes, ornaments etc. I like your article, I will try these steps at home.
Laura Radniecki
Hi Chris!
Thank you for reading and commenting!
Holyland Imports has beautiful products too. Thanks for pointing them out!
Laura
Christy
Quick question, do you have the tutorial on how to make the stable?
Laura Radniecki
Hi Christy!
Unfortunately no, I don't have a tutorial on how to make the stable. But I did measure mine and drew up some measurements/templates of the different pieces and added that to the tutorial in the stable section. I hope those drawings might be of some help to you! Good luck!
Ash
What kind of wood and sizes did you use to make the stable?
Laura
Hi Ash! There is a printable pattern in the resource library for the Nativity Stable, that shows the dimensions of the different parts of the stable. Any kind of wood will work (I even made a stable out of cardboard!) so I'd get something thin and cheap. Hope that helps!
lyn
Love this! SO precious. Looks straight out of a magazine the way you did the step-by-step
Laura Radniecki
Thanks Lyn! I'm glad you liked it! I'm already excited for next Christmas so I can put it out again! 🙂