Learn how to make a DIY baby Jesus ornament for your Christmas tree this year. It's the perfect handmade craft to do with your kids!
Christmas tree ornaments come in all shapes and sizes, but there's something striking about humble ornaments that make you pause.
Those ornaments that make you look a little closer and remind you of what Christmas is really about.
Today's handmade ornament does just that. It's humble, it's classic, and it's surprisingly emotional.
It's a visual reminder of the true meaning of Christmas.
We’re on Day 5 of The 30 Days of Ornaments Project, where we will make 30 handmade ornaments over the next 30 days.
Today, we are borrowing inspiration from my popular Nativity Scene and Holy Family posts and learning how to make a DIY Baby Jesus Ornament!
Jump to:
Why You'll Love This Craft
- If you loved our rustic DIY Nativity Set, you'll love this sweet baby Jesus ornament. It's the same type of vibe - humble, natural, and sweet.
- Kids love this project because they love the little baby peg doll inside the swaddle.
- This project would be perfect for a church group or as a Bible study craft.
Craft Supplies Needed
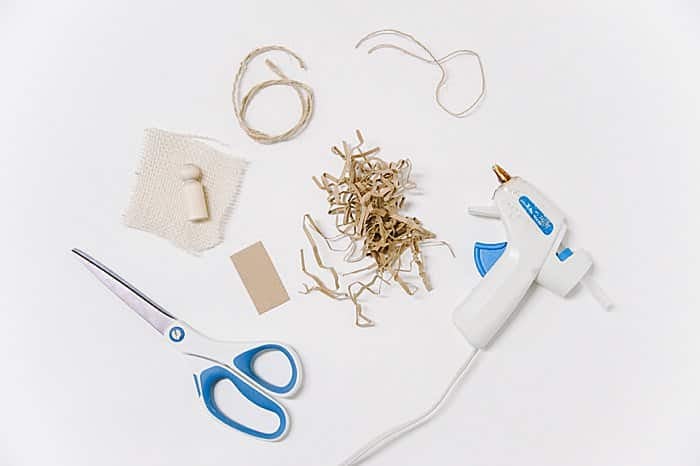
- Wooden "Boy" Peg Doll - This is the smaller peg doll size and perfect for a little baby Jesus.
- Burlap - I like burlap for the swaddle fabric because it is sturdy and easy to fold and glue.
- Scissors, Hot Glue Gun and Glue - Craft room staples!
- Twine - My preferred hanging string for nearly any ornament I make. I love the rustic look, and it pairs perfectly with the other natural elements of this ornament.
- Shredded Kraft Paper - For underneath Baby Jesus. You could also try raffia paper shreds too.
- Cardboard - You need a small piece of scrap cardboard to make a base to glue the shredded kraft paper on.
Video of Making Baby Jesus
How to Make a Baby Jesus Ornament
Step 1. Cut burlap fabric into a 3x3 inch square.
Trim off one corner to make swaddling easier.
Step 2. Swaddle Baby Jesus in the burlap using hot glue.
Bottom up first, then glue.
Wrap one side and glue.
Wrap the other and glue.
Step 3. Cut a small rectangle of cardboard to use as a base to glue shredded paper to.
Step 4. Hot glue shredded kraft paper to the small piece of cardboard.
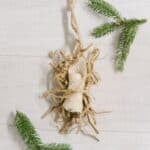
Step 5. Glue the swaddled Baby Jesus peg doll to the shredded paper and cardboard rectangle.
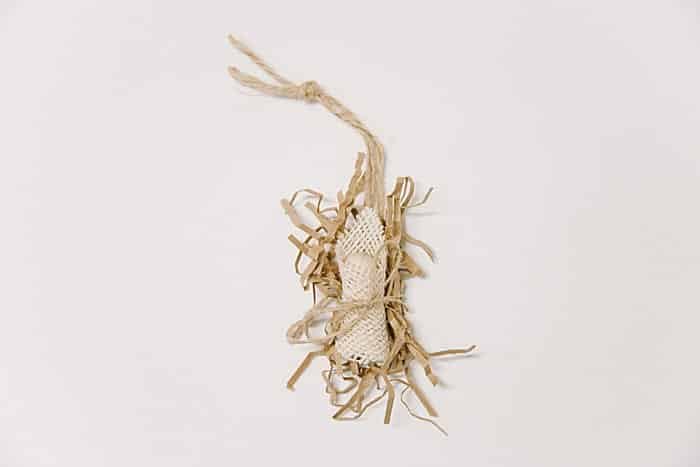
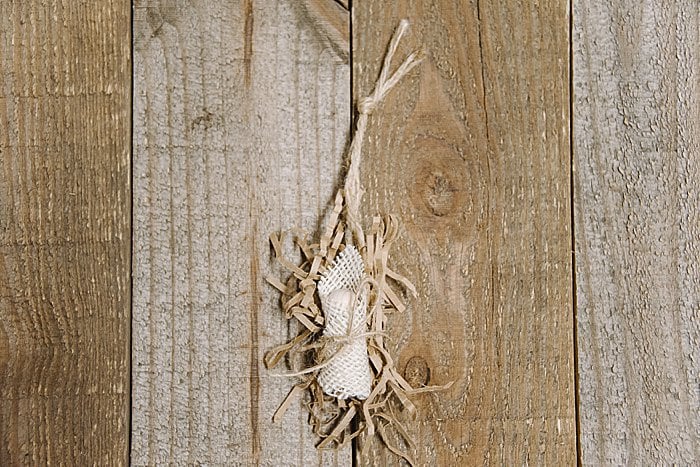
Step 6. Wrap thin twine around the center of shredded paper, rectangle, and Baby Jesus.
Knot it and tie a bow to finish it off.
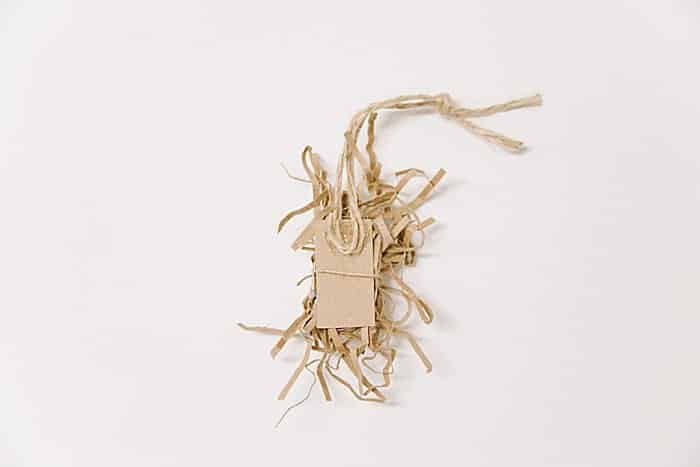
Step 7. Hot glue a twine loop to the back of the cardboard piece for hanging string.
Step 8. Assess ornament; glue or trim any rogue pieces of shredded paper, and it's ready to hang!
Common Questions
I buy my wooden peg dolls on Amazon - there are lots of different sellers and many different sizes of peg dolls. You might be able to find some options at big craft stores as well.
Of course! Use whatever you have. I like burlap because I like the rustic look of it, and it makes it super easy to swaddle the peg doll because it's so sturdy. You could also use natural fabrics like linen or cotton, or even something like felt.
I used what I had - the shredded kraft paper. But I think what might even look better would be raffia paper shreds like these on Amazon! That would look even more natural and rustic.
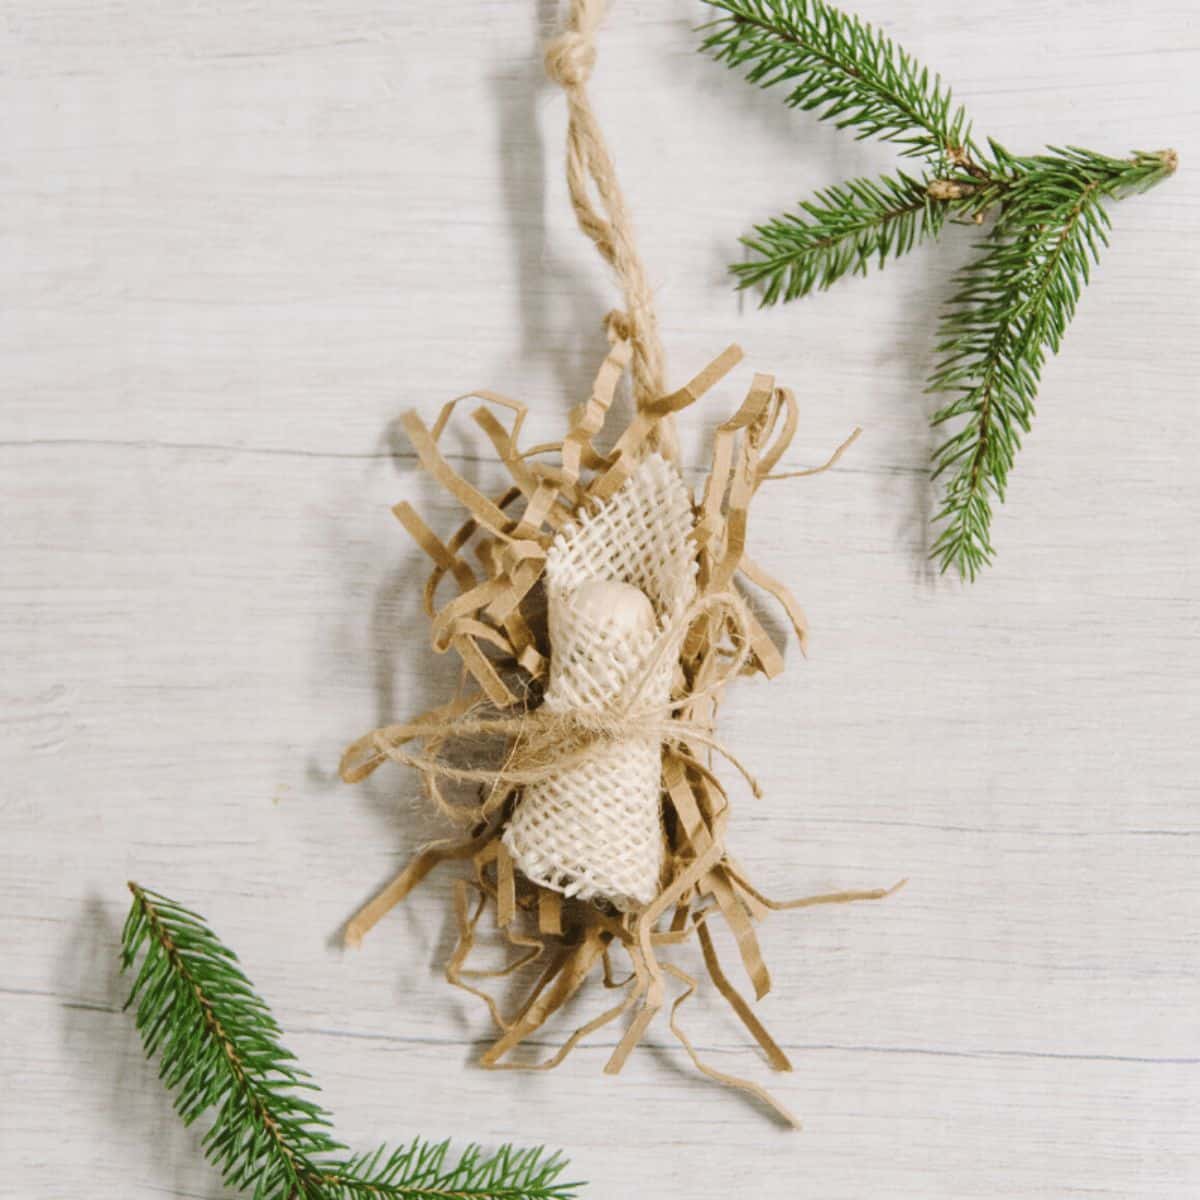
With just a few simple supplies and a little bit of time, you can make a handmade Christmas ornament that has the power to stop people in their tracks.
This DIY Baby Jesus ornament is unlike any other; it's a physical reminder of the true meaning of Christmas... something we could all use this time of year.
More Christmas Crafts You'll Love

---
⭐️🧶 Did you enjoy this craft and want to see more like it? ✂️ Join our FREE email community and get inspiring craft ideas sent right to your inbox! 🧵 ⭐️
---
Day 5: How to Make a Baby Jesus Ornament | The 30 Days of Ornaments Project
Materials
- Wooden "Boy" Peg Doll
- Burlap
- Scissors
- Hot Glue Gun and Glue
- Twine
- Shredded Kraft Paper
- Cardboard
Instructions
- Cut burlap fabric into a 3x3 inch square.Trim off one corner to make swaddling easier.
- Swaddle Baby Jesus in the burlap using hot glue.Bottom up first, then glue.Wrap one side and glue.Wrap the other and glue.
- Cut a small rectangle of cardboard to use as a base to glue shredded paper to.
- Hot glue shredded kraft paper to the small piece of cardboard.
- Glue the swaddled Baby Jesus peg doll to the shredded paper and cardboard rectangle.
- Wrap thin twine around the center of shredded paper, rectangle, and Baby Jesus.Knot it and tie a bow to finish it off.
- Hot glue a twine loop to the back of the cardboard piece for hanging string.
- Assess ornament; glue or trim any rogue pieces of shredded paper, and it's ready to hang!
Notes
- Peg dolls are available online, and you may be able to find them at big craft stores as well.
- I like burlap for the swaddle fabric because it's sturdy and easy to use. But you can use any fabric you like - you could try linen, cotton, or felt.
- Try raffia paper shreds instead of shredded kraft paper for a more natural option.

Leave a Reply