

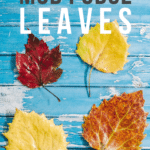
Learn how to make DIY Mod Podge leaves to preserve them for your fun fall crafts and leaf projects! This simple craft uses Mod Podge to seal and preserve leaves, so the color stays vibrant for a long time.

The best part of fall isn't the boots, scarves, or pumpkin spice lattes... It's the colorful leaves that make the trees look like they're on fire.
The spectacular fall leaf colors are precious and fleeting; in the blink of an eye, the leaves turn brown, and fall to the ground.
You can preserve fall leaves so their colors will last for weeks, months (or even years!) You can do this by coating the leaves in Mod Podge or dipping the leaves in melted beeswax.
Today, we are going to use Mod Podge because I think it's the easiest and fastest way to preserve them and keep fall leaves colorful for a long time.
Jump to:
Why You'll Love This Craft
- All you need are three supplies - colorful fall leaves, foam brushes, and Mod Podge. That's it!
- You can use Matte or Gloss Mod Podge, depending on how much shine you want your leaves to have.
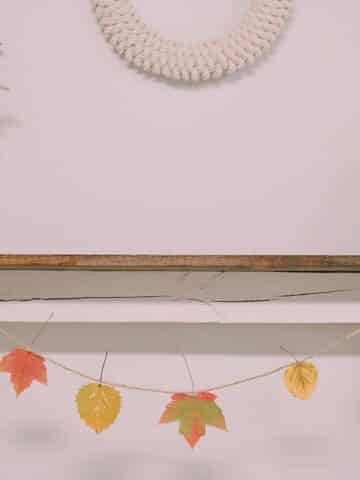
- Once the leaves are coated and dry, you can use them in your fall decor by making them into a Mod Podge leaf garland, or even turning them into leaf monsters for kids.
Craft Supplies Needed
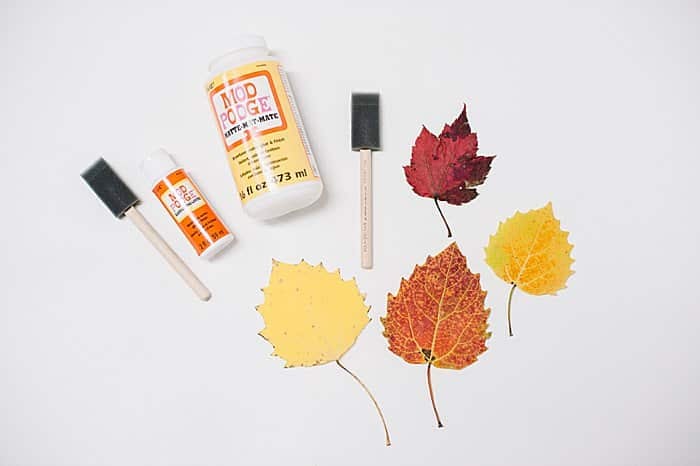
- Leaves - Dry, flat leaves are the easiest to brush Mod Podge onto. You can press the leaves between the pages of a book for a few days, with a paper towel to soak up any moisture.
- Mod Podge - You can use Gloss or Matte Mod Podge. The Matte looks more like a Satin or Semi-Gloss finish. The Gloss finish is much more shiny. (Check out this tutorial that takes a closer look at the difference between Gloss and Matte Mod Podge for preserving fall leaves.)
- Foam Brush - 1" foam brushes work well.
How to Make DIY Mod Podge Leaves
Step 1. Use this tutorial about the difference between Gloss and Matte Mod Podge for preserving fall leaves to decide what type of Mod Podge you want to use.
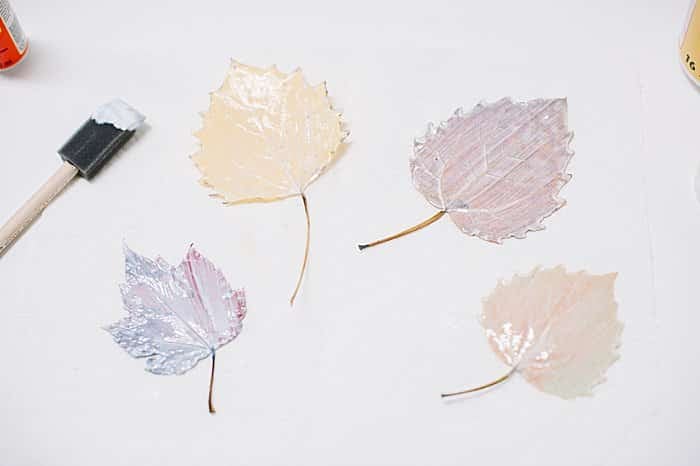
Starting with the back of the leaf first, paint on a layer of Mod Podge with a foam brush.
Let dry.
Step 2. Once the first Mod Podge layer is dry, flip the leaves over.
Brush a layer of Mod Podge on the second side of the leaves.
Let dry.
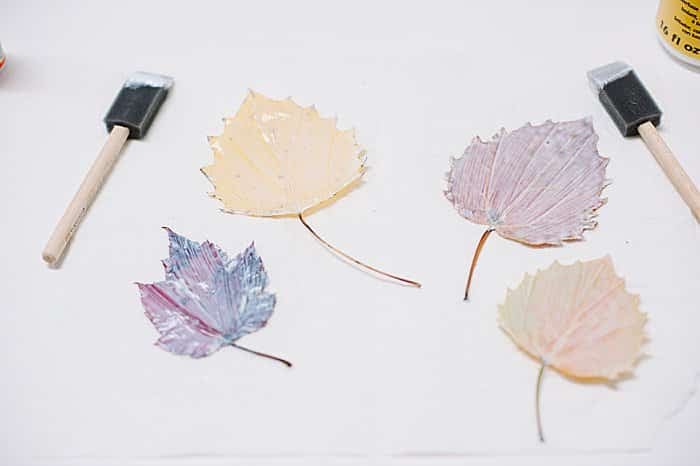
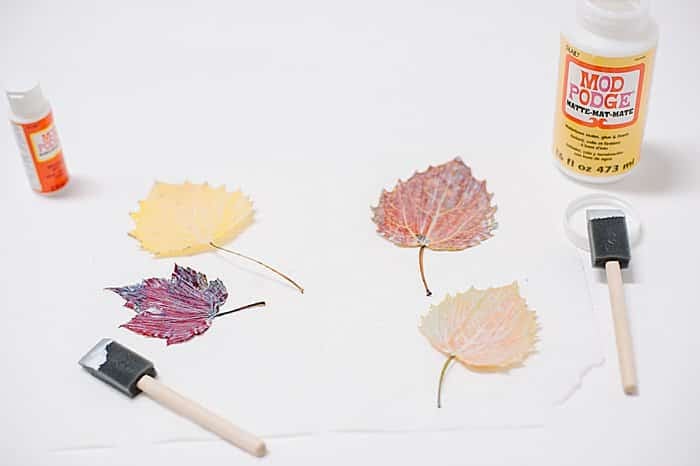
Step 3. Repeat the first two steps, brushing a second coat onto the back and then the front once it's dry.
Step 4. Once the Mod Podge leaves are fully dry, you can use them in projects like a leaf wall hanging, a diy leaf garland, or leaf monster crafts for kids.
You can display them in mason jars, scatter them on a mantle or tabletop, or even just use washi tape and tape them to the wall.
Common Questions
The two most common types of Mod Podge are Matte and Gloss finishes. The Matte dries with a subtle satin finish, and the Gloss dries with a shiny finish.
This post talks in detail about the difference between Matte and Gloss for preserving fall leaves.
If the leaves are flat, dry, and coated completely with Mod Podge, the colorful leaves can remain preserved for years!
I have leaves that were preserved with Mod Podge a few years ago and the leaves are still colorful after all this time! The colors have become a bit muted over time; the vibrant red leaves are darker and more subdued. But the leaves remain preserved, flat, and colorful!
The easiest way (and arguably the right way) to coat colorful fall leaves with Mod Podge is to start by brushing Mod Podge onto the backside of the leaves first. After that coat dries, flip the leaves over and brush a layer onto the front of the leaves. You can repeat the process with a second coat, letting each coat dry in between.
Compared to bare, un-Mod Podge'd leaves which dry out in mere days, these preserved leaves are a great way to decorate for fall, and make fall leaf crafts that will stay colorful for much more than just a few days.
More Fall Crafts You'll Love


---
⭐️🧶 Did you enjoy this craft and want to see more like it? ✂️ Join our FREE email community and get inspiring craft ideas sent right to your inbox! 🧵 ⭐️
---

How to Preserve Fall Leaves with Mod Podge
Materials
- Colorful Fall Leaves
- Mod Podge (Either Matte or Gloss)
- Foam Brush
Instructions
- Use this tutorial about the difference between Gloss and Matte Mod Podge for preserving fall leaves to decide what type of Mod Podge you want to use.Starting with the back of the leaf first, paint on a layer of Mod Podge with a foam brush. Let dry.
- Once the first Mod Podge layer is dry, flip the leaves over.Brush a layer of Mod Podge on the second side of the leaves. Let dry.
- Repeat the first two steps, brushing a second coat onto the back and then the front once it's dry.
- Once the Mod Podge leaves are fully dry, you can use them in projects like a leaf wall hanging, a diy leaf garland, or leaf monster crafts for kids.You can display them in mason jars, scatter them on a mantle or tabletop, or even just use washi tape and tape them to the wall.
Notes
- You can use Mod Podge in either Matte or Gloss finish. The Matte Mod Podge has a satin finish, and the Gloss Mod Podge has a shiny finish.
- It works best to use dry, flat leaves. You can press them in the pages of a book between paper towels.
- Foam brushes work best for brushing Mod Podge onto colorful fall leaves because they are cheap to buy, and they don't leave streaks.


Vidhya
Hi, this is a great article. Thanks for this. I tried mod podge on leaves and I ran into 1 issue. I wanted different variety of leaves so as and when I get it, I bring it home, mod podge and store it. But now Im noticing that some leaves got spoiled, changed colors and some are remaining the same way. Would you know the reason? Is there a way we need to store these leaves post mod podge? I need it for a big project and very upset that I lost more than half batch of leaves like this 🙁
Laura
Hi Vidhya! Yeah, I did notice that happening to some of my leaves too. I don't know for sure why - I would guess maybe it has to do with something in the leaves, maybe moisture or a little bug spot or something? Could even be something we can't see. Unfortunately, I don't know there's a way around it. I would probably just make more than you think you'll need, so that you will have enough for your project even with the ones that will inevitably not work out. I hope that helps!
Macy
Can you also preserve the leaves using epoxy resin.
Laura
Hi Macy! I haven't worked with epoxy resin before, so I can't say whether it would work or not. But I am sure there are people who have tried it. If it seals the leaf, it probably would have the same effect as Mod Podge, so it's worth a try! If you try it, report back and let me know how it turned out!
Cheryl
I did this to smaller bright leaves and put them in my Thanksgiving cards and mailed to my relatives in Florida.
Laura
Hi Cheryl! Oh my gosh, what a fantastic idea!! That's such a sweet way to share the fall spirit with people who don't get the chance to enjoy fall. I bet they loved them!!
Sharon
This is so neat because the other day I brought in three leaves and decided to try mod podge on them to preserve them !They were so beautiful!!! And then here I see your article on how you did it too!
They are beautiful, aren't they!!!! Thanks for your additional info on how to do this project!
Sharon
Laura
Thank you, Sharon! I am so glad you tried it out!
Cathy
Can you paint on them after you lodge it
Laura
Hi Cathy! I haven't tried to paint them, but I think you probably could! I would think the paint would stick to the Mod Podge just fine. Let me know how it goes if you try it out!
Sasha
What an awesome idea. Got to try it
Laura
Thanks Sasha! I'm so glad you like the idea; if you do try it, I'd love to hear how it goes!
Zahab
Enjoy craft