


Learn how to make a Mod Podge Leaf Garland in this craft tutorial, using colorful fall leaves coated in Mod Podge, and twine to hang them!

Using Mod Podge to preserve fall leaves is a great way to prevent colorful fall leaves from drying out, turning brown, and crumbling to dust.
Whether you use Gloss or Matte Mod Podge, you can keep the gorgeous colors of fall for months or even years by giving them a good coating of Mod Podge.
Today, we are using Mod Podge-covered leaves to make a pretty Mod Podge leaf garland - a similar project to the beeswax leaf garland we made recently, without the melted beeswax.
Jump to:
Why You'll Love This Project
- Garlands are one of the easiest crafts to make and pack a big punch in home decor.
- Collecting fall leaves is a fun task for adults and kids alike! Plus, by preserving them with Mod Podge first, the fall colors will last long past the fall season!
- This is a kid-friendly fall craft project; if a child can use a paintbrush, they can help brush Mod Podge onto leaves for this garland!
Craft Supplies Needed

- Colorful Fall Leaves - You can press them between the pages of a thick book to flatten them.
- Mod Podge - Mod Podge comes in two main finishes - Glossy and Matte. You can use either one for this project! (For a look at the difference between the two types of Mod Podge on leaves, we did a post about it!)
- Foam Brush and Container - Yogurt cups are my go-to container for paint and Mod Podge! Foam brushes let you brush Mod Podge onto the leaves with minimal brush streaks.
- Parchment Paper - To protect the surface while you work.
- Twine - You can use any type of hanging string, but twine is my favorite. I love the rustic look of twine.
- Scissors - To cut the twine to length.
How to Make a Mod Podge Leaf Garland

Step 1. Use our Mod Podge Leaf Tutorial to coat one side, and then the other of the fall leaves - letting them dry in between.
You can use Gloss or Matte Mod Podge, depending on the look you prefer.
Gloss Mod Podge is very shiny and gives the leaves a glossy appearance.
The Matte version of Mod Podge isn't truly matte, but it's much less shiny than the Gloss.
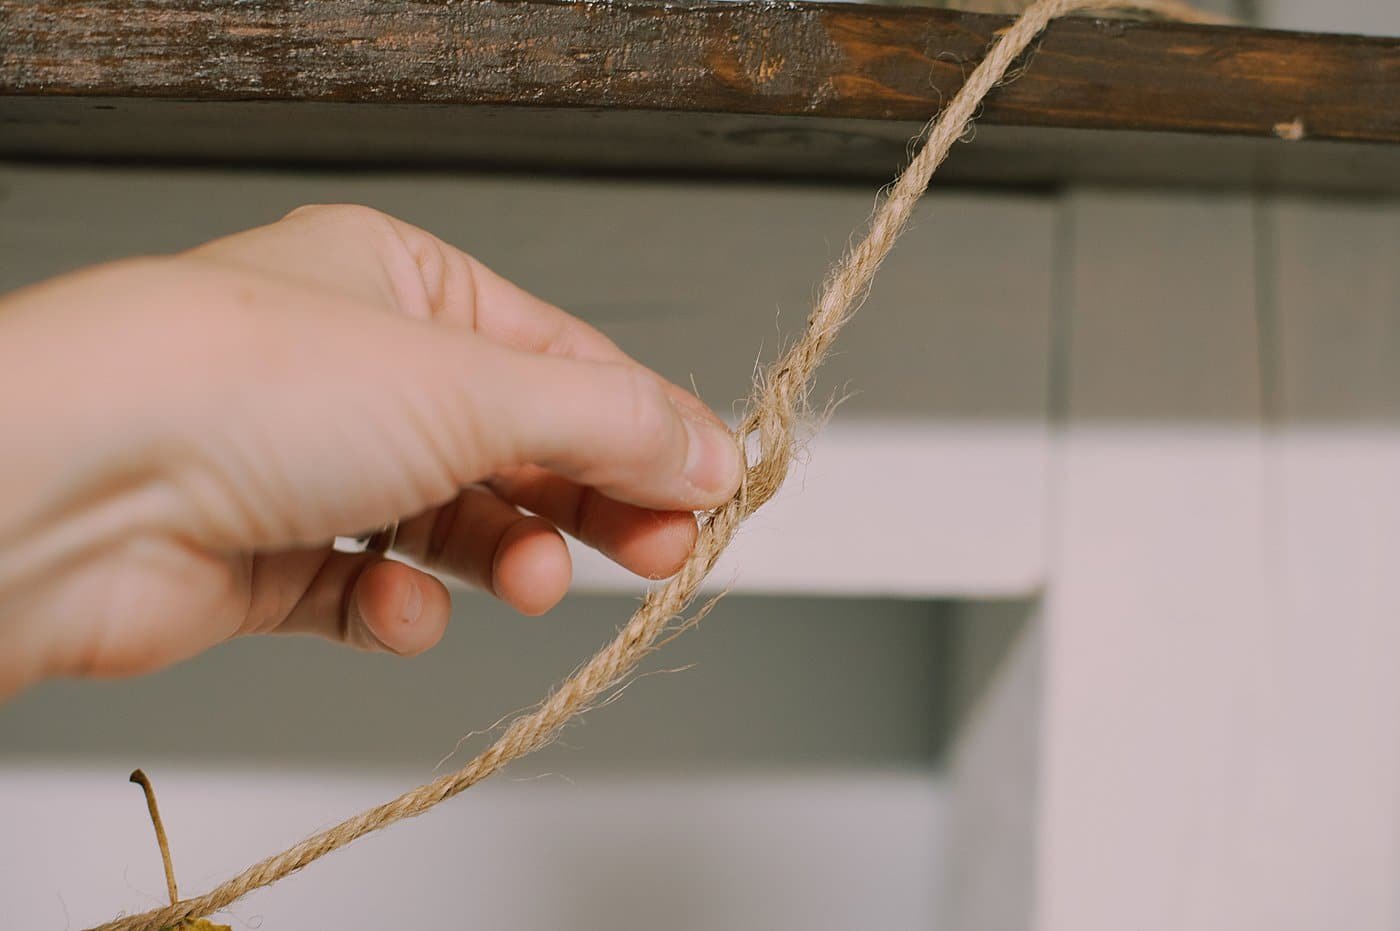
Step 2. Cut a long piece of twine for the garland string, tie loops at each end of the garland, and hang the string up.
Open up the strands that form the twine to make a small hole.
Slip the stem of a leaf into the hole and pinch the twine to hold the leaf stem.
The leaf is so light, it should stay in place in the twine.

Step 3. Repeat for all of the leaves along the length of the twine!
This is the easiest method of attaching leaves to the twine, but it's not very durable. The leaves can easily be pulled free of the twine - keep this in mind.

Step 4. If you want your garland to be more durable, you could secure the leaves in the twine with glue so they are harder to remove and won't fall out if they are bumped.

Common Questions
It depends on how long your leaf garland needs to be, and how close together you want the fall leaves to be!
I used 6 fall leaves for the garland on my small mantel.
When in doubt, collect and prepare extra leaves. It's better to have leftovers than to run out!
We looked at the two main types of Mod Podge (gloss vs matte finish) in our blog post. They both work equally well in preserving leaves - the choice comes down to whether you like a shinier glossy finish or a more matte look to your leaves!
I always keep multiple thicknesses of twine on hand at all times - it is my favorite tie string to use for almost any project!
But if you aren't a rustic enthusiast, or don't have twine, you can use any other string you have. Cotton string, thin rope, oeven yarn would work!

This Mod Podge fall leaf garland is a beautiful way to display leaves that you've collected and preserved.
It's especially fun for kids to pick their favorite leaves and then see those hanging up on the mantel.
This same garland could also be made with green leaves - who says it has to be only for autumn?!
Collect brilliant green leaves as spring emerges, and celebrate the new season with a Mod Podge SPRING leaf garland!
More Garland Crafts You'll Love


---
⭐️🧶 Did you enjoy this craft and want to see more like it? ✂️ Join our FREE email community and get inspiring craft ideas sent right to your inbox! 🧵 ⭐️
---

How to Make a Mod Podge Leaf Garland
Materials
- Colorful Fall Leaves
- Mod Podge
- Foam Brush and Container
- Parchment Paper
- Twine
- Scissors
Instructions
- Use our Mod Podge Leaf Tutorial to coat one side, and then the other of the fall leaves - letting them dry in between.You can use Gloss or Matte Mod Podge, depending on the look you prefer.Gloss Mod Podge is very shiny and gives the leaves a glossy appearance.The Matte version of Mod Podge isn't truly matte, but it's much less shiny than the Gloss.
- Cut a long piece of twine for the garland string, tie loops at each end of the garland, and hang the string up.Open up the strands that form the twine to make a small hole.Slip the stem of a leaf into the hole and pinch the twine to hold the leaf stem.The leaf is so light, it should stay in place in the twine.
- Repeat for all of the leaves along the length of the twine!This is the easiest method of attaching leaves to the twine, but it's not very durable. The leaves can easily be pulled free of the twine - keep this in mind.
- If you want your garland to be more durable, you could secure the leaves in the twine with glue so they are harder to remove and won't fall out if they are bumped.
Notes
- I used 6 leaves for my small mantel's garland. Gather extras so you don't run out!
- You can use Glossy or Matte Mod Podge, depending on how much shine you want your leaves to have.
- If you don't want twine (or don't want to use it), you can use cotton string, thin rope, or even yarn as the hanging string!


Leave a Reply