
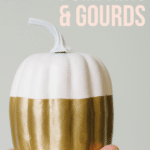
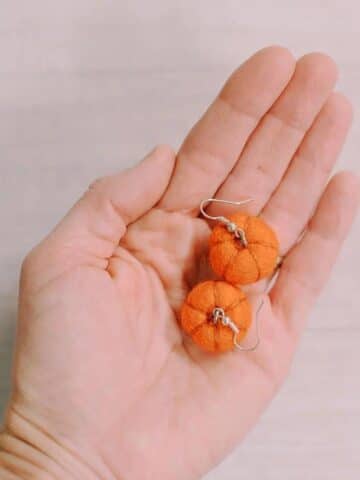
An easy tutorial showing how to make DIY fall pumpkins and gourds by repainting plastic or styrofoam pumpkins and gourds! They're the perfect fall decorations; use them in fall table centerpieces, fall mantle decorations and more!
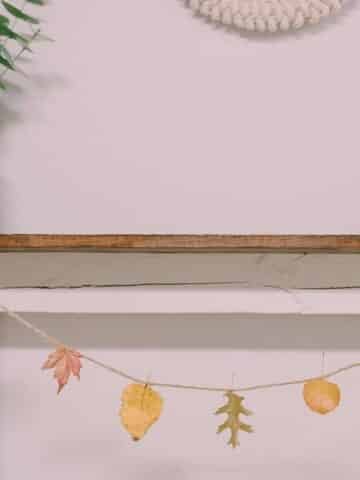
I don't enjoy spooky Halloween decor. I like the idea of having classy Fall decorations like painted pumpkins, DIY yarn balls, or a faux leather leaf wreath to display throughout the autumn season from Halloween through Thanksgiving.
Today, we are using cheap plastic pumpkins and gourds as well as a styrofoam pumpkin, and giving them a makeover with spray paint!
All it takes is a few coats of spray paint to turn tacky fall decor into beautiful, classy decorations you can't wait to put up for fall.
Jump to:
Why You'll Love This Craft
- Pumpkins and fall gourds made of plastic and styrofoam are easy to find when the autumn season rolls around. You can find them almost anywhere!
- These pumpkins and gourds are usually kind of ugly. Unrealistic, gaudy, and not cute or trendy at all. They are basically pleading for a makeover!
- This is such an easy project. All you do is repaint the pumpkins and gourds with spray paint, so no expert skills are required. Just a little time and patience, and you'll have some lovely fall decorations in no time!
Craft Supplies Needed
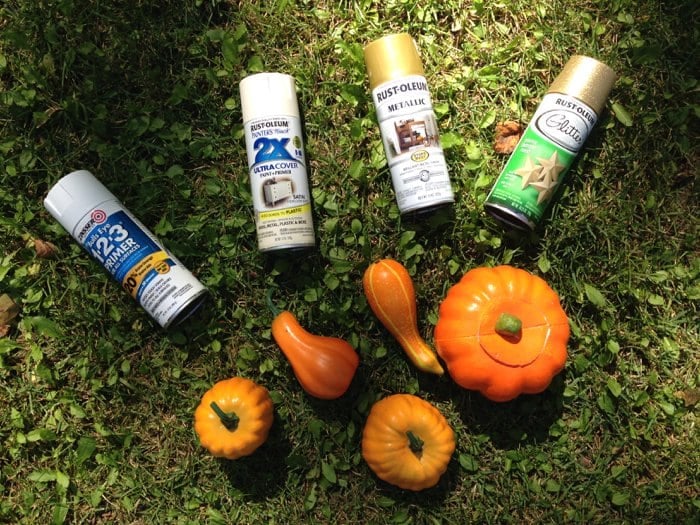
- Plastic or Styrofoam Pumpkins and Gourds -- I bought mine at the dollar store but you can buy them anywhere, including Amazon!
- Spray Paint: Use a primer rated for plastic, as well as plastic-ready spray paint in whatever colors you want. I used white primer, Heirloom White, gold and gold glitter.
- Painters Tape & Paper Towels - Make sure the painter's tape is fresh and sticky so you get a good seal to prevent paint seepage.
- Rubber Gloves - Optional.
- Respirator - Optional.
How to Make DIY Fall Pumpkins and Gourds
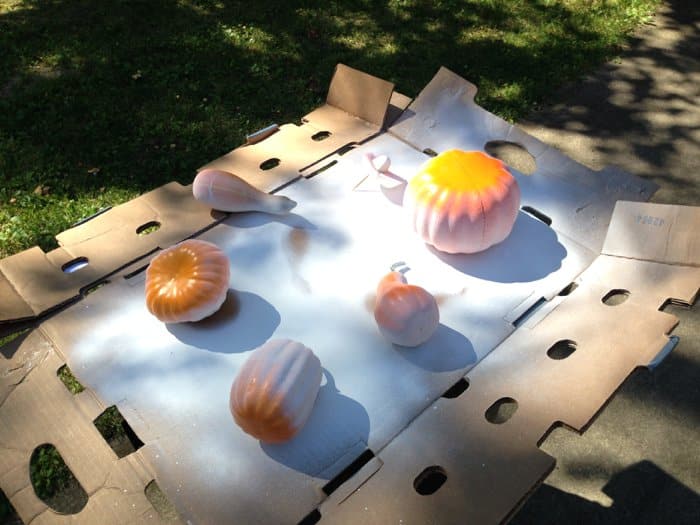
Step 1. Prime the pumpkins with a spray primer that is rated for plastic.
This is especially important if your original pumpkins and gourds are orange like mine, and if you are using light paint colors. You don't want the original orange color to show through.
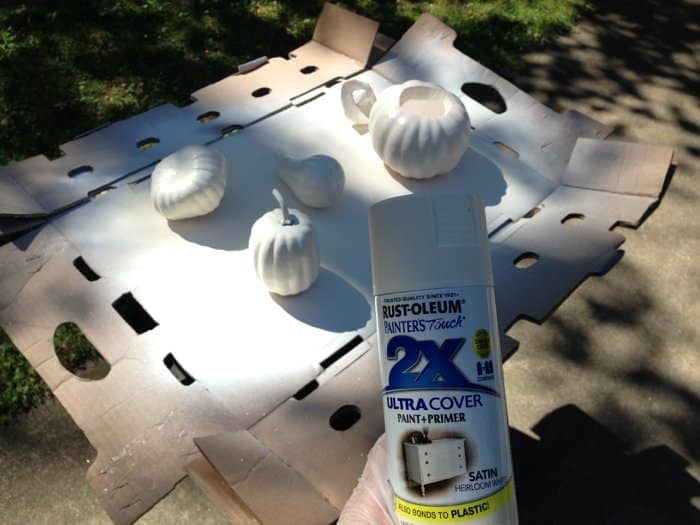
Step 2. Spray paint the pumpkins (I used white) with a paint that bonds to plastic.
Begin by spraying the bottom first. Let dry.
Then set them upright and work on spraying the sides and the top. Let dry.
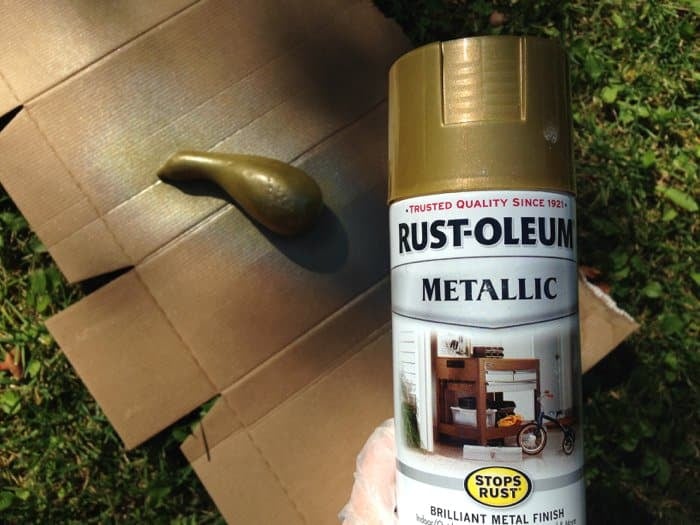
Step 3. Continue the same painting process with any additional colors (like this metallic gold.)
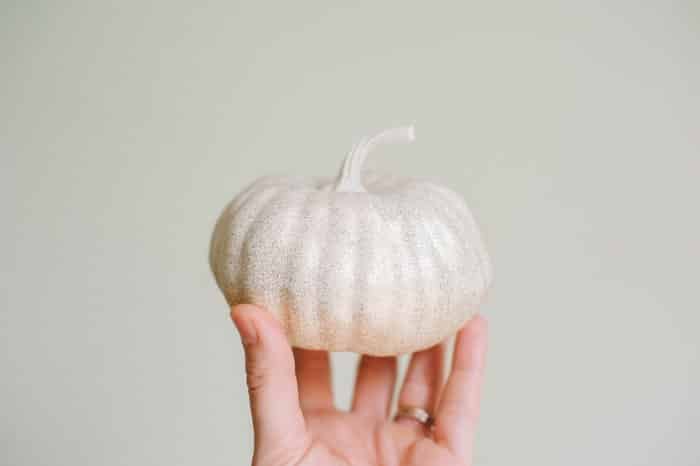
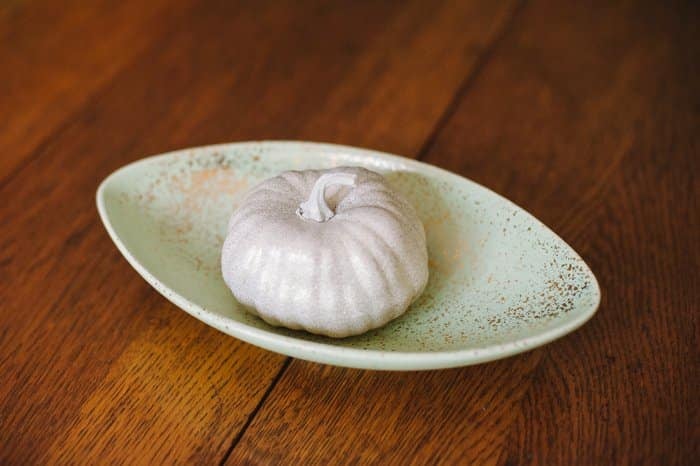
Step 4. Add glitter if desired.
This adds a fun dimension and shimmer to the simple, chic pumpkin.
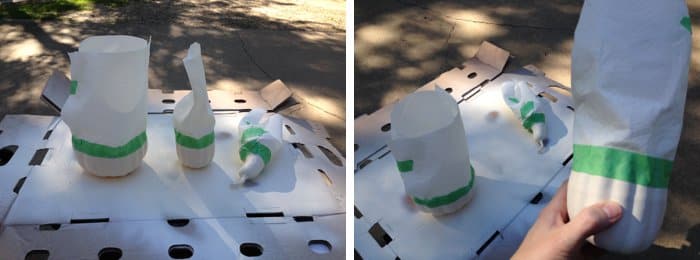
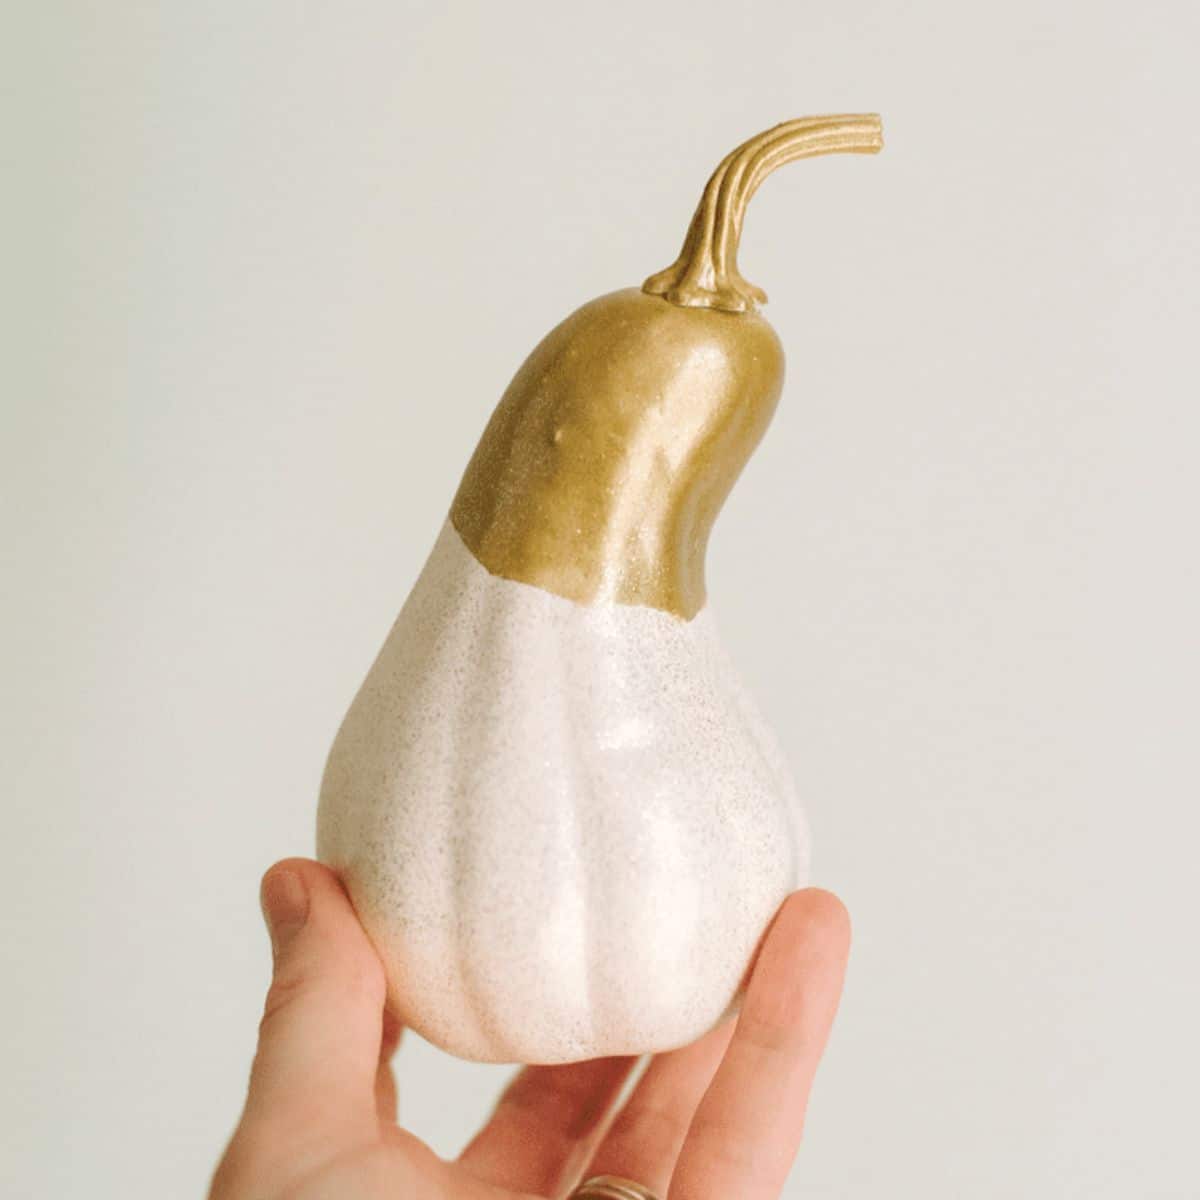
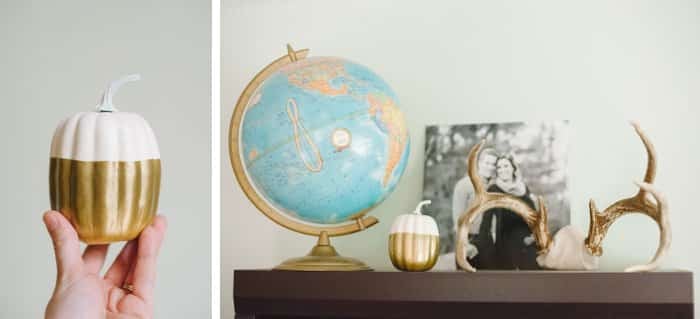
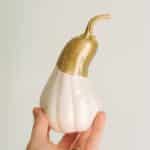
Step 5. To make two-toned pumpkins and gourds, mask off the sections you want to remain the original color.
Use sticky painters tape and paper towels to cover the parts you don't want to get paint on, and rub firmly along the tape's edges.
If you don't rub well to seal the painters tape, paint can seep underneath the tape.
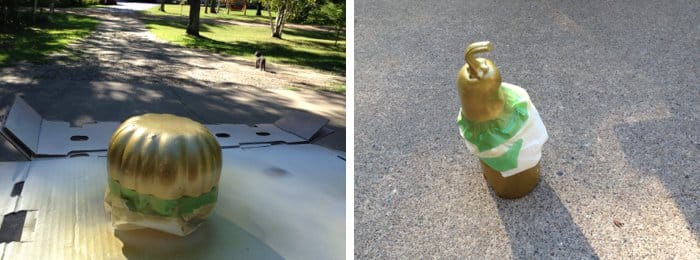
Step 6. Spray the second color onto exposed areas, and let dry. Remove the tape and paper towels to reveal the final product!
Common Questions
The plastic and styrofoam pumpkins, and plastic gourds I painted in this tutorial came from the Dollar Tree. You can find them at dollar stores, craft stores, and even big box stores too. As always, you can also find them on Amazon too.
First, prime the pumpkin using a spray primer made for plastic. Then follow that up with plastic-rated spray paint; several thin coats each letting the dry in between.
One pro tip is to begin with the bottom of whatever you are painting. You can usually do a single coat on the bottom because it's hardly seen. Then once it's dry, you can sit it upright and focus on the sides and top without risking smudges.
You can paint them whatever colors you want!
I love the look of the warm white and gold I used in this tutorial. It's classic and chic, plus goes with any decor color and style.
You can use traditional autumn colors like mustard, burnt orange, and deep red.
Or try something totally different - like neon colors! The sky is the limit - have fun with it!

These DIY fall pumpkins and gourds turned out beautifully!
They were cheap to buy, easy to paint, and lovely to display; perfect for fall decorations on the mantel, a centerpiece on the table at Thanksgiving, or as part of the fall front porch decor!
More Spray Paint Crafts You'll Love
---
⭐️🧶 Did you enjoy this craft and want to see more like it? ✂️ Join our FREE email community and get inspiring craft ideas sent right to your inbox! 🧵 ⭐️
---
How to Make DIY Fall Pumpkins and Gourds
Materials
- Plastic or Styrofoam Pumpkins and Gourds
- Spray Paint (primer and paint, both rated for plastic)
- Painters Tape and Paper Towels
- Rubber Gloves and Respirator
Instructions
- Prime the pumpkins with a spray primer that is rated for plastic.This is especially important if your original pumpkins and gourds are orange like mine, and if you are using light paint colors. You don't want the original orange color to show through.
- Spray paint the pumpkins (I used white) with a paint that bonds to plastic.Begin by spraying the bottom first. Let dry.Then set them upright and work on spraying the sides and the top. Let dry.
- Continue the same painting process with any additional colors (like this metallic gold.)
- Add glitter if desired.This adds a fun dimension and shimmer to the simple, chic pumpkin.
- To make two-toned pumpkins and gourds, mask off the sections you want to remain the original color.Use sticky painters tape and paper towels to cover the parts you don't want to get paint on, and rub firmly along the tape's edges.If you don't rub well to seal the painters tape, paint can seep underneath the tape.
- Spray the second color onto exposed areas, and let dry. Remove the tape and paper towels to reveal the final product!
Notes
- Make sure your spray primer and spray paint are both rated for use on plastic so they have the best chance of sticking.
- Use fresh, sticky painters tape to make sure you get a good seal if you are masking off any parts of your pumpkins to paint a second color. If you don't get a good seal, paint can seep underneath.
- Start by spraying the bottom of the pumpkins and gourds first. Once the bottoms are dry, turn them upright and continue with the sides and top. That will decrease the risk of smudges.
Leave a Reply