
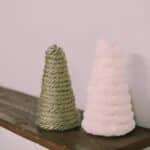
Create beautiful DIY Chunky Yarn-Wrapped Styrofoam Trees with our easy step-by-step guide. They are fast and easy to make, take only a few supplies, and are perfect for your festive decor, either for Christmas or the winter season!

Yarn Christmas trees are super easy and fun to make, and they can be made in many different ways.
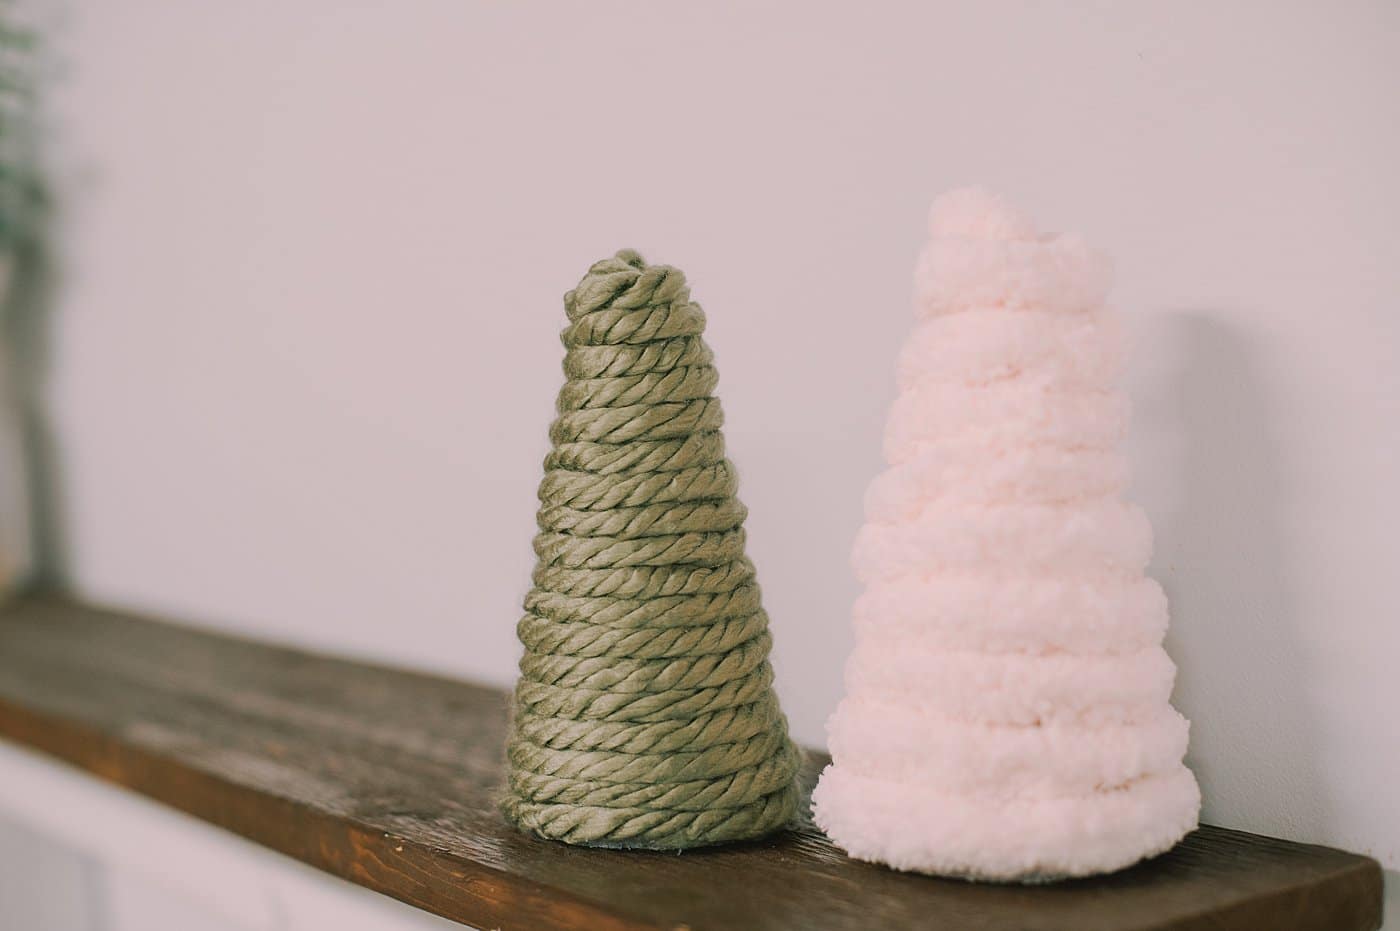
We've made trees using paper cones and wrapping them in yarn, we've wrapped yarn around styrofoam cones to make similar trees, just with different materials, and we have also made yarn-wrapped cardboard trees!
Today, we will use styrofoam cones again as the base for our trees, but we will wrap them with chunky yarn!
The results are beautiful DIY yarn Christmas trees, using fun chunky yarn that can be whipped together in minutes!
Here's how to make them!
Jump to:
Why You'll Love This Craft
- Yarn is a craft room staple, and it's available in every available color, thickness, and material imaginable. This gives you unlimited options when choosing yarn to make your cone trees!
- This is a super easy craft. All you have to know how to do is use a hot glue gun and you can make these!
- These yarn-wrapped cone trees are a great example of decor that works for the Christmas season but can extend far beyond, into the winter season. The trees aren't overtly "holiday" themed - they are more winter-inspired, and depending on the decor of your home, they may even blend into your home's everyday decorations too!
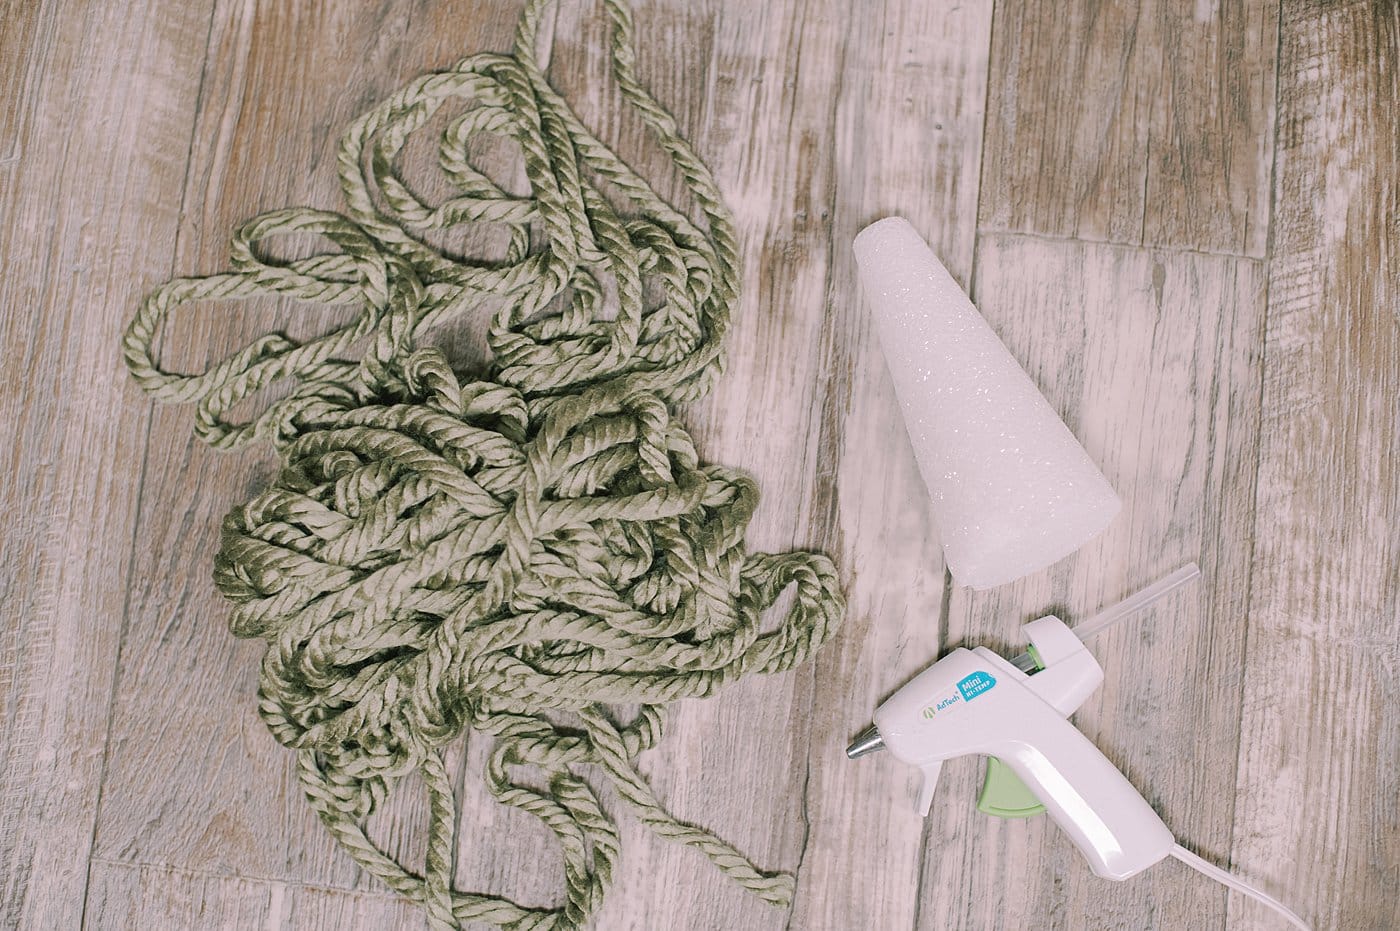
Craft Supplies Needed
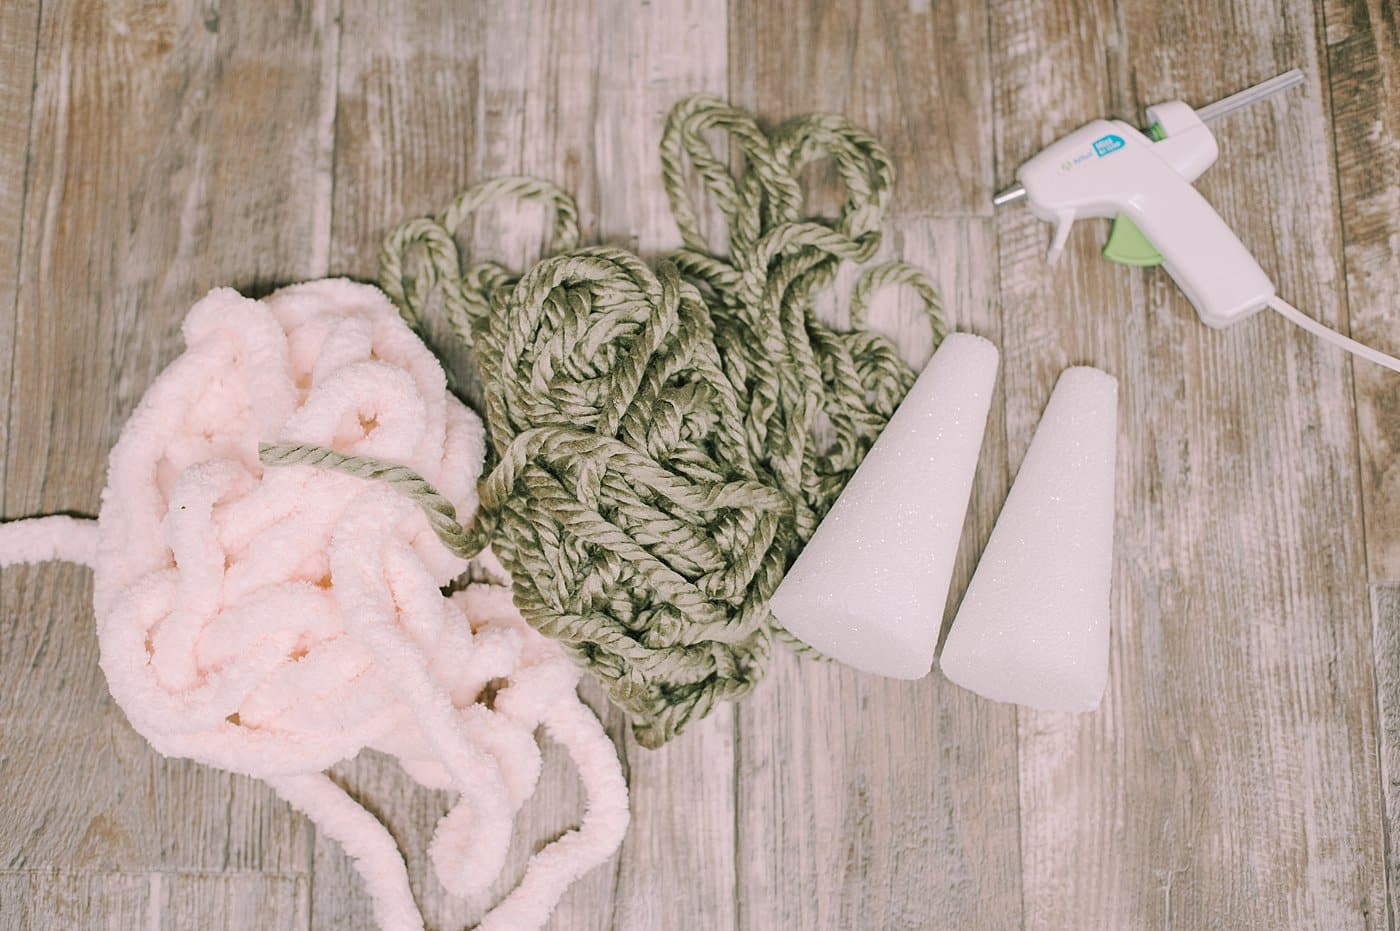
- Styrofoam Cones - You can buy styrofoam cones in all different sizes. You can even buy cones in multiple sizes to create a multi-dimensional display for your decor.
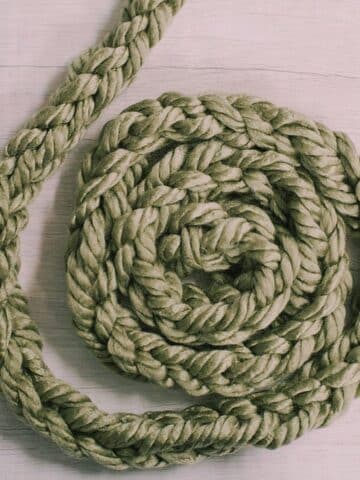
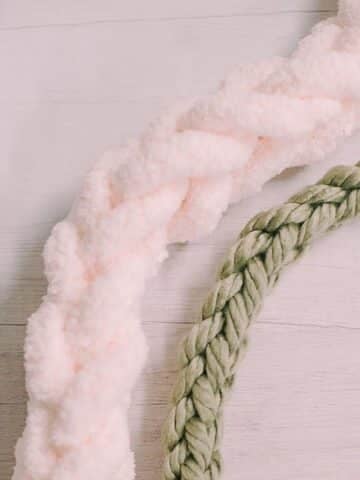
- Chunky Yarn - Making cone trees is so fast and easy when using chunky yarn.
- Scissors - To cut the yarn.
- Hot Glue Gun and Glue - To glue the yarn to the styrofoam cone. A mini glue gun works great for this project because it gets hot but not TOO hot. I have a Hart full-sized battery-powered hot glue gun and it gets so hot, it will literally melt the styrofoam of the cone.
How to Make DIY Chunky Yarn-Wrapped Styrofoam Trees
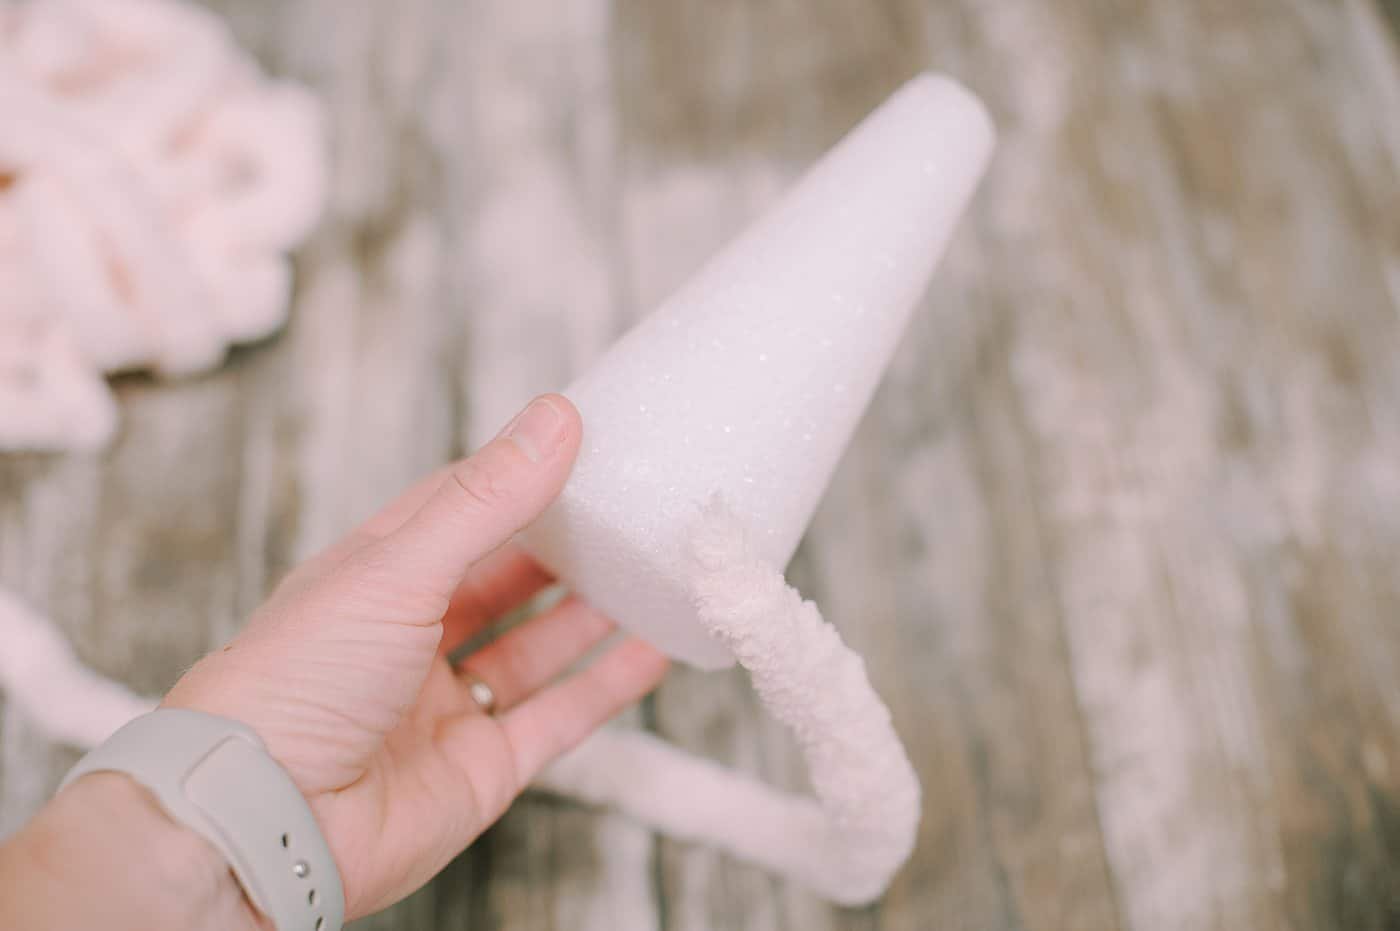
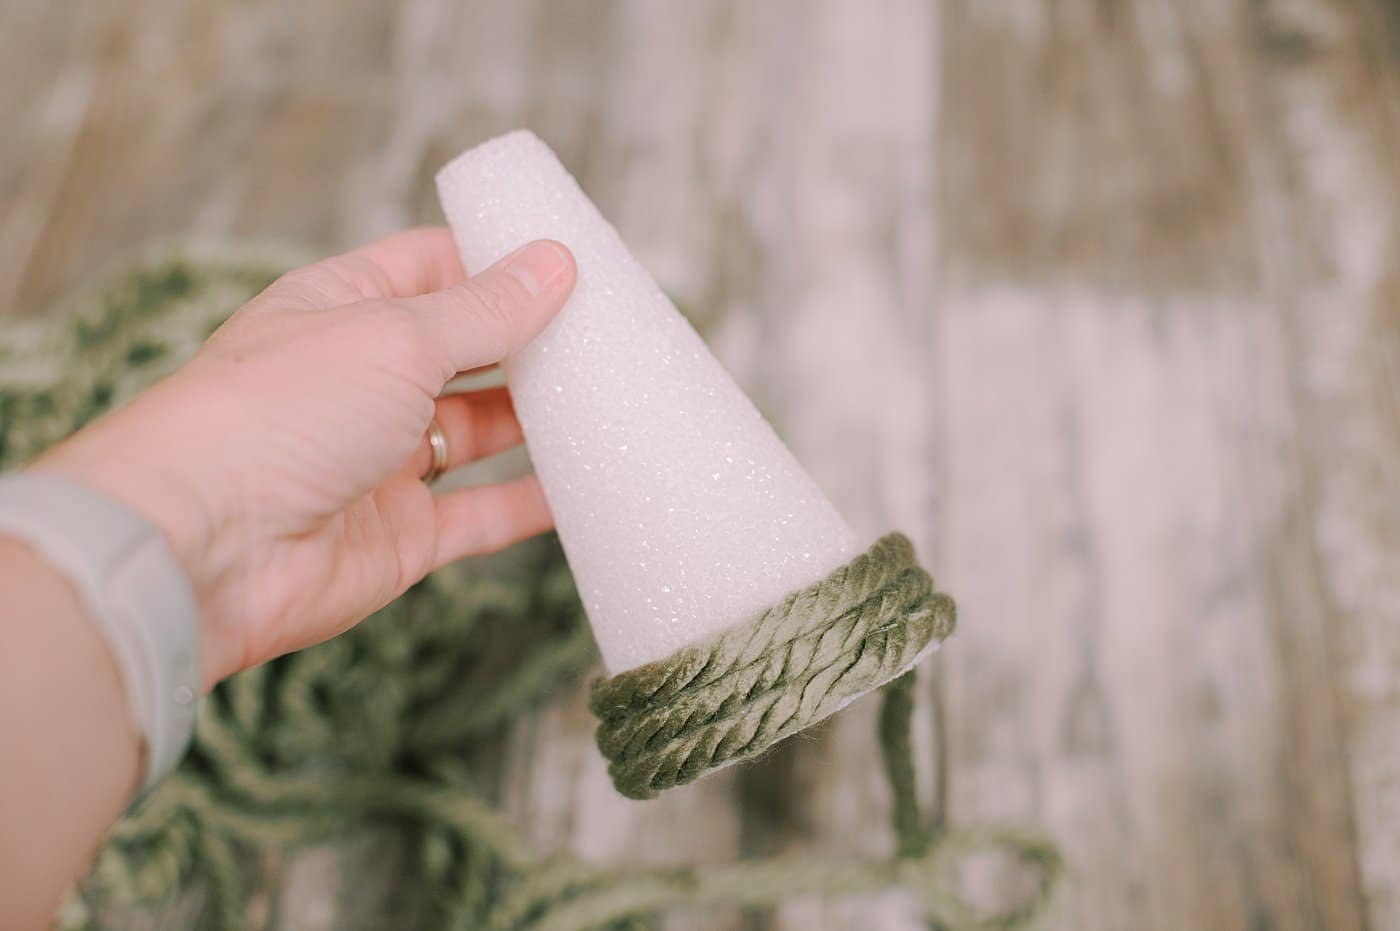
Step 1. Beginning at the base of a styrofoam cone, hot glue yarn around it.
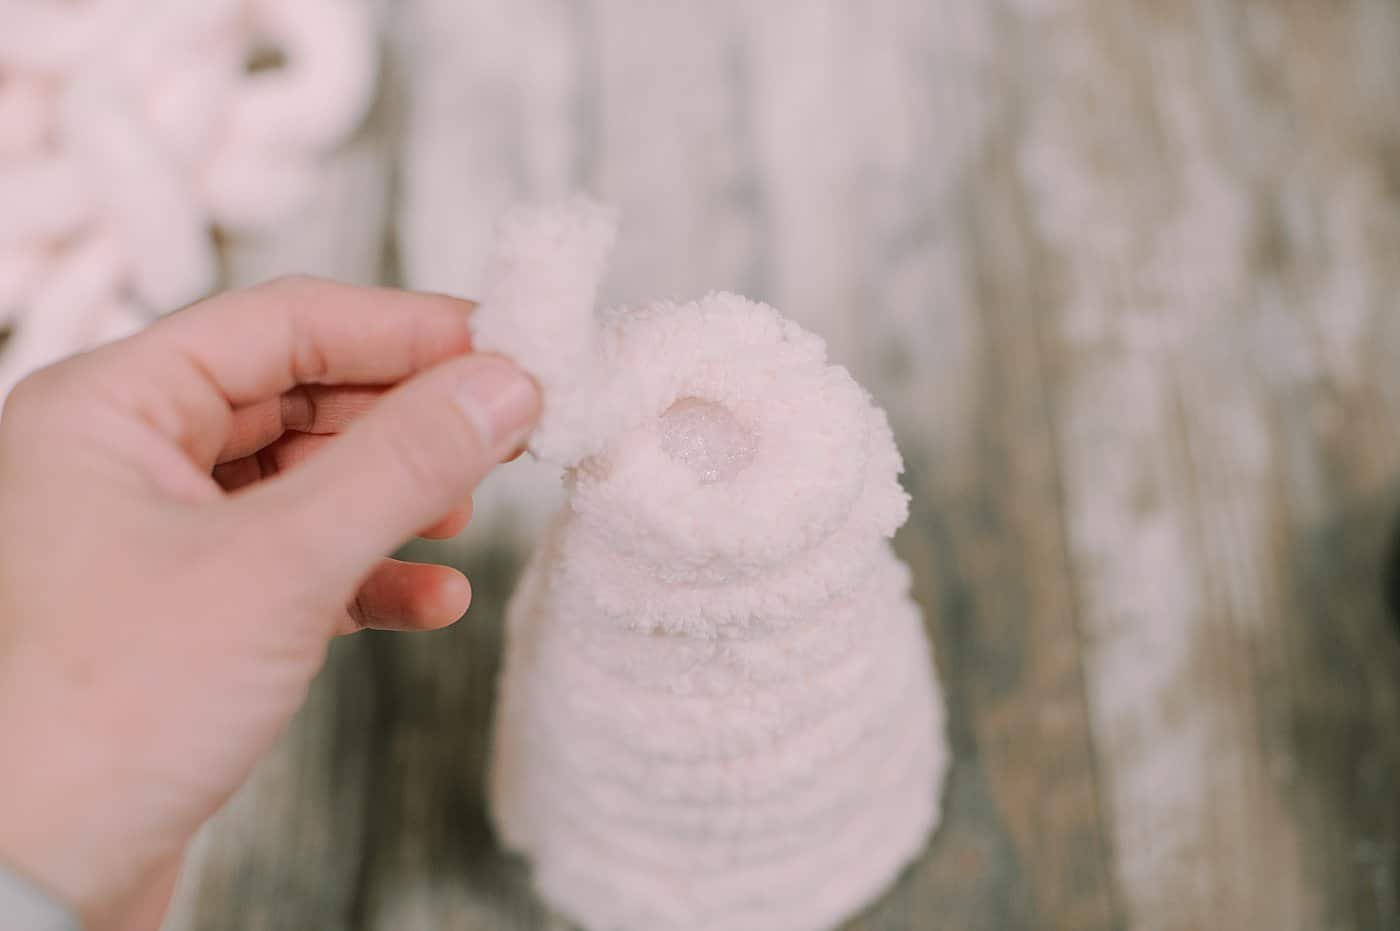
Step 2. Continue hot gluing and wrapping the yarn around the cone as you move up toward the top.
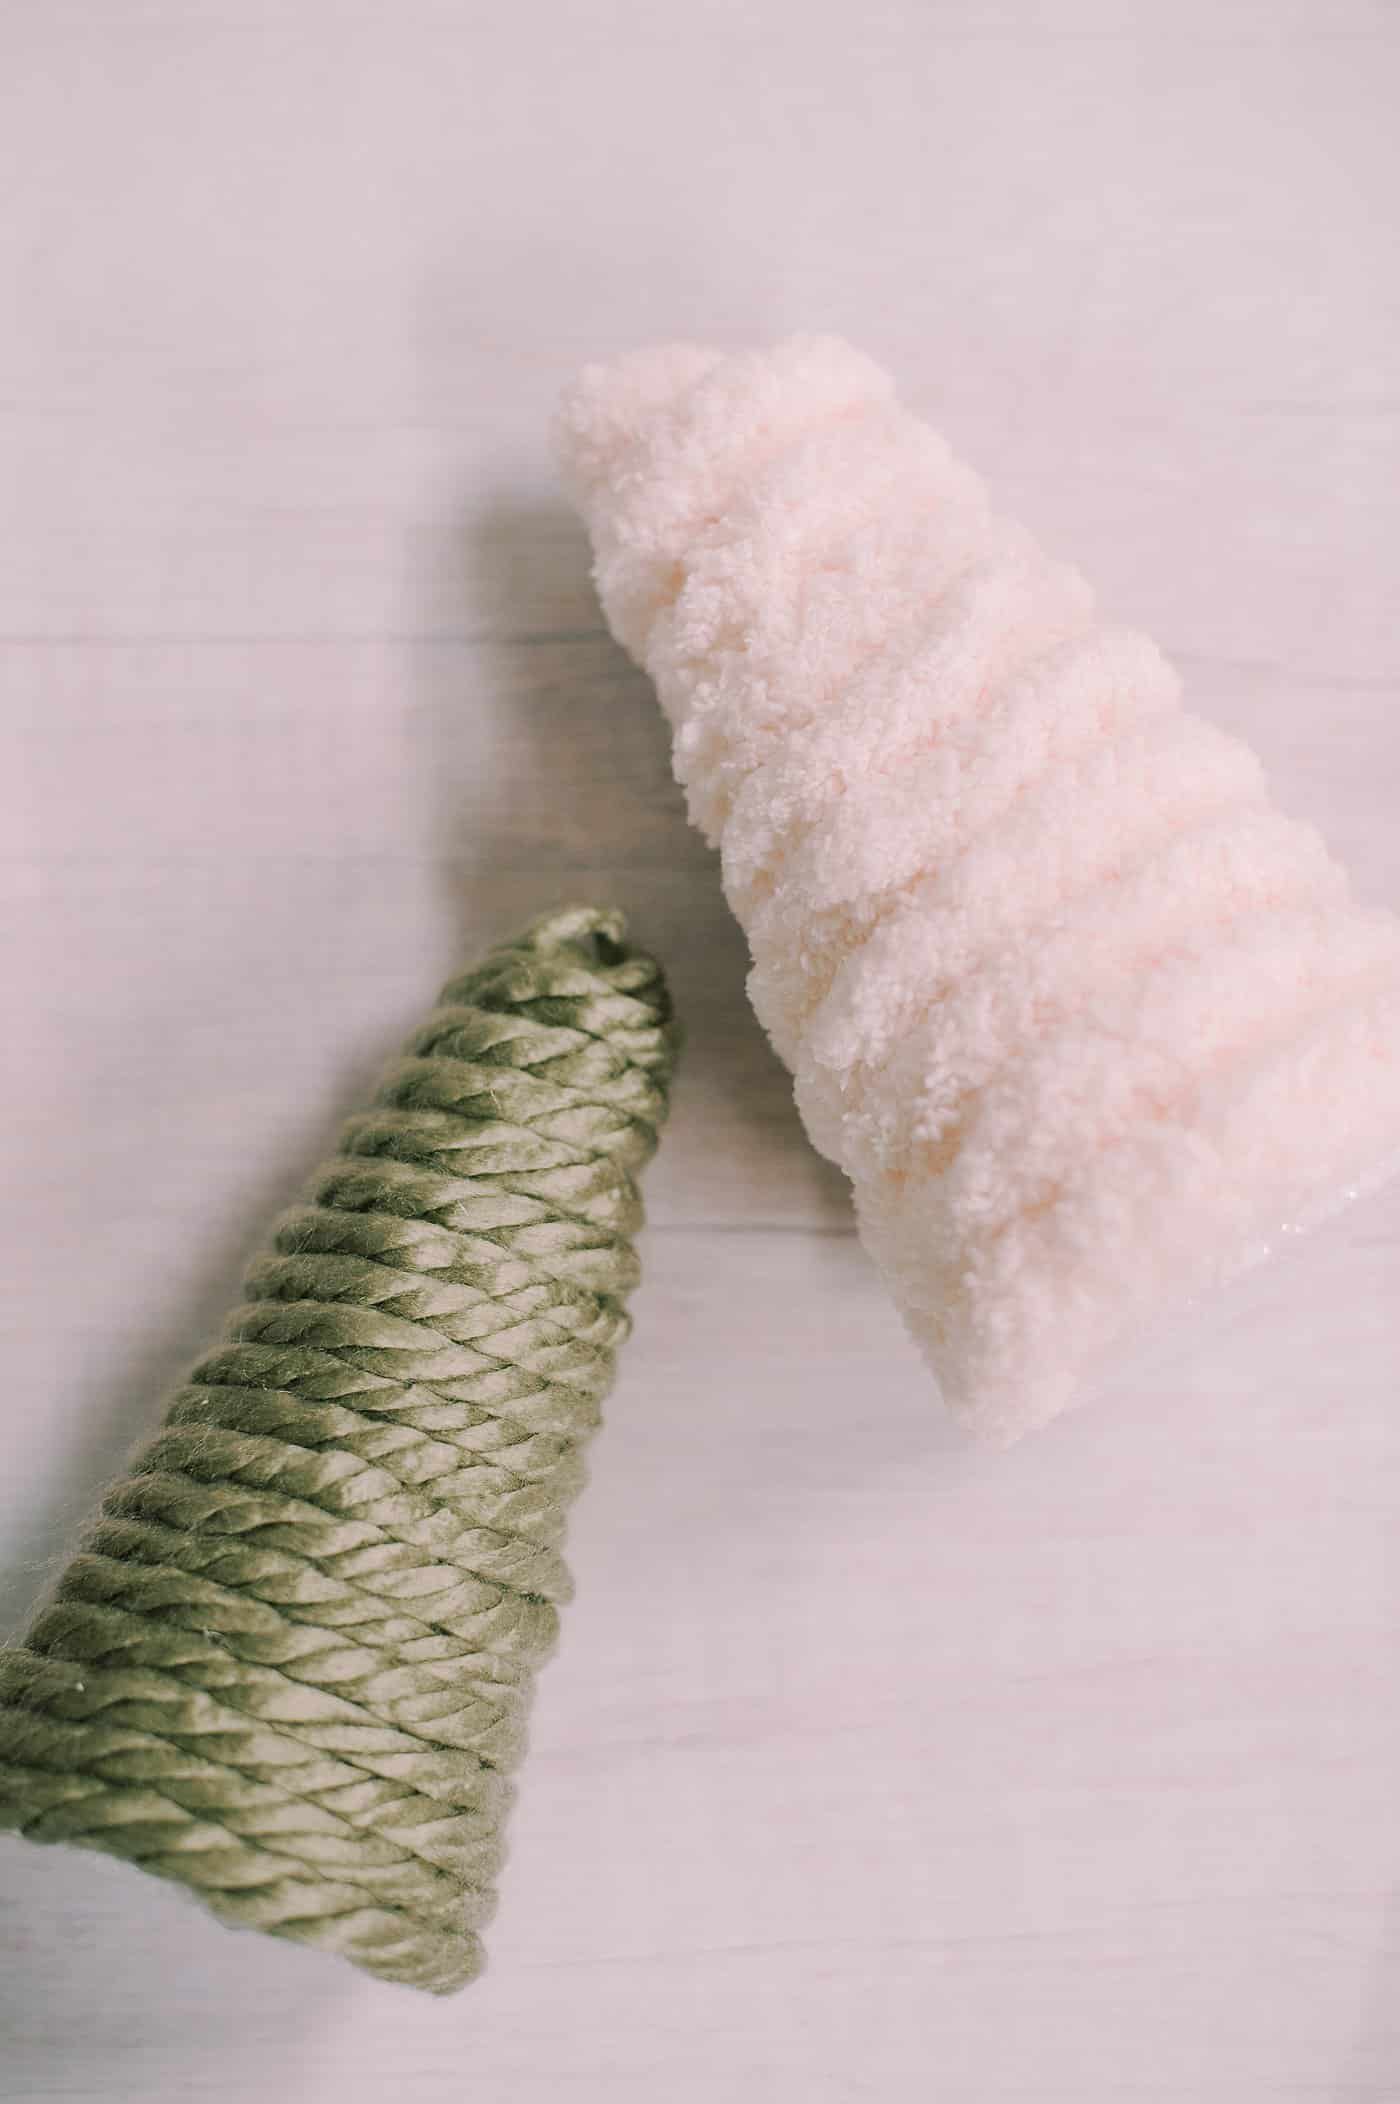
Keep the yarn close together as you wrap it so you can't see the cone underneath.
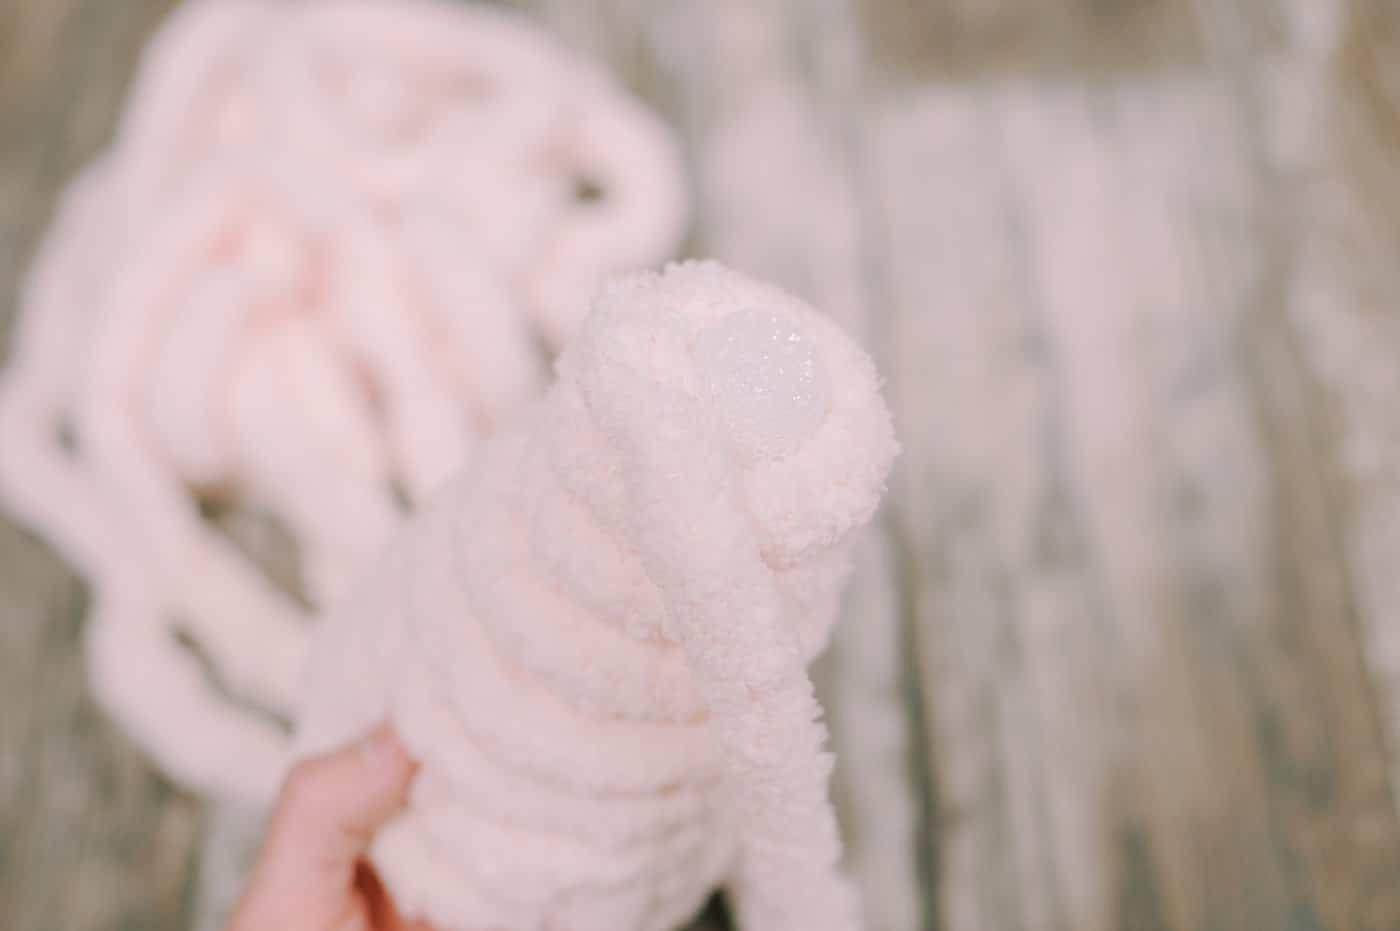
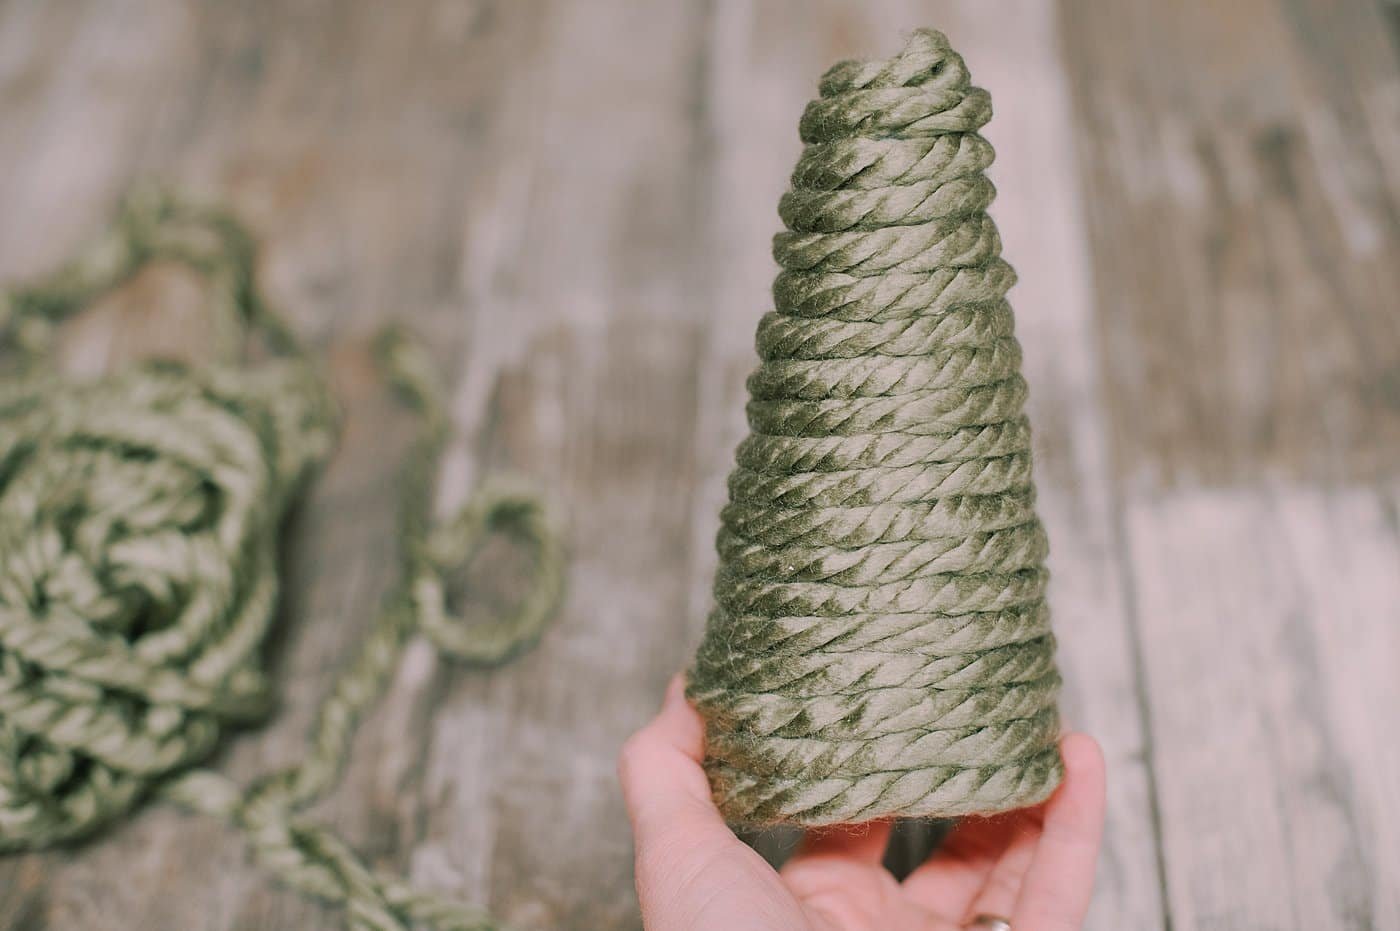
Step 3. When you get close to the top, cut the yarn, and glue the end of the yarn tail down into the top of the tree.
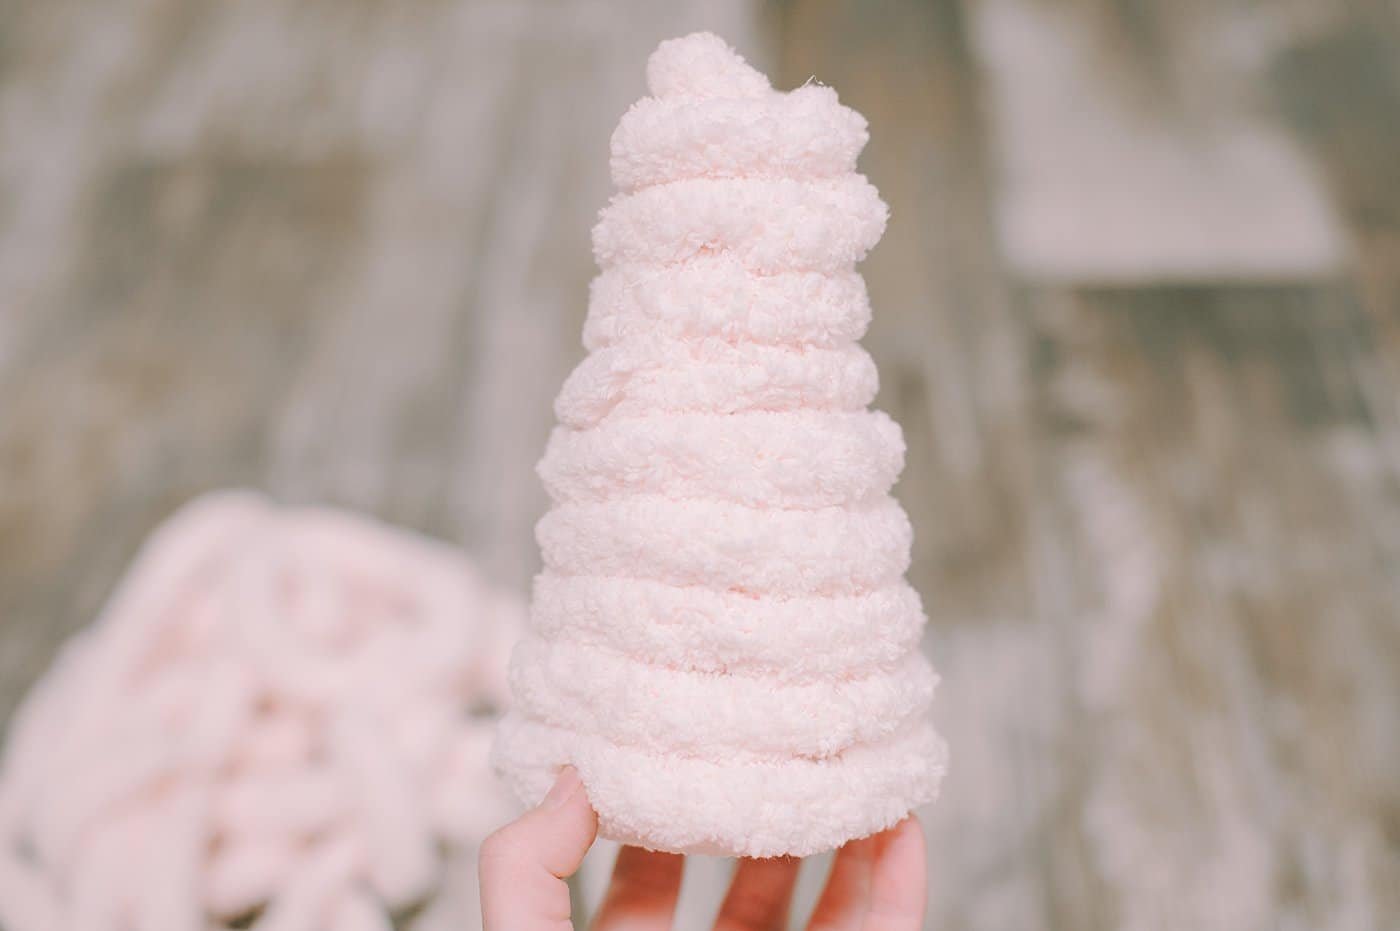
That's it! Your chunky yarn tree is finished!
You can do the same process with any type of chunky yarn, like the green yarn skein in these photos.
Hot glue the yarn around the styrofoam cone from the base to the top, wrapping the yarn tightly so you minimize gaps.
Tuck and glue the yarn end into the top of the tree when you're finished and you're done!
You can make them with any sized styrofoam cone (or even try a homemade paper cone!) and any thickness of yarn. The sky is the limit for the variety of trees you can create!
Common Questions
You can make yarn-wrapped cone trees with any sized cone. You can make mini trees with tiny cones (we made small paper cones for these trees), all the way up to giant trees with huge styrofoam cones. It's the exact same wrapping and gluing process, no matter how big your cones are.
For a multi-dimensional display for your shelf or mantel, you can even wrap many cones that are different sizes (and use different yarn!) to create an interesting set of trees.
You wrap yarn around a cone in exactly the way you would imagine you do. Starting at the base, you add a little hot glue and put the end of the yarn in the glue until it dries. Then you wrap the yarn around the cone, gluing as you go with small dots or dabs of glue to hold it in place. Each time you wrap the yarn around the cone, make sure you aren't leaving gaps where you can see the cone underneath. You want the yarn to be snugged up to minimize any gaps.
Some glue guns, especially full-sized hot glue guns, can get really hot. I have a cordless Hart glue gun that gets incredibly hot. Way too hot to use on styrofoam; it will melt the styrofoam as soon as the glue lands on it. Instead, for projects with styrofoam, I use a mini glue gun (like the one pictured in the tutorial). It's a Hi temp mini glue gun, but because it is smaller and releases a smaller amount of glue at a time, it doesn't melt the styrofoam like the Hart gun does.
If you don't have any choice but to use a full-sized glue gun, you could try making paper cones to wrap with yarn, or you could try an alternative type of glue, like Elmers or Tacky Glue.
Yarn Christmas trees can be made using any type of string or yarn you want, and any size styrofoam cone or paper cone you choose. These mini yarn-wrapped trees are so cute!
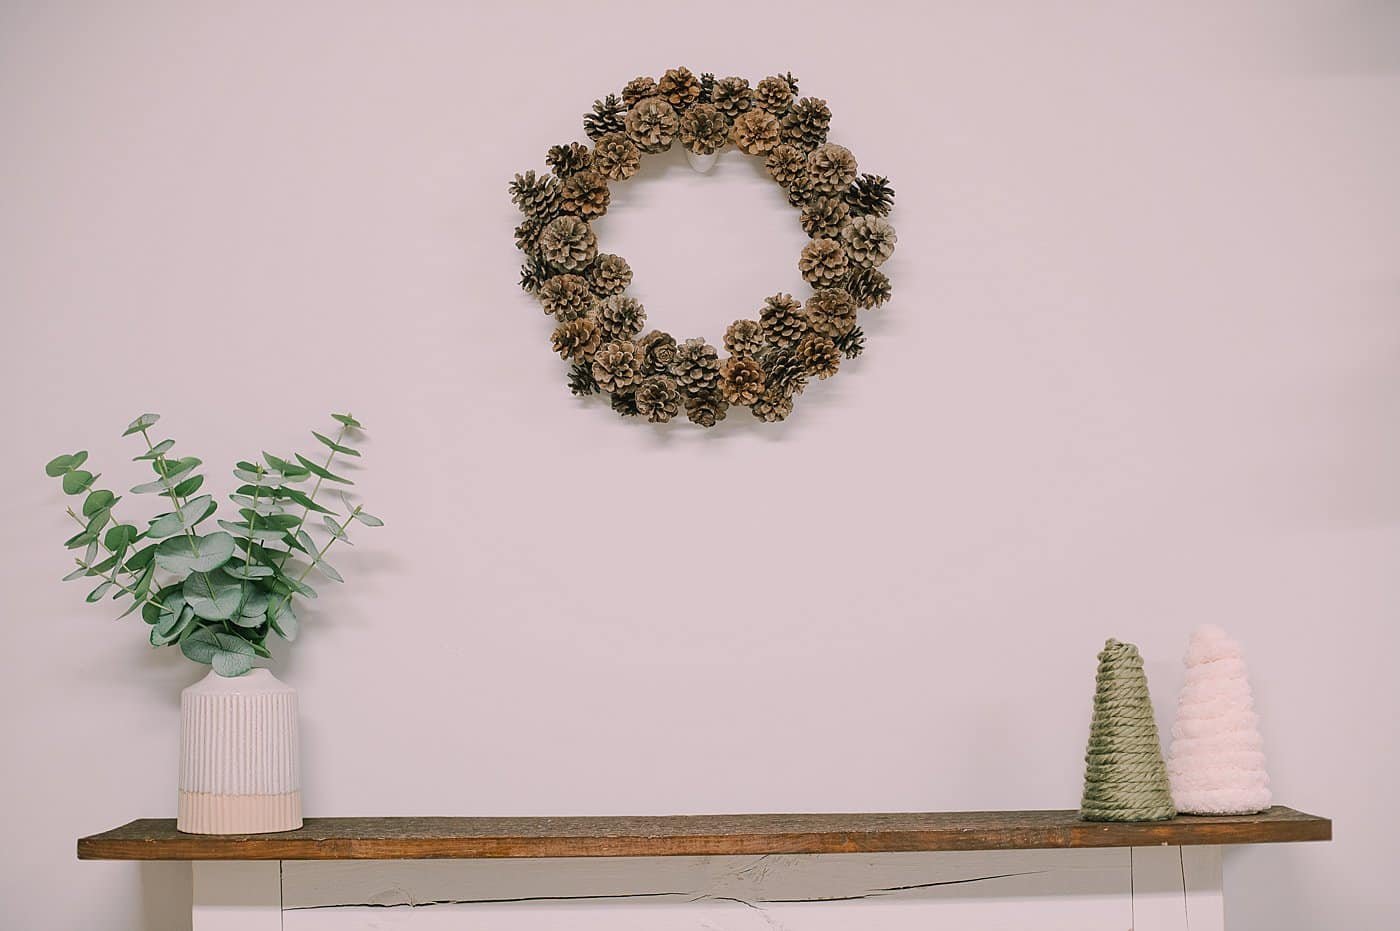
You can make a batch with trees of varying sizes and colors to create a beautiful winter scene for your mantel or tablescape!
More Yarn Crafts You'll Love

---
⭐️🧶 Did you enjoy this craft and want to see more like it? ✂️ Join our FREE email community and get inspiring craft ideas sent right to your inbox! 🧵 ⭐️
---
How to Make DIY Chunky Yarn-Wrapped Styrofoam Trees
Materials
- Styrofoam Cones
- Chunky Yarn
- Scissors
- Hot Glue Gun and Glue
Instructions
- Beginning at the base of a styrofoam cone, hot glue yarn around it.
- Continue hot gluing and wrapping the yarn around the cone as you move up toward the top.Keep the yarn close together as you wrap it so you can't see the cone underneath.
- When you get close to the top, cut the yarn, and glue the end of the yarn tail down into the top of the tree.
- That's it! Your chunky yarn tree is finished!
Notes
- You can use cones of any size to make a variety of different yarn-wrapped trees.
- If you don't have styrofoam cones, you can make your own paper cones and wrap yarn around those.
- Make sure to minimize gaps between the yarn as you wrap and glue it around the cone. Ideally, you don't want to see through to the cone beneath the yarn.

Leave a Reply