
Learn how to make mini Christmas trees by first creating a paper cone out of cardstock, and then wrapping it with yarn of your choice!
Christmas trees are a staple of holiday decor; the bottle brush tree being one of the most popular. If you want to DIY a collection of Christmas trees and don't want to spend a fortune, yarn-wrapped paper cones are perfect for you!
You can use paper cones as the base to make chunky yarn-wrapped trees or use your favorite fabric to make DIY fabric cone Christmas trees.
Today, we're going to make mini Christmas trees, using cardstock to make different-sized paper cones, and then using a glue stick to wrap them in yarn.
Let's get to it!
How to Make Mini Christmas Trees with Paper Cones and Yarn
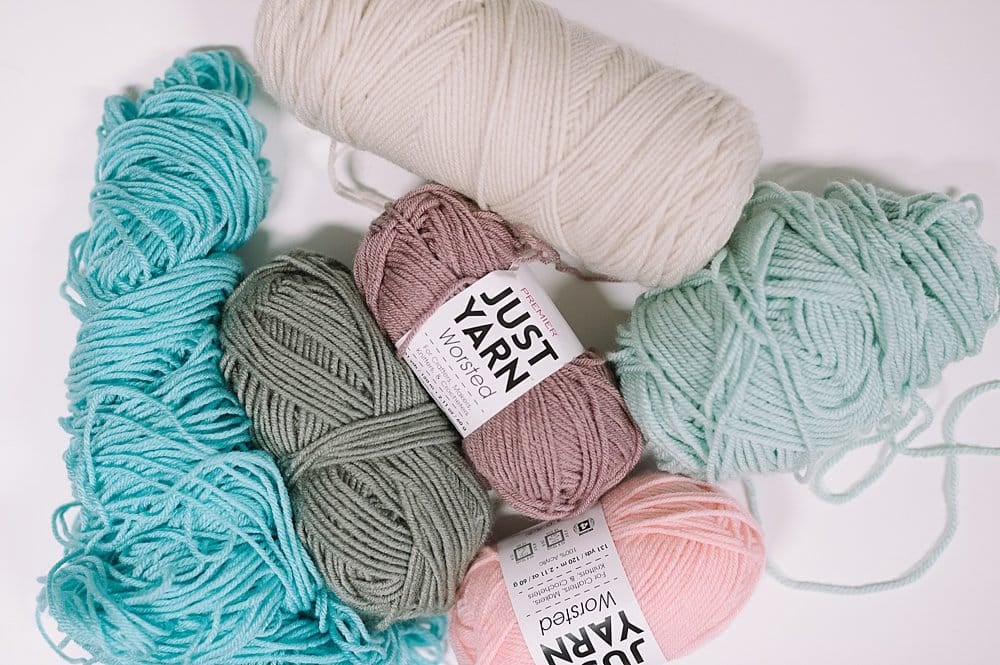
Step 1: Gather Supplies
Supplies Needed:
- Paper Cones - make cones with cardstock, or you can use styrofoam cones instead.
- Hot Glue Gun and Glue
- Scissors
- Glue Stick
- Yarn
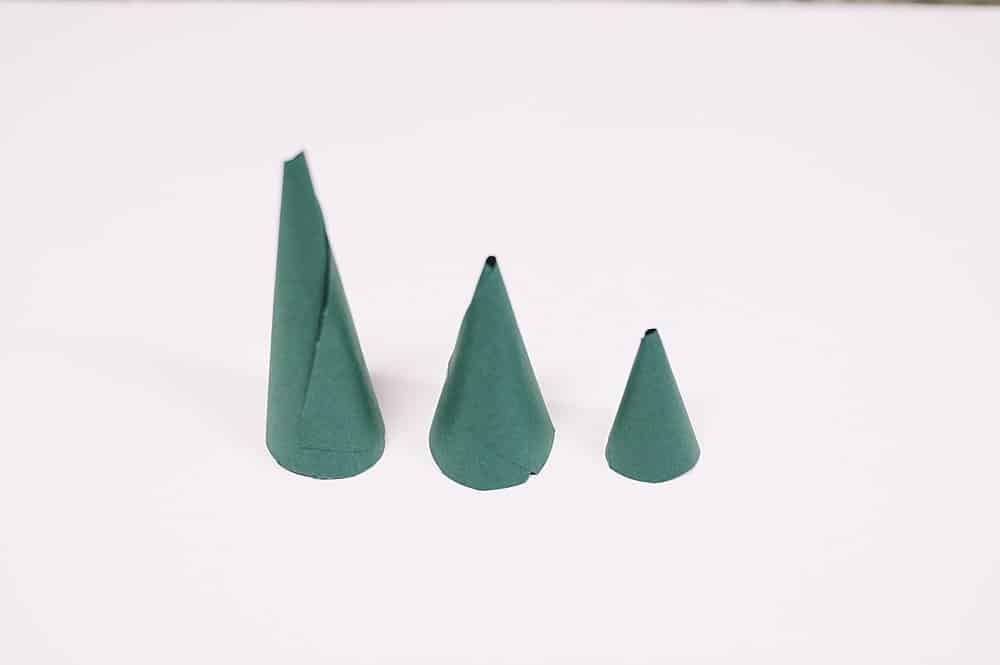
Step 2: Make paper cones out of cardstock and hot glue.
You can vary the size of the paper cone by using full, half, quarter, and ⅛-sized pieces of cardstock.

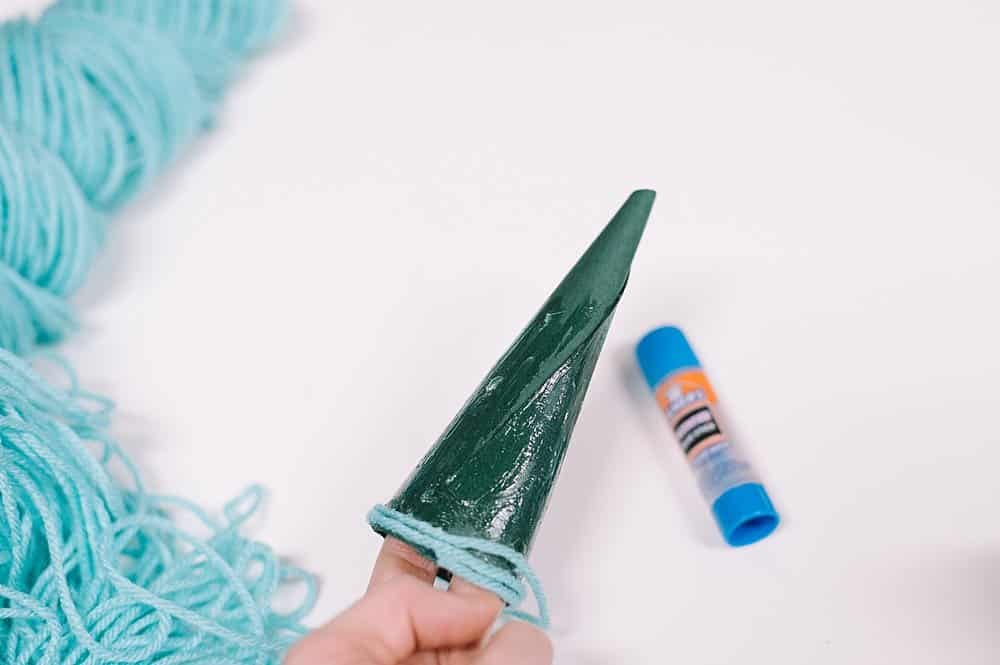
Step 3: Coat the paper cone liberally with a glue stick.
Start wrapping the yarn along the bottom edge of the cone and move up toward the top.

Step 4: Glue the yarn into the hole at the top of the cone to finish the Christmas tree.
Once you get to the top of the paper cone, finish the tree by tucking and gluing the yarn down into the hole at the top.

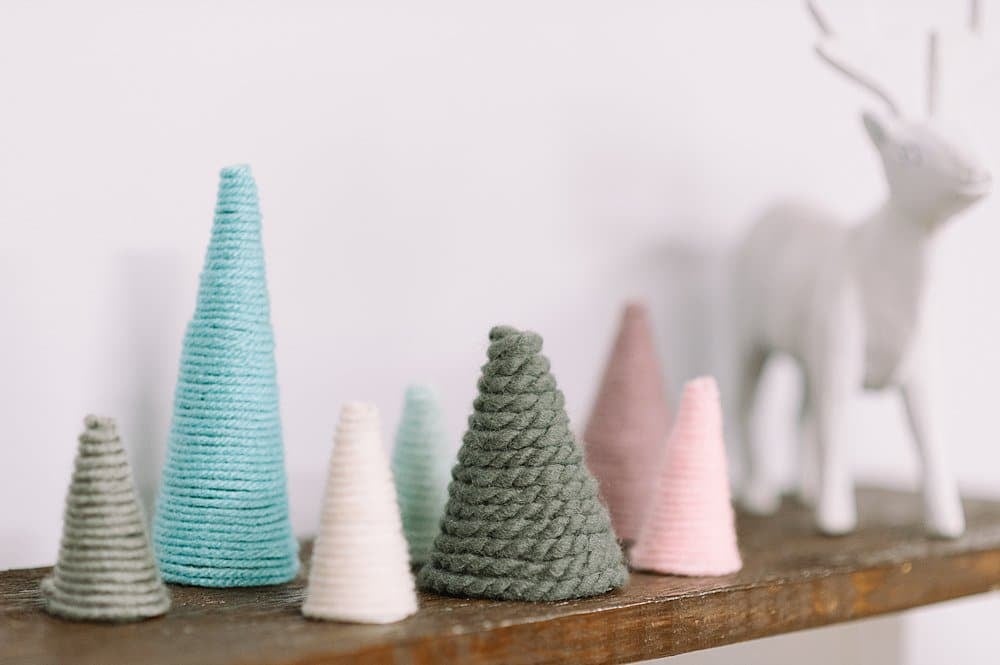
Repeat with different-sized paper cones and different colored yarn.


The result is a collection of trees you can use on your mantel or use as part of a cute Christmas village!


- - - - -
All you need to make mini Christmas trees are cardstock, glue, and yarn; the cardstock becomes paper cones, and the yarn is glued onto the cone with the glue stick!
Make different-sized paper cones, and choose different colors of yarn, and you are able to create a beautiful collection of Christmas trees.


Leave a Reply