
In this fun sewing tutorial, learn how to make a baby bib! Included are photos and instructions on how to sew a DIY baby food bib and how to make a bandana drool bib.
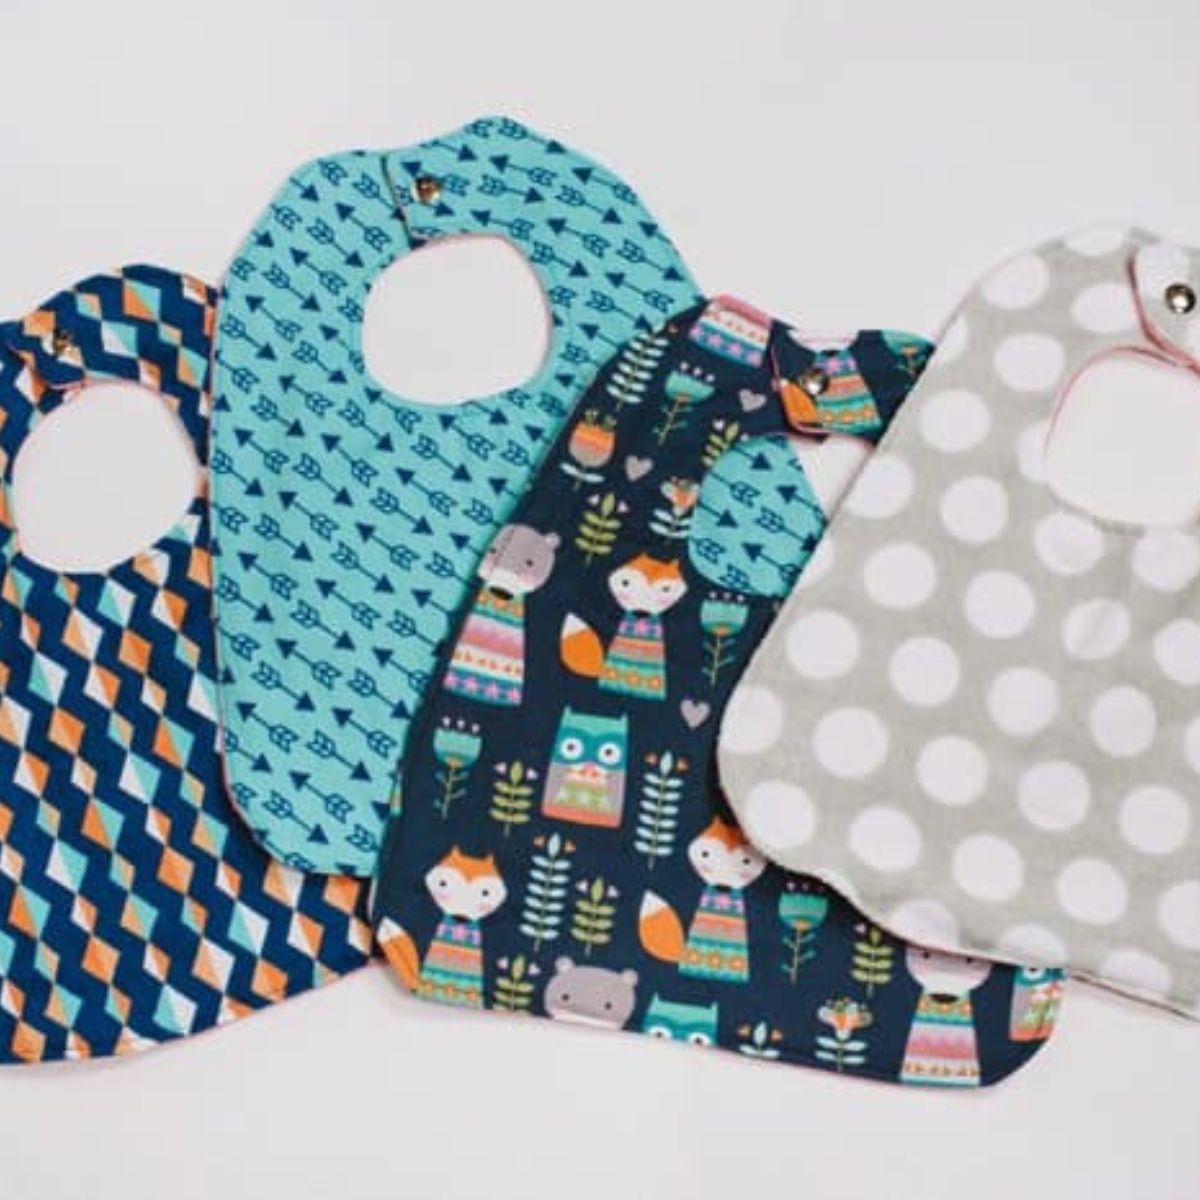
I was visiting my sister and during breakfast, my niece had on a super cute bib with a fun printed front.
Using hers as a pattern, I made dozens of bibs with this tutorial for relatives, friends, and for my own two kids, and they've been a hit every single time.
Let's walk through the basic steps of how to make a simple baby bib!
NOTE: This free tutorial shows how to make the baby bib, but the printable pattern is available for purchase in our shop.
Jump to:
Why You'll Love This Craft
- Every baby needs a bib! (At least they do if you want to limit the amount of laundry you do and try to keep stains at a minimum.)
- These bibs can be easily customized with the type of material you use (flannel vs terry cloth etc), and by the patterns you choose! A walk through my local Joann Fabrics shows at least a hundred different colors, patterns, designs, and styles of fabric that can be used for these bibs!
- I speak from experience when I say these bibs make a fantastic gift. Put a few into a gift package for a baby shower and they are a guaranteed hit. (Better yet, pair them with the World's Best Baby Washcloths!)
Buy The Unbeatable Baby Bib and Printable Pattern
Looking for a comprehensive baby bib guide and bib pattern? Check out THE UNBEATABLE BABY BIB in the Laura Radniecki SHOP!
Craft Supplies Needed
- Fabric - You have freedom when it comes to choosing fabric, and deciding how many layers you want your bibs to have. The majority of my regular food bibs that I'll show below are three layers of flannel fabric. A print for the front, a solid color for the back, and another layer of solid-colored flannel in the middle to add extra absorbency. I also made some variations with terry cloth fabric for the front and then one layer of flannel for the back, so those were only two-layer bibs.
- Baby Bib Pattern - You can buy a printable bib pattern and tutorial in our shop. Otherwise, you can trace a bib you have, or create your own pattern and then follow along with this tutorial.
- Coordinating Thread - You want thread in colors that are similar to the colors of your fabric.
- Velcro or Snaps for the Bib Closure: The snaps that I used can be found here, and you need a small tool to attach them, found here. You use those tools and a hammer to attach the snaps. Some craft stores sell a package of snaps and the tools as a starter kit, so that's an option for you too. A reader had some trouble attaching her snaps with the hand tool and hammer method, so these pliers are an option if you'd rather go that route to attach your snaps.
- Scissors, Rotary cutter, Cutting mat, Pins, Sewing machine, Iron - Standard sewing supplies!
How to Make a Baby Bib | Baby Bibs DIY
Step 1. Cut the fabric for your bib layers.
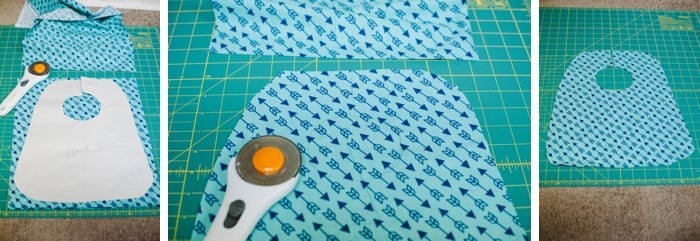
I was making a bunch of these bibs, and I wanted to go as fast as I could, so I adopted a quicker and more freestyle way of cutting the fabric. If I wanted to be more precise, I would have probably pinned the pattern down and cut around it with scissors.
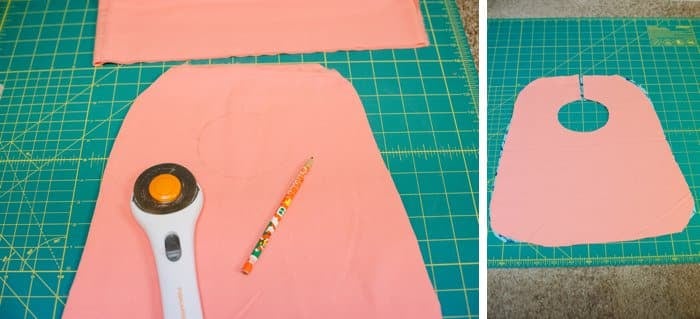
Instead, I laid the pattern down on my fabric [I folded the fabric up if possible to be able to cut several layers at the same time], and I used my rotary cutter to generally outline the pattern, with an additional ½ inch or so of fabric for sewing room.
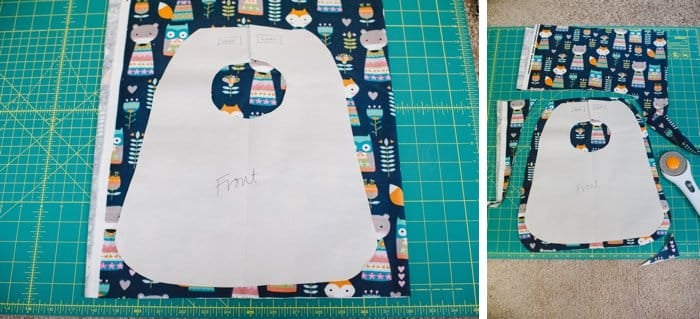
I cut out the circle for the neck hole as well.
This process was repeated for each layer of the bib.
Step 2. Stack layers, and trim excess from the edges.
When I had all the layers I needed cut, I laid them on top of each other.
The order that you lay them matters, because you're essentially sewing them inside out right now, and then you'll turn them once you sew around the outside.
For the three-layer bibs, I did:
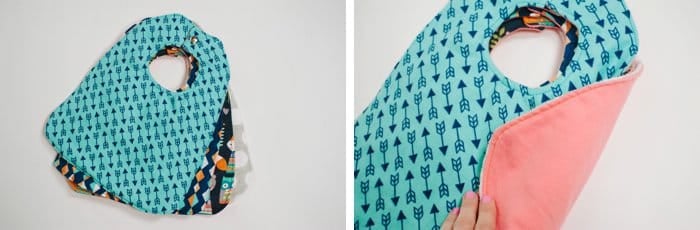
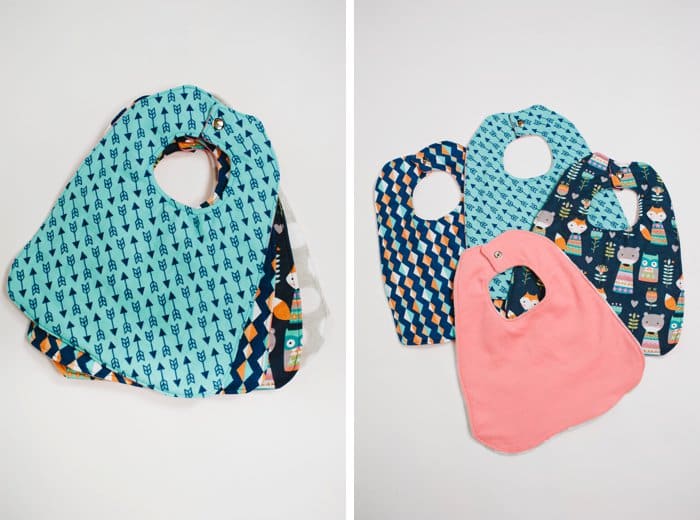
Layer 1 - Front patterned fabric piece, right side up *[Teal arrow print in photos above]
Layer 2 - Back solid color piece, right side down *[Coral fabric in photos above]
Layer 3 - Middle solid color piece, right side up *[Gray fabric in photos below]
If you're making a two-layer bib, then you're pieces would be like this:
Layer 1 - Front patterned fabric piece, right side up
Layer 2 - Back fabric piece, right side down
This allows you to sew the pieces together, leaving a gap to turn them inside out, and then you'll have your bib with the correct sides facing out when you're finished.
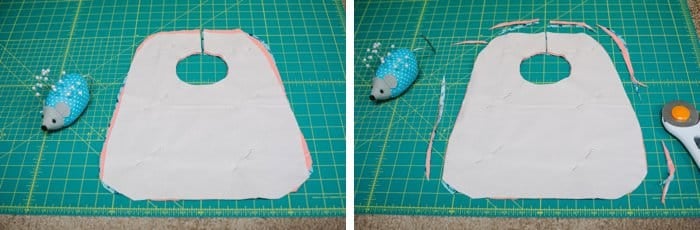
Once I had the fabric layers stacked correctly, I pinned them together, and then trimmed off any excess from the outside, so that my layers all matched up.
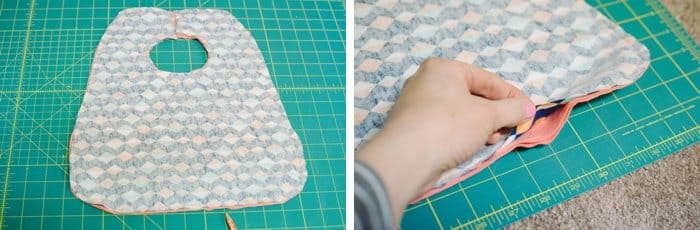
The photos below show the gray fabric on top, which is Layer 3 mentioned above [my middle, absorbent layer.]
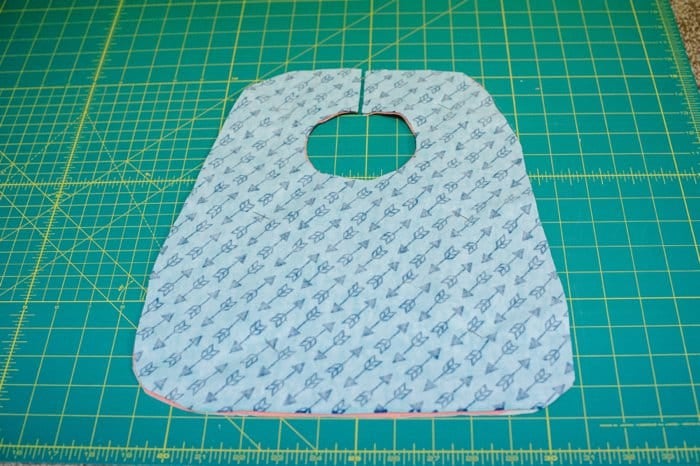
I flipped the stack over to make sure all the edges matched up correctly from the other side, in the photo below, which shows Layer 1 now on top, the backside of the printed front fabric piece.
Step 3. Sew around bib, leaving a 3" gap on the bottom to turn bib right side out.
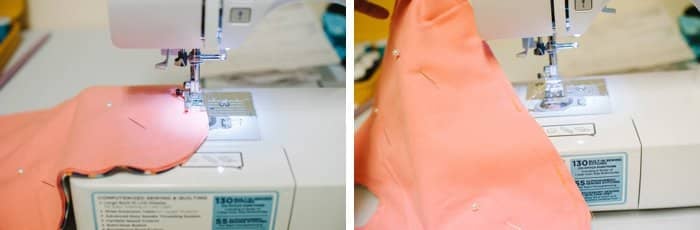
Once I had all the fabric trimmed correctly, and pinned together, it was time to sew!
I used roughly a ⅜" seam allowance, but it really doesn't matter what you use.
Sew around the whole bib, leaving a 3 inch gap open to turn the bib right side out.
I started sewing at the bottom of the bib because it was the flattest, straightest section, and that worked well for me.
Make sure to backstitch when you start and stop sewing.
*The photos below are of a different bib than the ones above. The patterned front piece of this bib below is a geometric navy flannel print.*
The photo below shows the opening I didn't sew; my hole to turn the bib right side out through.
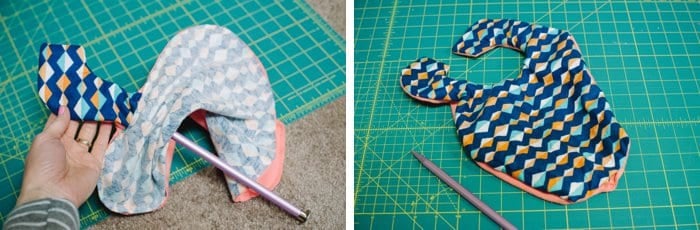
Step 4. Flip the bib right side out, through the hole you left open.
You want to turn it right side out so that your patterned piece is facing out on the front, and your back piece is in the back, with the absorbent layer in the middle on the inside.
I used a knitting needle to help me turn it right side out.
Be careful that you do this gently though, because I have accidentally poked the tip of the needle through the fabric when I was pushing a little too forcefully.
The bib starts to take shape as you flip it right side out.
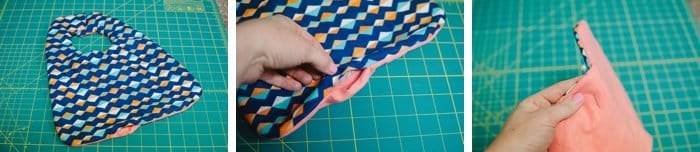
Step 5. Iron the bib to flatten it out.
This helps you see the shape the finished bib will take, and allows you to get ready to top stitch around the bib. [See the left photo below.]
Step 6. Find the hole you left open, and pin it closed in preparation for top stitching.
You want to turn the edges of the opening in, and pin it so that it looks like the rest of the bib edges.
When you top sew over it, it'll make that opening disappear. I pinned it so that I knew where it was as I was sewing around the edges.
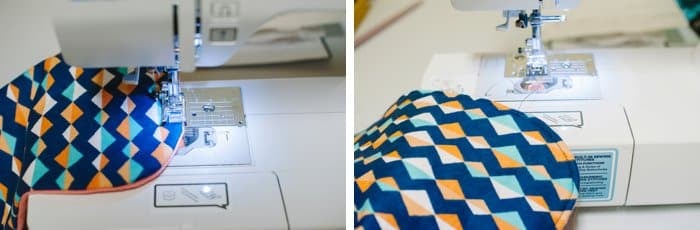
Step 7. Top stitch around the edge of the bib.
At this point, I made sure my main thread color blended in with the patterned top fabric, and I picked a bobbin color that would blend in with the back fabric color.
In these photos, that meant navy for the main top thread, and orange [I didn't have coral, but orange blended in well enough] for the bobbin color.
Once I had the correct thread colors ready, I top sewed using a 3.5 stitch length around the bib edge, about ¼" from the edge.
This gives it a finished look.
When I got close to the opening at the bottom of the bib, I moved a little bit closer to the edge so that I closed up the hole more securely.
Backstitch and then it's all sewn!
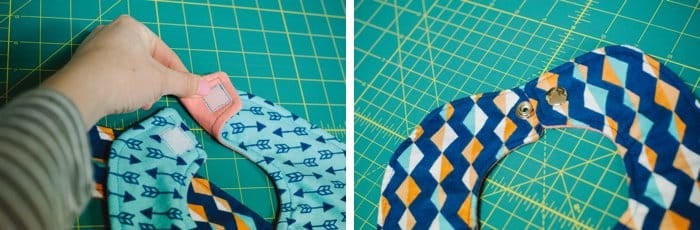
Step 8. Add your fastener.
My sister's bib had velcro closures, so I made one that had velcro too. Velcro is a cheap option and easy to sew on.
I also tried snaps and like the finished, classy look the snaps give the bibs.
And that's it!
Once the fastener is attached, they're ready to be washed and worn!
I made a whole bunch of variations with different fabric combinations.
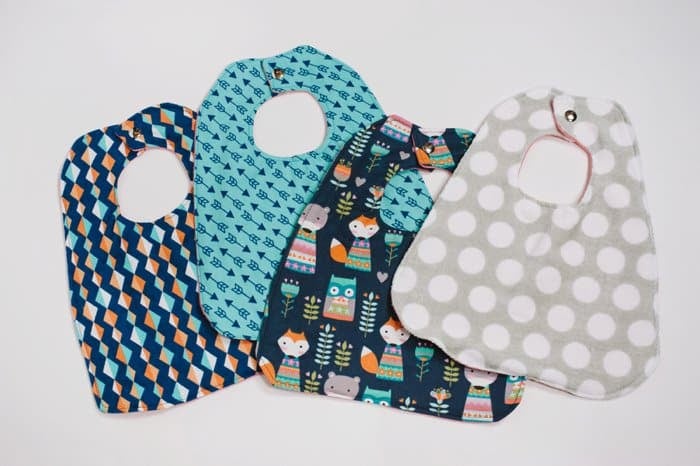
I found them kind of addicting to make. And there are so many amazingly cute patterns at the fabric store; I had to limit myself to just a few.
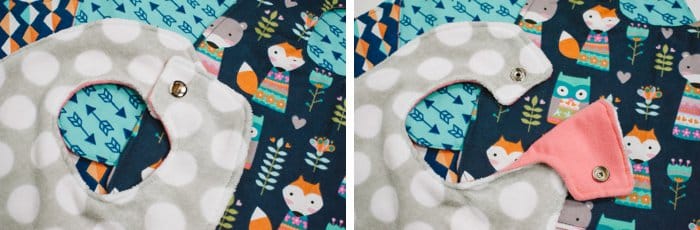
These bibs can also be reversible if you'd like!
I could use mine that way if I wanted, although my snaps aren't truly reversible because I used the regular front and back snaps. You can see this in the coral back of the bib shown in the bottom right photo below.
However, if I wanted to make true reversible bibs, the snap package tells how to use the smooth snap top for both the front and back of the bib so that it could be worn interchangeably and look nice both ways.
Velcro would be inherently reversible if you went that route, allowing you to choose which side of the bib you used as the front, if you wanted to have options.
How to Make Bandana Drool Bibs
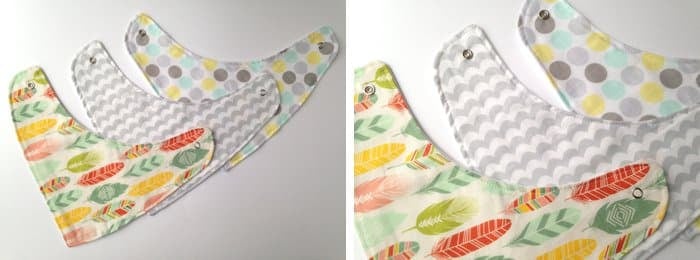
The bibs I made and show below can be used as food bibs if you'd like.
But I made them to be used mostly as drool bibs, to protect baby's clothes from getting soaked when he starts to teeth and drool.
We got some bandana drool bibs for Christmas and I modeled these after them. I whipped them up real quick so I used the ones we had as a template and made them as simple as possible.
These bibs use only two layers of fabric; a soft cotton patterned front and a white flannel for the back.
I wanted them to be light and flexible since they'll be worn as part of our boy's wardrobe during drool days rather than just when he's eating.
The process for making these bibs was almost identical to the steps outlined above.
I just used a different template in Step 1, and I used only 2 layers of fabric.
I also used a different type of snap for these ones; one that is a little smaller and cheaper.
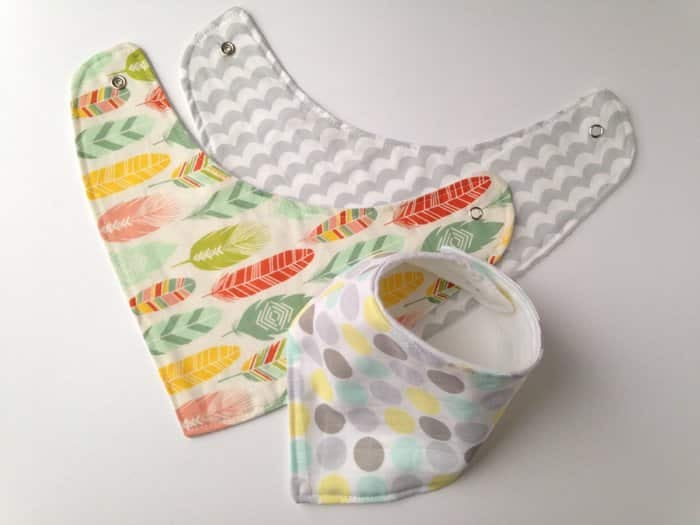
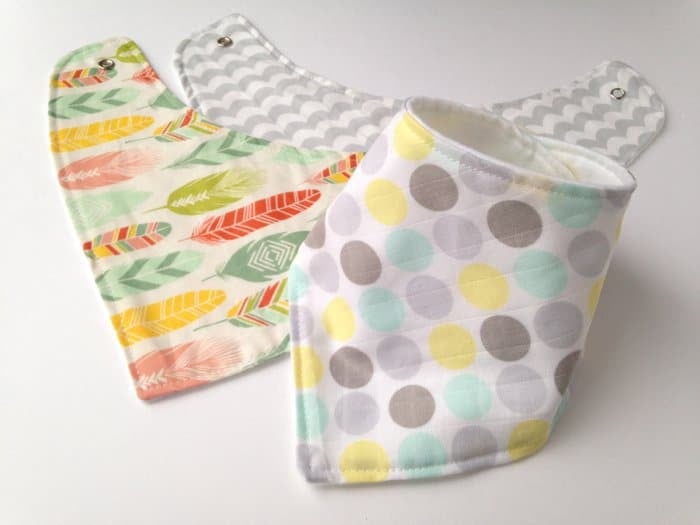
This tutorial shows the official way to make these drool bibs, which results in a little extra neck coverage in the front of the bib to catch more drool. The front piece of the pattern in that tutorial is a different shape than the back, which creates the extra coverage.
Because I was making these up quickly, I used the general shape of the bib we got as a gift as the pattern for both the front and the back. This makes the neck hole a little larger than the pattern above.
We'll see how these work to catch the drool. If they're too loose in the neck and I need to make another batch using that pattern above so they have the additional fabric to catch extra drool, I happily will!
Common Questions
This free tutorial shows the process for sewing a baby bib, but doesn't include a pattern. If you want a printable baby bib pattern, you can buy a detailed tutorial and printable baby bib pattern from our shop!
You can use velcro or metal snaps to secure the two flaps of the bib behind the head and neck. Both ways are shown in this tutorial. The metal snaps look clean and sleek, but they do have a tendency to pull out of the fabric over time. The velcro looks a bit more DIY and can become less sticky over time, but seems to be fairly durable for regular bib use.
This is an awesome idea and one of my favorite uses for these baby bibs! You can also make a batch of the world's best baby washcloths to add to the gift basket - they were a staple in my house through all those early childhood bathtime years. You can also make a wooden bead teething necklace, a DIY tag blanket, and a few versatile zipper pouches to round out the perfect baby shower gift basket!
I am glad I have a good stockpile of food and drool bibs on hand in anticipation of teething and when baby boy starts to eat solid foods.
I wanted to have enough to frequently throw them into the wash without running out.
The challenge is not making 100 more once you know how to make a baby bib!
These bibs are also great to add to a handmade baby gift basket along with diy pacifier clips, zipper pouches and teething necklaces!
P.S. If you're looking for a more comprehensive and detailed walkthrough on how to make these bibs, plus a printable PDF bib pattern, take a look at The Unbeatable Baby Bib Guide sold in the LauraRadniecki.com SHOP!
More Fabric Crafts You'll Love
---
⭐️🧶 Did you enjoy this craft and want to see more like it? ✂️ Join our FREE email community and get inspiring craft ideas sent right to your inbox! 🧵 ⭐️
---
How to Make a Baby Bib
Materials
- Fabric
- Baby Bib Pattern (Available for purchase in our shop!)
- Coordinating Thread
- Velcro or Metal Snaps
- Scissors, Rotary Cutter, Cutting Mat, Pins, Sewing Machine, Iron
Instructions
- Cut the fabric for your bib layers.
- Stack layers, and trim excess from the edges.
- Pay attention to the orientation of the fabric because you're sewing them inside out.For three-layer bibs:Layer 1 - Front patterned fabric piece, right side up.Layer 2 - Back solid color piece, right side down.Layer 3 - Middle solid color piece, right side up.For two-layer bibs:Layer 1 - Front patterned fabric piece, right side up.Layer 2 - Back fabric piece, right side down.
- Sew around bib, leaving a 3" gap on the bottom to turn the bib right side out.
- Flip the bib right side out, through the hole you left open.
- Iron the bib to flatten it out.
- Find the hole you left open, and pin it closed in preparation for top stitching.
- Top stitch around the edge of the bib.
- Add your fastener.
Notes
- You can make these bibs with two layers or three layers. If using all flannel fabric, I like having three layers, one of which is an absorbent inner layer. If you use a thicker fabric like terry cloth for the front, you may only need two layers.
- Velcro works well as the fastener on the back of the bib. It's cheap to buy, and easy to sew. The downsides for velcro are it can look more DIY, and it can lose its stickiness over time, but seems to perform well overall. The metal snaps are another option. They look professional and sleek. The possible downsides are they can be tricky to install and they can sometimes pull out of the fabric over time because they are constantly pulled on to open and release the bib.
- These bibs make great baby shower gifts and can be combined with the best baby washcloths to make a wonderful gift basket!

Judy spaulding
If using Cotton fabric for the top and bottom and Terry cloth in the middle do you have to quilt the bib to prevent the batting from rolling up… to keep the batting in place?
Laura
Hi Judy! I never quilted any of my bibs; you sew the three layers together around the edge, and since they're all pretty sturdy fabrics on their own, I never had any problems with bunching or rolling or anything. I think it's different using an actual fabric as batting, like terry cloth, vs using actual batting in a quilt, which you know is basically smoothed out cotton. I hope that helps!
Stacy
Hi Laura,
How much of each fabric do you need for the bibs? I am not an experienced sewer so I’m not very good at figuring out how much I need lol
Laura
Hi Stacy! It depends on if you're going to make the bibs 2 or 3 layers. But, you could definitely cut 4+ bib shapes out of one yard of fabric. So if you wanted a two layer bib, and you bought a yard of each of your two fabrics, you could make 4+ bibs. If you wanted to buy a half-yard of each of your fabric layer choices, you could make 2+. I'm in the camp of "buy more because you might need it" (which is also why my unused fabric stash is huge haha) so I err on the side of extra. I hope that helps. If you go with one yard of each of the layers you want to make, you'll have plenty to make a stack of bibs from. And if you choose to use flannel, that's usually cheap or on sale so that's an added bonus! Thanks for being here. xo, Laura
Mona
Loved this tutorial. Thank you!
Sue Dewland
I always prewash my fabric before making baby bibs. You never know how much each fabric and batting will shrink....
Laura Radniecki
Hi Sue!
Yes, after working with unwashed fabric on these bibs, I too realized it was way better to wash the fabrics right from the beginning! You're smart to do so! That way, the size you are making them will be the size they end up as too!
Thanks for your tip!
Laura
Rebekah
Bad recommendation on the snaps! I bought the links you showed, and the tool doesn't go to the snaps, and the snaps are a bit big and definitely too tough for a baby bib. Gr!
Laura Radniecki
Hi Rebekah! I'm so sorry to hear you had issues with the snaps and the hand tool you ordered. I bought my snaps and hand tool on my local craft store and they came together in a set. But I just checked the product numbers of the items I used with the amazon listings I put in the post and they all match up as the same products.
Yes, the snaps are big but the bibs I made are fairly big and I didn't think they looked too oversized. You're right that the snaps are tough; they require some force to undo. But now that my son tries to pull his bibs off, I appreciate him not being able to unsnap them himself.
As for why the handtool didn't work for you with those snaps; did the packaging of yours say that it works with the Heavy Duty size #5 snaps? Everything looks like it should match up ok. Mine worked for me once I read the directions on the back and figured out which parts of the snaps went together, and which part of the disc to use for the front or back of the snaps. A regular hammer and that tool worked for me to put all the snaps together.
I'm sorry it didn't work out for you! This pliers tool is apparently another option for putting those #5 5/8" snaps together - https://amzn.to/2IUWdj3 I haven't used that but I'll add it to the instructions as an option for the snaps, so people know there are other options.
Thanks for giving the tutorial a try, and I hope you're able to either find some snaps that work for your next batch, or use a different option like velcro.
Laura
Arlene
That was a great tutorial and I started making some but I have a question. I was going to use flannel for the back of my bibs and 100% cotton for the front, do I have to prewash any of my fabric? I would rather not!! Some of my flannel is white, some has little roses and some is plaid...
Laura Radniecki
Hi Arlene!
Thanks for the message!
To be completely honest, I am not sure how much of a difference there is between how much flannel and 100% cotton will shrink.
I did not prewash any of my flannel, and I did notice that my finished bibs shrank some from how big they were before I washed/dried them. Had I prewashed/dried the fabric first, I would have ended up with bibs that were a little bit longer and covered more surface area.
If you decide not to prewash, my guess is your finished bib will be somewhat smaller once it's washed, and it's possible that there could be some warping if the cotton shrinks more than the flannel, or vice versa.
But if it were me, I probably wouldn't wash any of it and I'd try it out, maybe making the bibs slightly longer than I'd like the finished product to be. If you do that for one and it turns out to warp badly or shrink a whole bunch, then you know to wash the fabric, iron it and try again.
I hope that helps. In all of my sewing projects, I haven't been very great about prewashing/drying my fabrics. And then I'm often surprised why things shrink later on haha! I'm trying to get in the habit of washing things first, but sometimes it's just another step.
These bibs are pretty durable, and they hide imperfections well.
I'd love to hear how things turn out for you, and what you decide to try. The fabric you picked out sounds beautiful and I am sure will make some great baby bibs!
Thank you so much for reaching out.
xo,
Laura
Gail Miller
I have made hundreds of bibs for children, grandchildren, and greatgrands........instead of using velcro, which doesn't do well after many washes and dryer use. I used the same pattern and steps you use, however, I put a 1/2 inch wide x 4 inches elastic sewn in connecting both sides of bib, easy to slip over childs head. Try one and see how you feel about my comment.
Laura Radniecki
Hi Gail!
Thanks for reading and sharing your tips!
So, you sew the elastic piece into the seams? I will have to look and see if I can find a tutorial to see how that's done. Do you sew it in place when you have the right sides together? How do you turn it right side out then?
It sounds like a great method!
Laura
Author Belinda Hunter
I had thought about this but wasn't sure. Thanks I am going to do this.