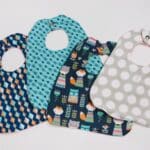
How to Make a Baby Bib
In this fun sewing tutorial, learn how to make a baby bib! Included are photos and instructions on how to sew a DIY baby food bib and how to make a bandana drool bib.
Materials
- Fabric
- Baby Bib Pattern (Available for purchase in our shop!)
- Coordinating Thread
- Velcro or Metal Snaps
- Scissors, Rotary Cutter, Cutting Mat, Pins, Sewing Machine, Iron
Instructions
- Cut the fabric for your bib layers.
- Stack layers, and trim excess from the edges.
- Pay attention to the orientation of the fabric because you're sewing them inside out.For three-layer bibs:Layer 1 - Front patterned fabric piece, right side up.Layer 2 - Back solid color piece, right side down.Layer 3 - Middle solid color piece, right side up.For two-layer bibs:Layer 1 - Front patterned fabric piece, right side up.Layer 2 - Back fabric piece, right side down.
- Sew around bib, leaving a 3" gap on the bottom to turn the bib right side out.
- Flip the bib right side out, through the hole you left open.
- Iron the bib to flatten it out.
- Find the hole you left open, and pin it closed in preparation for top stitching.
- Top stitch around the edge of the bib.
- Add your fastener.
Notes
- You can make these bibs with two layers or three layers. If using all flannel fabric, I like having three layers, one of which is an absorbent inner layer. If you use a thicker fabric like terry cloth for the front, you may only need two layers.
- Velcro works well as the fastener on the back of the bib. It's cheap to buy, and easy to sew. The downsides for velcro are it can look more DIY, and it can lose its stickiness over time, but seems to perform well overall. The metal snaps are another option. They look professional and sleek. The possible downsides are they can be tricky to install and they can sometimes pull out of the fabric over time because they are constantly pulled on to open and release the bib.
- These bibs make great baby shower gifts and can be combined with the best baby washcloths to make a wonderful gift basket!