Wondering how to make a zippered pouch? Here are two zipper pouch tutorials; one for a simple, flat pouch and one for a flat-bottom bag that will stand upright on its own.
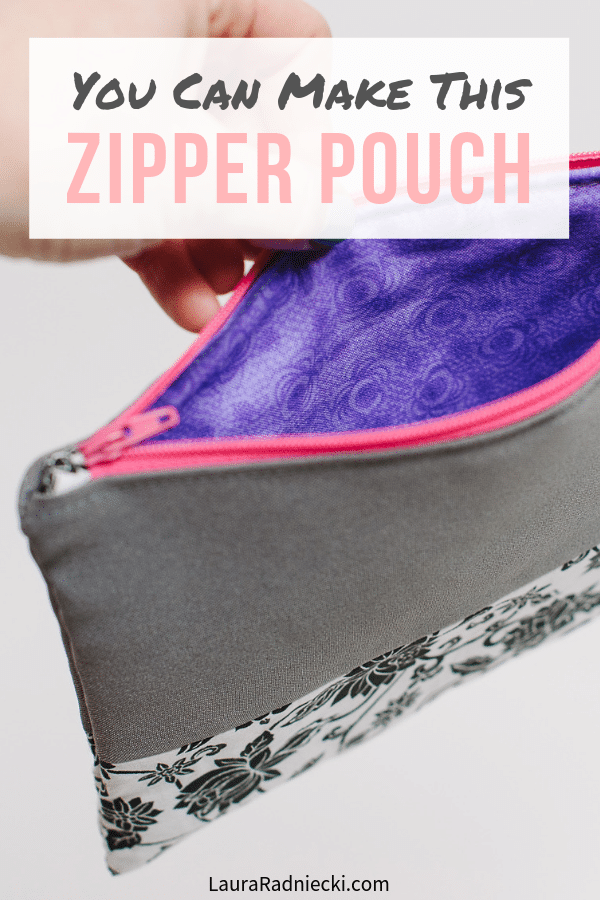
For the past several years, I've chosen some type of craft project and made a whole bunch of them as Christmas presents for family and friends.
Several years ago, I knitted infinity scarves, and then for the previous two years, I sewed infinity scarves.
This year, I wanted something different than a scarf, and I had been eyeing up these cute zippered pouch tutorials I'd seen on Pinterest. I didn't know how to put in a zipper, but I wanted to learn.
So in November, I decided I was going to try to learn how to sew a zipper pouch. I pinned a couple tutorials, bought a set of zippers, fabric and interfacing and set out to try it.
Like most of my sewing projects, my first attempt is usually a disaster as I troubleshoot and work out the kinks. I sewed the fabric to the wrong side of the zipper the first time, and after trying and failing to seam rip it out, I threw that one away and started over.
Over the course of the next few weeks, I sewed dozens of zippered pouches in a few different styles and sizes. I played around with fabric combinations and gave most of them away as gifts. I sewed a few for prizes at my baby showers, and kept a couple to use in my diaper bag to keep it organized.
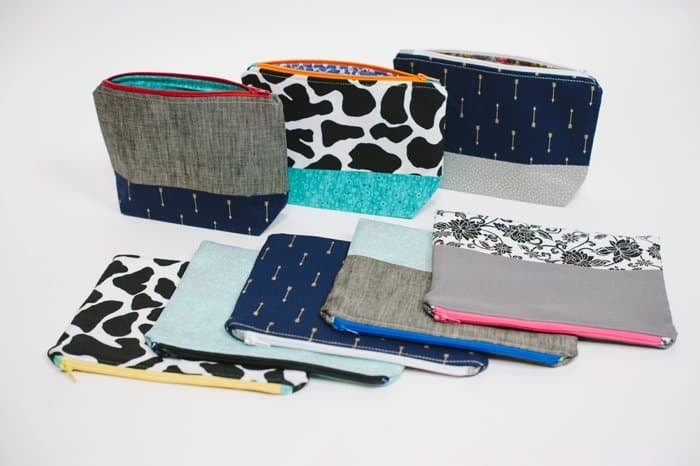
I wanted to share some photos today of the zippered pouches I made, link to the tutorials that I found most helpful [I read a lot and tried a bunch of different techniques to determine what I liked and thought worked best], and share the sources for the zippers and interfacing I used.
**Edited to add: One of the original tutorials I used to make these is no longer available, so I am linking to a similar tutorial, that follows similar steps.
I made two different versions of zippered pouches this year.
How to Make a Zippered Pouch - The Flat Version
The first was a flat zippered pouch.
It was the simpler of the two to make, and the quickest.
Supplies needed for the flat zippered pouch:
- Sewing machine
- Fabric for the outside of the pouch
- Fabric for the inside of the pouch
- Two small fabric tabs for the ends of the zipper to create the contrasting, finished look
- Interfacing: I wanted these pouches to be soft, pliable and yet sturdy so I used an iron-on quilting interfacing I bought at JoAnn fabrics. There are lots of options, and there's no true right or wrong type of interfacing to use. Something like this on from Amazon would work too. You wouldn't have to use interfacing either if you wanted to save time, and didn't mind a thinner pouch.
- Zipper: I used plastic zippers for these, but you could also use metal too. As the tutorials will show, you can easily shorten a long zipper to fit a smaller project. For that reason, it's best to buy long zippers because you can create larger projects if you want to. If you buy 9" zippers and decide to make a pouch that's 12" long, you're out of luck. You can buy a bulk set of 14" zippers here on Amazon, or else there's a great zipper shop on Etsy found here, that I bought my zippers from.
- Thread: coordinating or contrasting colors to your fabric; depending on the look you're going for.
- Iron, Scissors, Pins
The main tutorial I used for this pouch can be found here.
It is a very simplified tutorial. The pouches she makes don't have the tabs on the ends of the zippers [see the contrasting teal ends of the yellow zipper in the photo below?], and she also doesn't use any interfacing.
I used the instructions for using interfacing and for attaching zipper pulls from this zippered pouch tutorial. (The original tutorial I used is no longer live, so this is a similar tutorial to the one I used. A couple things to note: I made mine a slightly different size; I used 9"x7" pieces of fabric. I also cut the interfacing ½" smaller on every side, so 8"x6", so there would be less bulk in the seams. I used about a 3"/8" seam allowance.)
That second tutorial is also the tutorial that I used to make the makeup-style pouches I'll show in a minute but for now, let's stick with the flat version of the pouch for a minute.
By using the combination of the two tutorials, I was able to sew soft, pliable flat pouches that were sturdy enough to feel high quality.
I was also able to incorporate tabs on the ends of the zippers to create a more finished look, and compliment the colors of the fabrics I was using.
Dual Fabric Flat Zippered Pouches
Once I got the hang of creating a flat zippered pouch, I experimented with ways to make them more fancy.
One easy way to do this is to use two coordinating or contrasting fabrics to make up the outside fabric rectangles, rather than one piece of the same fabric.
The photos below are on the dual fabric pouches I made. I would use fabric tabs of the bottom fabric as zipper tabs to help the pouch have a cohesive and coordinating look.
The interior fabric of the pouch can be any color, pattern, or type of fabric that you want. I was trying to use up a lot of the fabric I had in my stash, so I used some bright, fun colors for the insides.

How to Make Flat Bottom Zippered Pouches
Once I had mastered and sewn a whole bunch of lay-flat zippered pouches, I wanted to try to make some that had a flat bottom and would stand up on their own. This is more of a traditional makeup bag style.
The second tutorial (updated second tutorial) I mentioned above is what I followed for these pouches.
A lot of the steps are the same as when making the flat zippered pouches, and the supplies needed are the same as well.
The main differences are that I used a different type of interfacing; one that was much stiffer and thinner to help the bags be more sturdy and stand up on their own.
Here's an Amazon link to the stiffer interfacing. You can also buy it from this site here in yard increments, like I did.
The other difference is that I cut squares out of the bottom corners and created the flat bottom that helps it stand up on it's own.
There are several different ways of doing this, and I found this great video tutorial that shows the 3 main ways.
I also used two fabric pieces sewn together to create my outside fabric pieces, giving the bags a fancier, higher end look.
It was a Christmas Gift Success
The bags were a big hit and everyone loved them.
I know no one specifically asked for a zippered pouch, but who couldn't use another one to hold makeup, toiletries, purse essentials or to use as a travel bag to keep jewelry or hair accessories safe and separate.
To be honest, I find them a little addicting. That's probably why I made more than 20 of them!
You can also change the dimensions of the bags by using longer zippers and making your fabric pieces bigger.
I sewed up a large pouch out of recycled t-shirts to hold some stuffed fabric shapes I made for my niece for Christmas.
I also made a larger version of the pouch with a more complicated outside fabric pattern using 3 different types of fabric to use as a purse of sorts in my diaper bag. I won't be carrying a purse and a diaper bag, so I wanted something sleek and pretty to house my wallet and other things, that I could tuck into the diaper bag and pull out easily.
I've also seen these pouches with wrist straps attached to make a cute clutch. You could even attach a long strap to use it as a purse if you wanted to.
The options are endless.
I don't think this is the last time I'll be making a batch of these bags!

– If you liked this post, I would love if you would share it on Pinterest or Facebook. Thanks & xo! –





Laura Damato
Hey, Laura!
Just a heads up: The links to many of the tutorials that you used no longer work. I followed them because I was looking for a more detailed materials list that included how much fabric to buy and the dimensions of the bags. For the flat zippered pouches, what are their dimensions and how much fabric was required to make them?
Thank you!
Laura Radniecki
Hi Laura! Thank you so much for telling me about the broken links so I can update the tutorial post!
I made my pouches using 9"x7" rectangles of fabric. And for the interfacing, I cut them 8"x6" and then centered them so there was a 1/2" gap around all sides. My finished pouches are about 8 1/4" by 6 1/4", using a seam allowance of approximately 3/8".
As far as fabric goes, it doesn't take much fabric to make them. You need 2 rectangles of your outer fabric (2 rectangles that are 9"x7" each) and 2 of your inner lining fabric (2 that are 9"x7"). And then interfacing for your outer fabrics too, if you choose to use it, (8"x6" each). You can make your pouches whatever size you want, as long as you make sure your zipper is long enough. You want to use a zipper that is a bit longer than your fabric for the pouches.
I hope that helps clarify a little bit! Here is a tutorial I found that is similar to the one I used. http://www.jedicraftgirl.com/2013/06/my-favorite-zipper-pouch-tutorial.html Let me know if you have any other questions! I am happy to help!