Magnets are the foundation of a lot of fun craft projects.
They can be used to make photo magnets with Mod Podge, wood burned leaf magnets or DIY agate magnets.
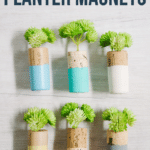
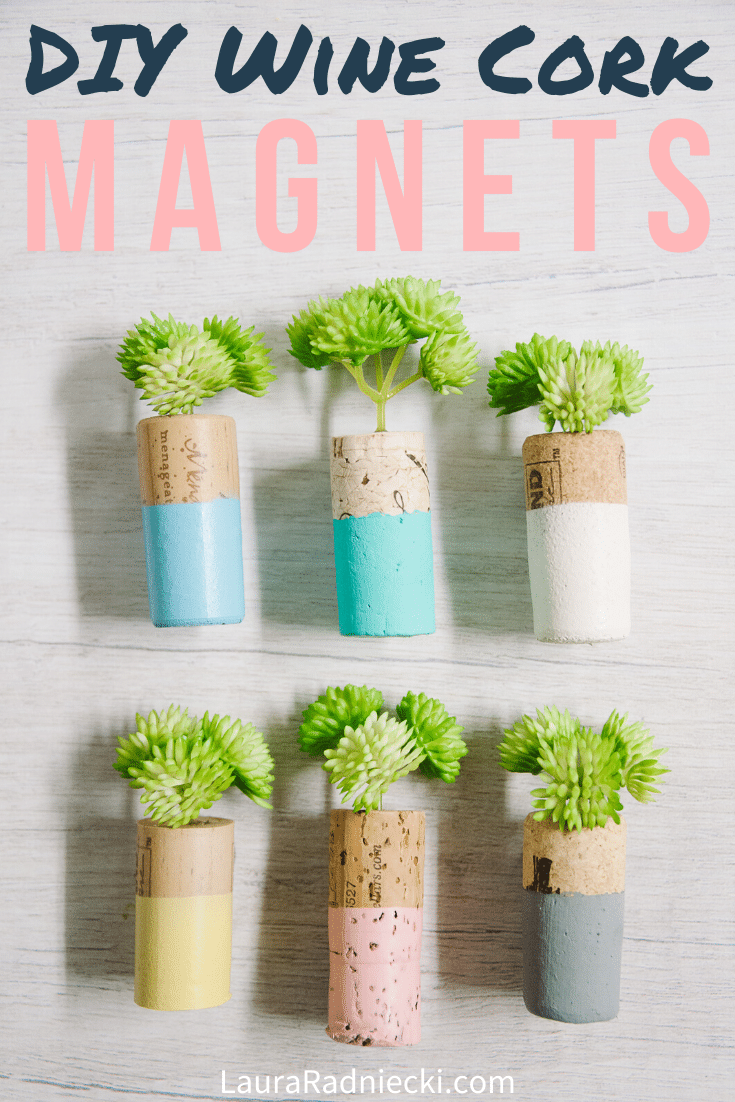
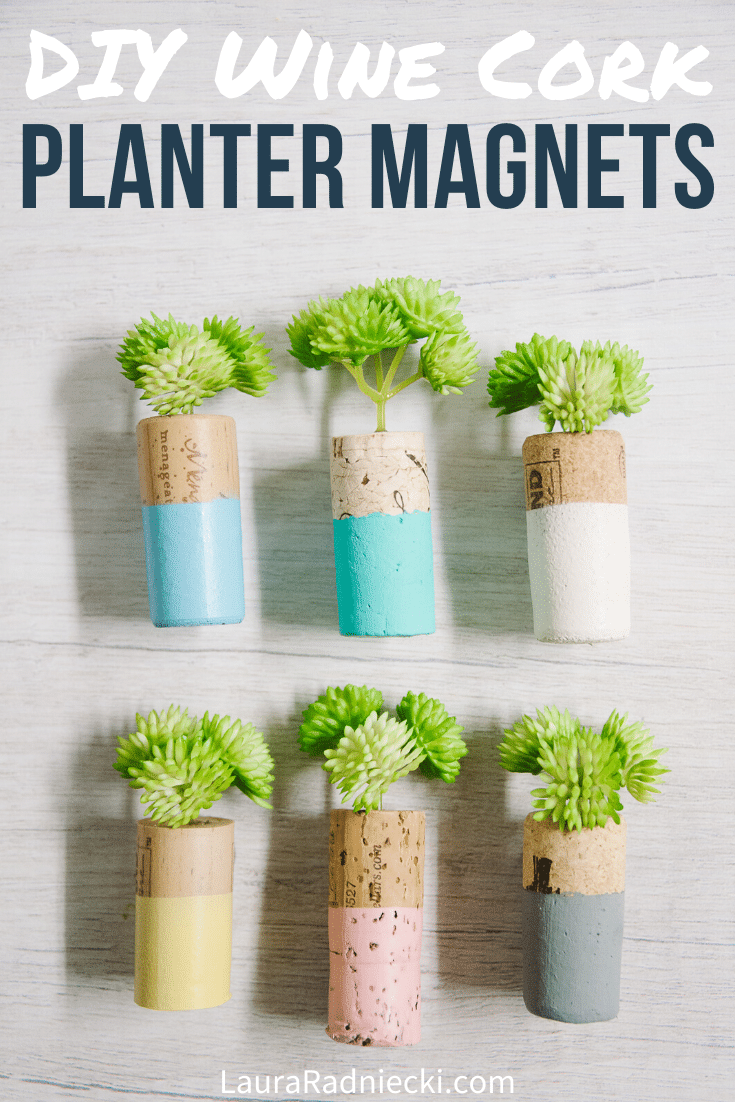
They can also be used to make probably the cutest magnets I have ever seen in my life: mini wine cork planter magnets!
By combining a magnet with a wine cork, some paint, and a little faux flower or succulent, you can make a tiny planter that (if you’re anything like me) will have you totally obsessed!
Here’s how to make one!
How to Make DIY Wine Cork Planter Magnets
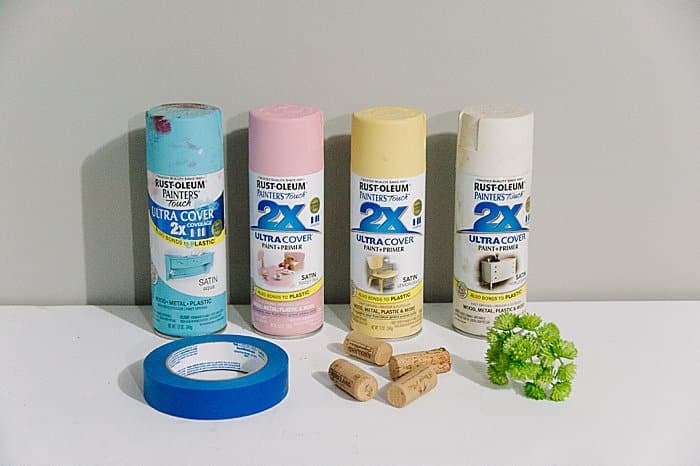
Step 1: Gather Supplies.
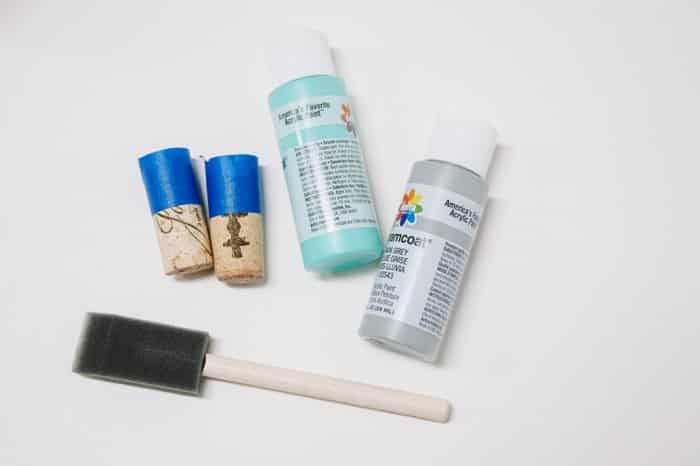
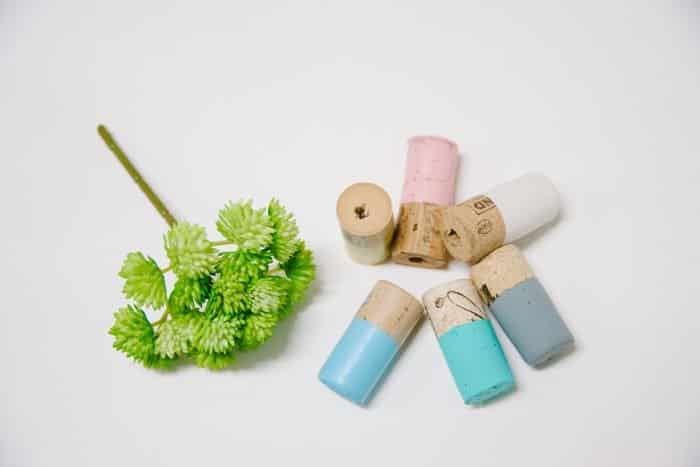
Supplies Needed:
- Wine Corks - perfect for making projects like pom-pom planters and cork snowman ornaments!
- Tape
- Spray Paint (or Acrylic Paint and a Brush)
- Clear Acrylic Sealer (optional)
- Drill and Large Drill Bit
- Faux Flowers
- Hot Glue Gun and Glue
- Magnets
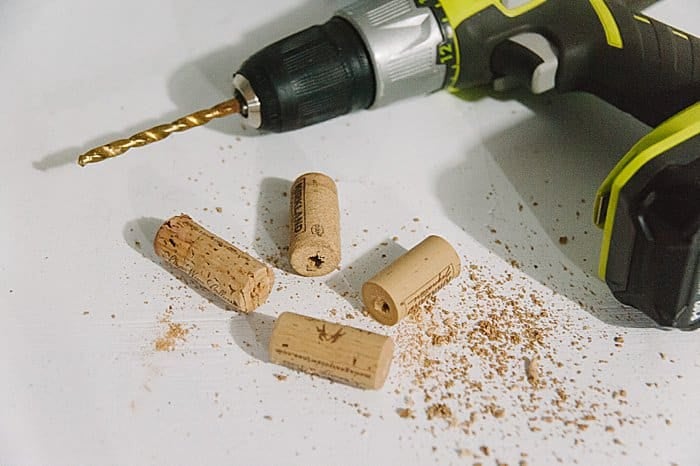
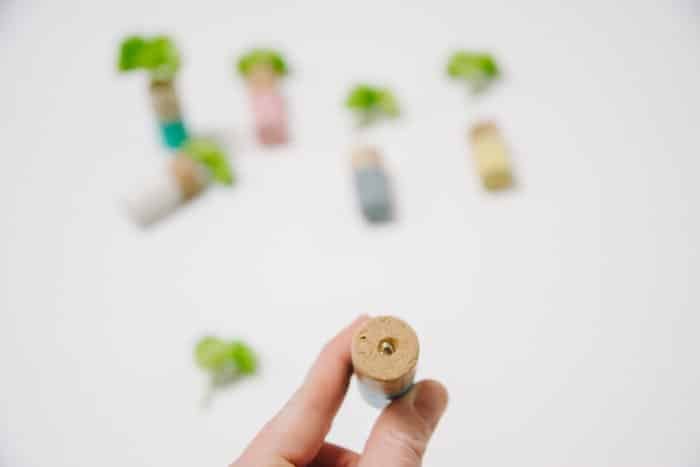
Step 2: Drill large holes in one end of corks.
Using a large drill bit, drill a hole into one end of each cork.
The hole should be big and deep enough to allow hot glue inside as well as room for the stem of a faux flower too.
I drilled mine ¾ inch deep or so.
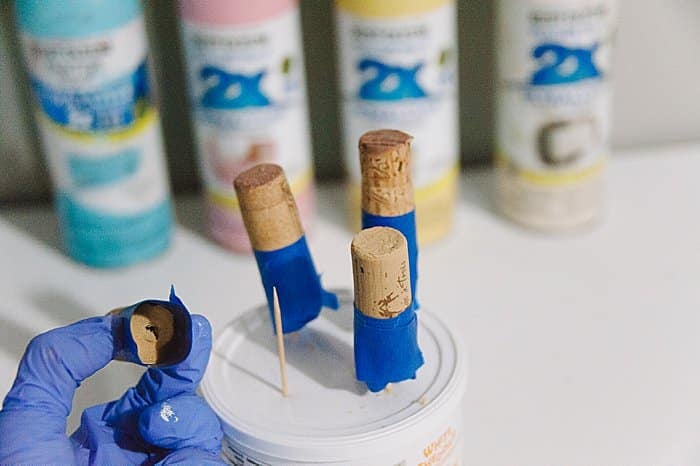
Step 3. Mask off corks using tape to prep for painting.
Using painters tape, tape each cork so that ⅓ of the cork is covered with tape, and the other ⅔ is exposed and ready for painting.
Rub your finger along the edge of the tape to ensure a good seal. This will minimize paint bleed under the tape.
I took a container with a plastic lid and stuck toothpicks upright to create a cork holder. This was perfect for putting the corks on to dry between coats of paint.
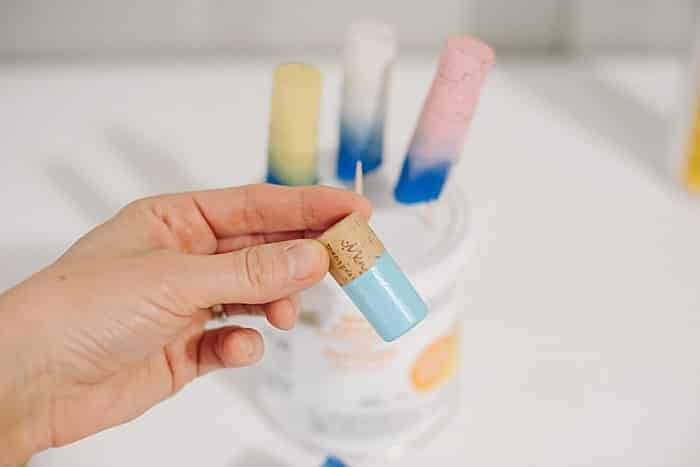
Step 4. Paint wine corks.
I used spray paint for the first batch of corks and it worked great.
I held each wine cork in my fingers (holding the painters tape section) and spray painted each cork that way. I was wearing gloves so a little paint splatter was fine.
For the second batch of corks, I used acrylic paint and a foam brush to see how that method compared.
It worked great too; it was even easier since I didn't have to be outside to do it.
Going forward, I would probably use acrylic paint and a brush to make more.
Paint each cork with several light coats of paint, letting each dry in between.

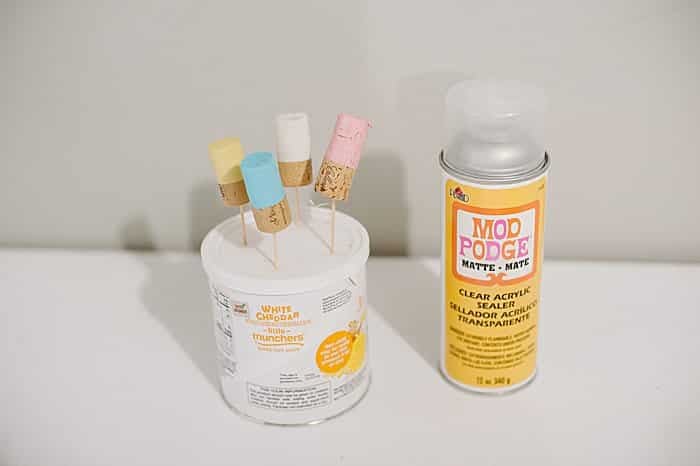
Step 5. Once paint is dry, remove tape and coat with Clear Acrylic Sealer if desired.
Once you've done several coats and the paint is dry, you can peel off the tape from each cork.
If you want to, you can spray each cork with Clear Acrylic Sealer to add another layer of protection and shine.
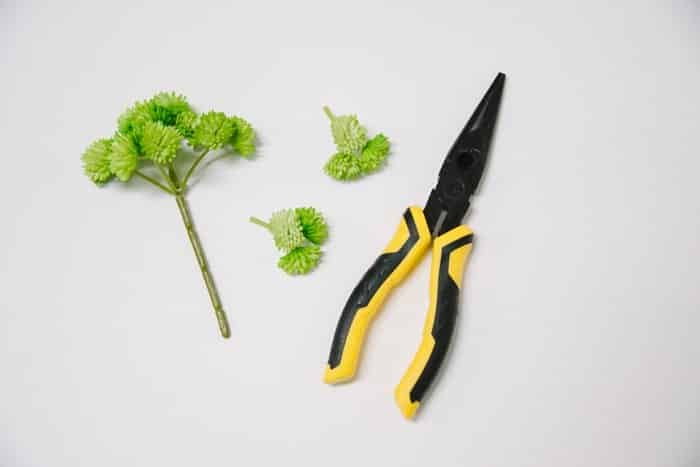
Step 6: Prepare faux flowers.
I chose a plastic faux succulent type of flower for my cork planter magnets.
Using a pliers with a wire cutter, I cut each bundle free.

Step 7. Hot glue one flower bundle into each cork.
Carefully squirt hot glue into the hole in one of the corks until it fills up the hole.
Insert faux flower.
Hold the flower steady until the glue begins to set. This will ensure the flower stays upright as the glue dries, instead of it drying with the flower tipping to the side.
Repeat for all of the cork magnet planters.

Step 8. Hot glue magnets onto the backs of the planters.
Using hot glue, glue a magnet to the back of each wine cork planter. (Or use E6000 glue if you don't mind the slower dry time.)
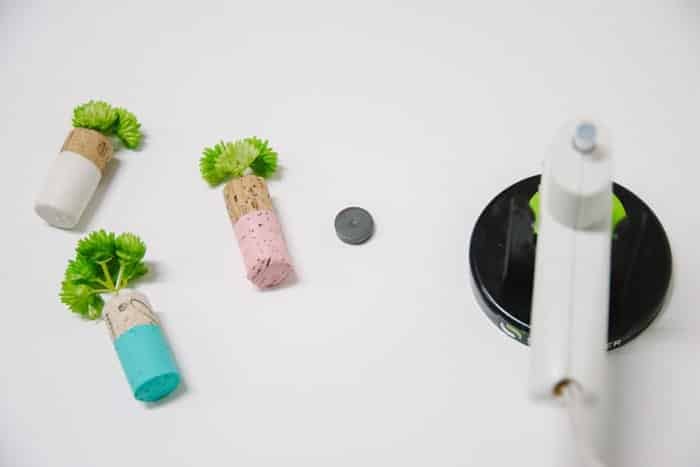
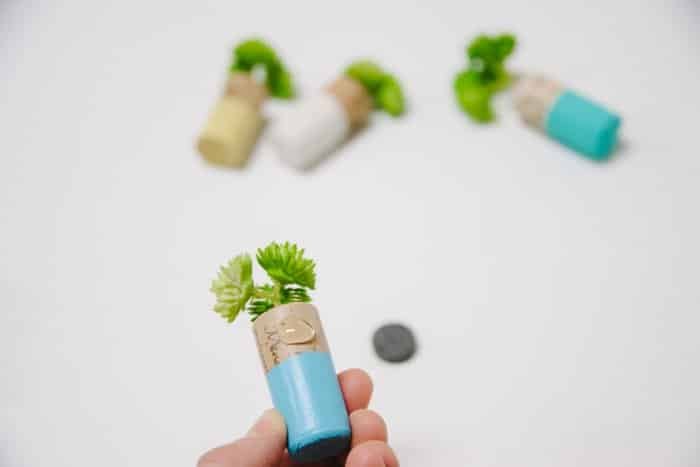
I experimented with gluing the magnet to the top of the cork and to the bottom to see which I liked better, and I like it at the top of the cork better. I think it balances the look and the weight of it better.
Repeat for all of the corks.
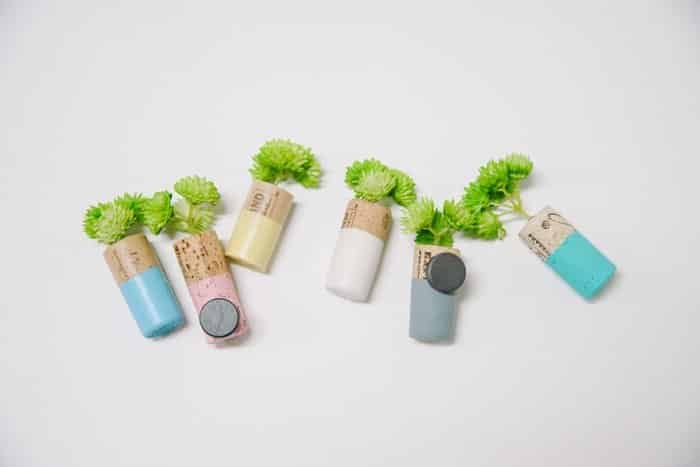
Step 9. Inspect your mini wine cork succulent planters and hang them up!

These planters can be made with any type of faux flower, plant, leaf, grass, or even sticks.
The paint colors can be customized, and you can even paint in layers, masking off sections to create stripes etc.
I’m positive these would make wonderful gifts too; Mother’s Day, Teacher gifts, or even as a Host gift at a party!
The sky is the limit, which makes them even more fun!


Leave a Reply