
Embroidery in the shape of a state? With a satin stitch and a little time, you can make state embroidery art, just like this Minnesota State Embroidery Project!
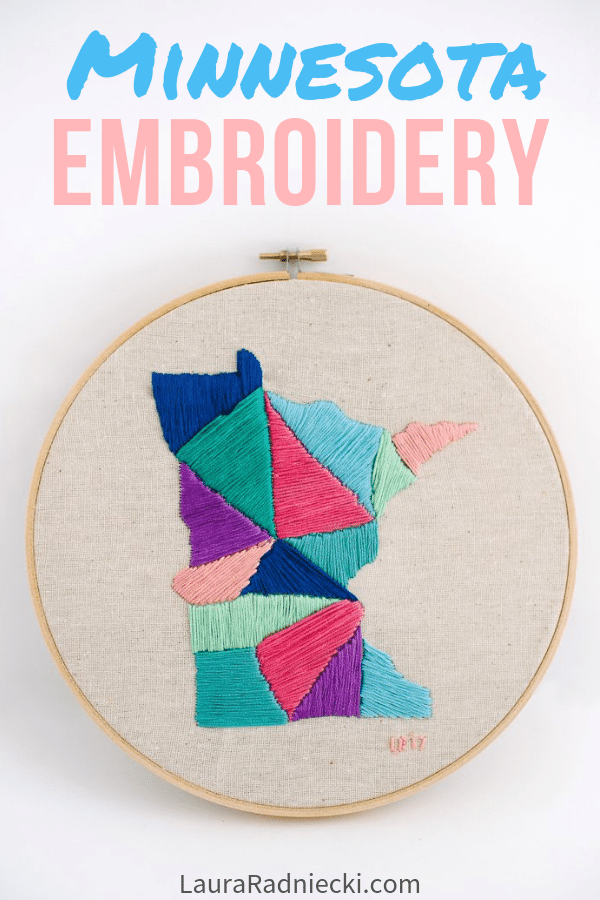
Recently, through a fated shopping trip to Target, I discovered embroidery.
While my husband took a phone call, I perused the end caps ( something I rarely remember to do), and I found a clearance section of dramatically reduced Brit + Co craft kits. One of those was a "learn to embroider" kit, and I immediately added it to my basket.
Long story short, it took an hour or less of working on that embroidery kit before I was hooked. The repetitive simple stitches were truly meditative to me, and I honestly couldn't get enough of it.
Since I bought that beginner kit, I have made several different embroidered art pieces. Some have been successes and some have been failures, but all of them have been fun.
Embroidery Inspiration from Africa
I started a gallery wall in my living room earlier this year, and there's been one spot that didn't have anything to fill it. I taped up a piece of hand print art with washi tape as a temporary placeholder, but my intention was always to fill it with something once I found the right piece.
One night, while looking at embroidery projects on Pinterest, I saw an embroidered map of Africa. It was BEAUTIFUL!
I immediately thought I could possibly translate that idea into a map of Minnesota. (I'm a sucker for state art.)
Making a Minnesota Embroidery Pattern Plan
After some googling, I was able to find one project online that did something similar to what I wanted to do. They embroidered the state of Minnesota using rainbow colors, dividing the state into sections.
I originally thought I might try to do the counties in Minnesota, but a quick look at the map made me realize there were WAY too many counties to do it that way. So, like the one other project I saw online, I decided to divide the state into sections of my own creating.
I also decided to choose colors in a calm, pretty color palette that fit the beach-inspired theme of my house.
It ended up being one of my favorite embroidery projects to date, so I'm excited to share it with you!
The State of Minnesota Embroidery Project
Step 1. Gather Your Supplies
Supplies Needed:
- Embroidery hoop - I used a 9" hoop
- Background fabric - I chose osnaburg from my fabric stash, because I wanted something neutral.
- Embroidery floss - I used floss with the non-braided/twisted strands, in the color scheme I wanted.
- Embroidery needle
- Map of Minnesota (or whatever state or shape you want to use) to use as a template, printed to the appropriate size for your hoop
***PRO TIP: One thing that's super important (I learned this the hard way) is your fabric needs to have NO WRINKLES, or it'll show in your final product.)
Step 2. Trace your template onto the fabric.
I used a regular pencil, but would have used a fabric pencil if I had one. If you use a regular pencil that doesn't come off, you have to be careful to cover up your marks when you embroider your pattern.
2a. Trace the state outline shape onto your fabric.
2b. Next, divide up the state shape into as many sections as you want your embroidery piece to have. I kind of sketched out the sections on the piece of paper, but ended up winging it and drawing random lines on the fabric to divide up my state.
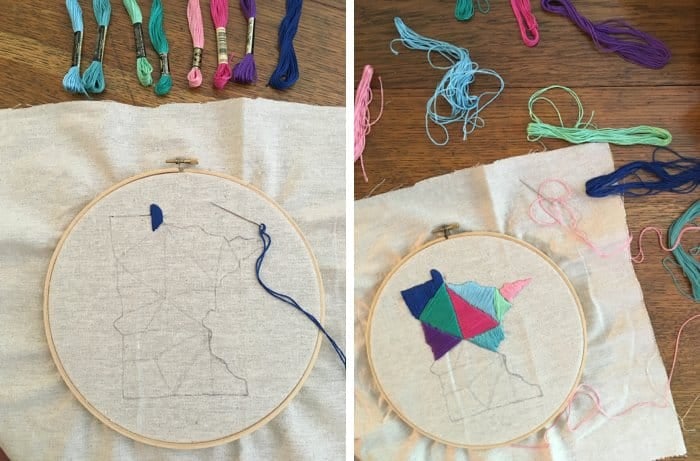
Step 3. Start filling in the sections, using the satin stitch.
I used one simple stitch to complete my entire project. It's called the "Satin Stitch" and it's the easiest embroidery stitch to do. You do simple long stitches across the area you'd like to fill.
It's perfect for filling in spaces, and it's easy to make a clean edge with it. You just have to go slow enough to make sure you don't leave any big gaps in between the long, straight stitches.
Step 4. Continue filling each section, using different colored embroidery floss.
I assessed each section before I started, to make sure I was using the best color. I didn't want any repeats too close together.
After each section is filled in, knot the floss at the back and start over with a new color.
(The back of your project will be a hot mess of random strands, knots etc. That's ok! It's the front that counts.)
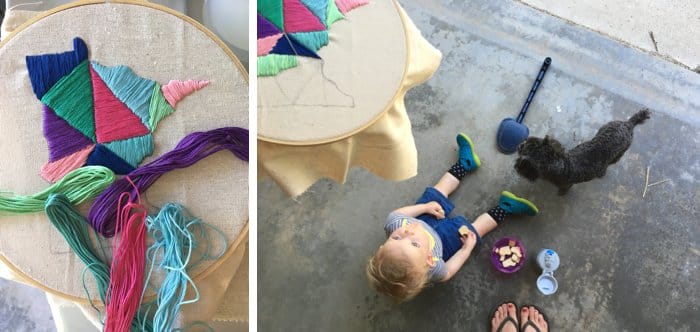
Step 5. Continue filling each section until the entire state is complete. Then add your initials and the date, if desired.
Keep going until the entire state is filled. Little by little, you'll see your state start to take shape.
When you're finished, you can add your initials and the date, if you'd like.
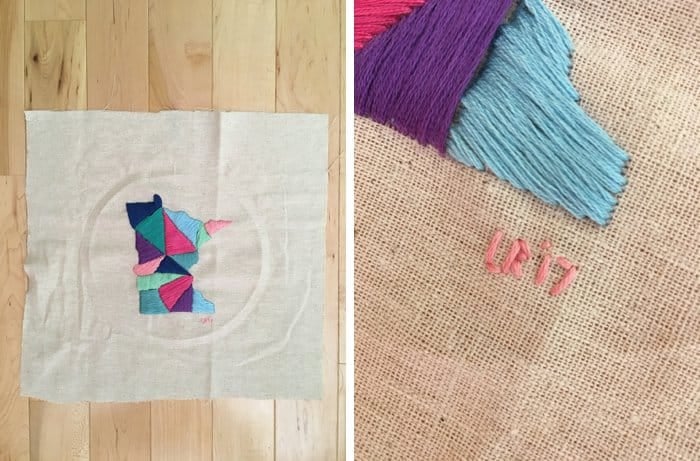
Step 6. Trim your fabric.
I first removed my art piece and tried to iron out the wrinkles. Like I mentioned before, I didn't realize it was a big deal if there were wrinkles in the fabric. I got some of them out with an iron, but not all of them. Lesson learned!
Once I ironed the non-stitched part of my fabric, I placed it back into the hoop and stretched it as flat and tight as I could.
Then I trimmed the excess fabric into a circle, leaving a couple of inches excess all the way around. (See photo below.)
Step 7. Finish the back of your project.
There are several methods of finishing an embroidery hoop art project. The important thing seems to be leaving a little extra fabric so that you are able to tighten and readjust it in the future, if need be. Apparently the fabric can shift and get loose over time, which is why you don't just trim all of the excess off right at the edge of the hoop. If you did that, it would be impossible to adjust/re-tighten it in the future.
To finish my hoop and get it ready for hanging, I took embroidery floss, and quickly and loosely threaded it around the trimmed fabric edges. (See left photo below.)
I went all the way around and then pulled the two ends together, which cinched up the fabric, like the right photo below shows.
Tie it off, and snip any long threads!
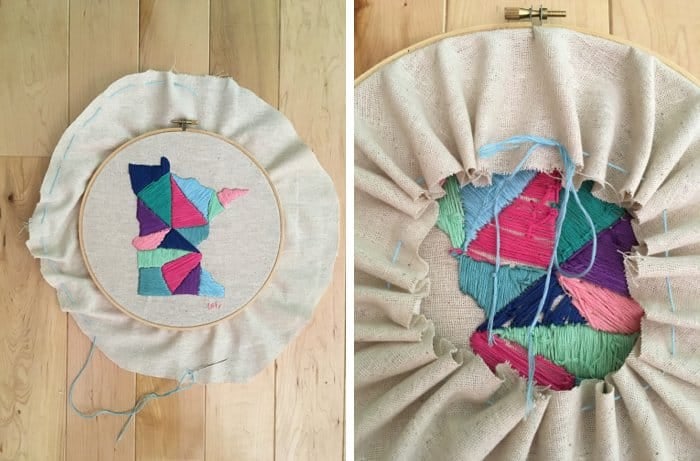
Optional Step 8: Finish your state embroidery project with a piece of cardboard, glued to the back of the hoop.
Depending on how much excess fabric there is, the back of the hoop might be kind of puffy, which makes it stick out from the wall. This is less of an issue for bigger hoops, and it's also less of an issue if you leave less extra fabric (I left more than necessary in these photos. Now, I stick to about 1.5-2 inches of excess all around.)
I was ok with the puffiness on this project, but I made a smaller 5" hoop project and that one hung all wonky on the wall because of the puffy fabric in the back. I had to add a piece of cardboard to flatten it and make it hang better.
If the excess fabric is interfering with how it hangs, you can trace your hoop on a piece of thin cardboard or cardstock, and cut out the circle. Using a little bit of glue right on the edge of the back of the hoop, you can attach the cardboard or cardstock which will help make the back more flat. This will help the hoop lay flatter against the wall.
And if you need to readjust in the future, the cardboard is only glued right at the edge, so you should be able to peel it off easily, and readjust your embroidery. Then you could add new cardboard before hanging it up again.
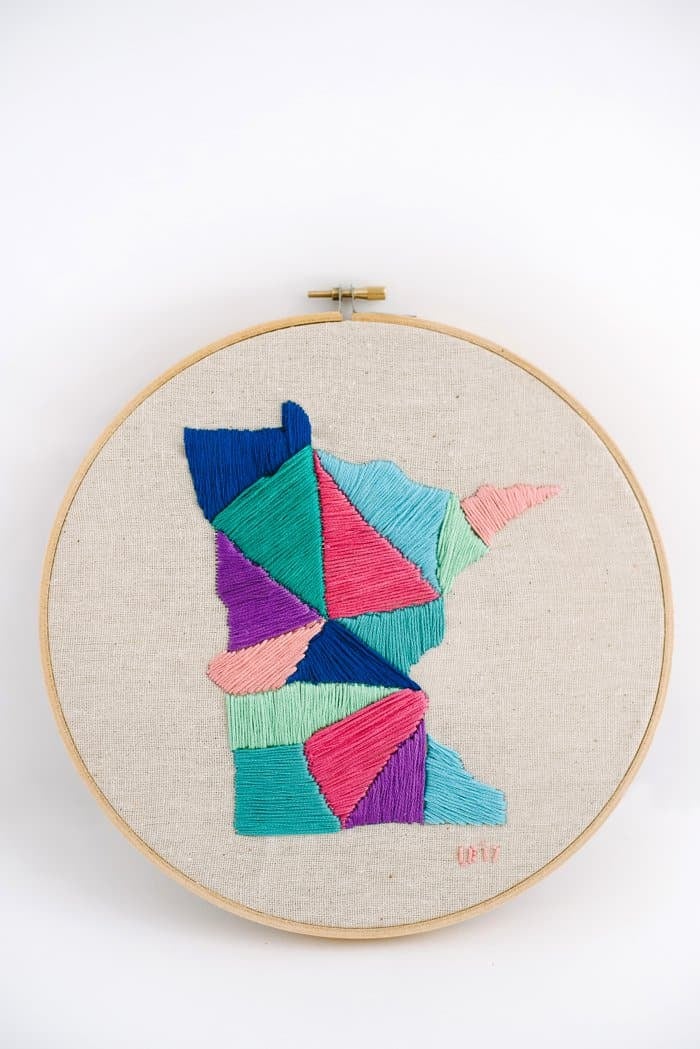
Step 9. Hang (or display) your state embroidery project!
I hung my Minnesota embroidery project up as part of my gallery wall with a simple nail. The hoop is all ready to hang because of the top screw mechanism!
(You can see how mine doesn't lay exactly flat to the wall in the photos below. It doesn't bother me in my day to day life, but if I had added cardboard to the back, it would lay flatter.)
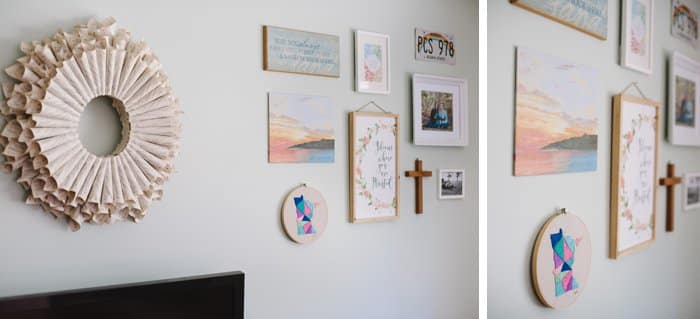
You can also put your embroidery hoop on a shelf or bookcase for display. It's a versatile art piece!
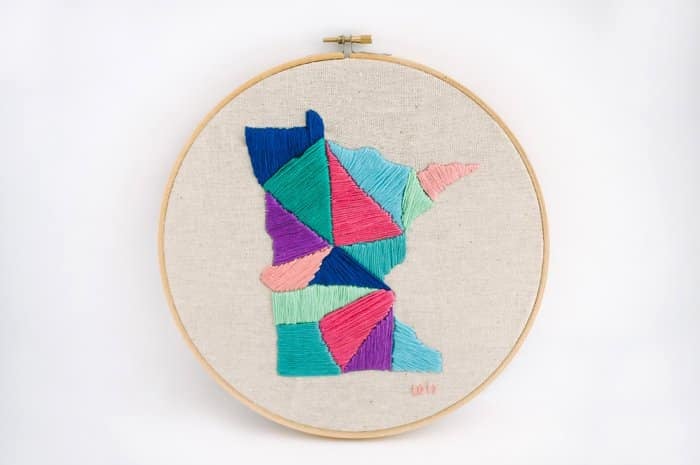
This state embroidery project map of Minnesota was SO fun to make!
I worked on it a little bit at a time, and I finished it in two or three days.
The result is a cute, customized artwork piece of the state I live in; one I love to look at and am proud to have on my wall!
Any state (or shape) can be used as a template for your embroidery pattern. With a simple satin stitch and minimal supplies (that's why embroidery is so amazing!), you can create a stunning piece of wall art!
– If you liked this post, I would love if you would share it on Pinterest or Facebook. Thanks & xo! –

Sarah Marshall
I am an avid crocheter but have often debated taking up embroidery. It is on my winter 2017-2018 list. We'll see if it happens
Laura Radniecki
I admire you for being an avid crocheter! I have dabbled a little bit, but I'm very much a novice at it! Let me know if you try out embroidery! I have a hunch you'll love it! 🙂 (P.S. I had no idea you blogged too! So neat reading some of your posts!!!)