


Learn how to close up fill holes in your sewing projects in this blog post that shows you how to sew a ladder stitch in this easy invisible stitch tutorial!
You’re sewing a stuffed animal or bean bag, and you get to the part where you’re stuffing the nearly completed project.
You finish adding the last bit of stuffing or filling, and you’re ready to close up the hole.
But how?
How do you sew an invisible stitch that won’t be seen from the outside?
Easy; with a ladder stitch!
A ladder stitch also goes by a lot of other names like a hidden stitch, blind stitch, or invisible stitch.
Whatever you choose to call it, the fact is simple - it’s a must-learn stitch that allows you to finish off your sewing projects in a clean, hidden way that looks way more professional than an external stitch.
Here’s how to sew a ladder stitch, so you can learn to finish your projects off with a simple but effective invisible stitch!
Jump to:
Why You'll Love This Tutorial
- The invisible stitch is a very important stitch to know how to do. It's very useful in many projects from making stuffed animals and bean bags to simply mending toys or clothing with holes in them!
- There are photos of each step showing you clearly how to thread the needle and sew the seam closed.
- By choosing a thread that most closely matches the color of your fabric, you can make this stitch almost truly invisible!
Craft Supplies Needed
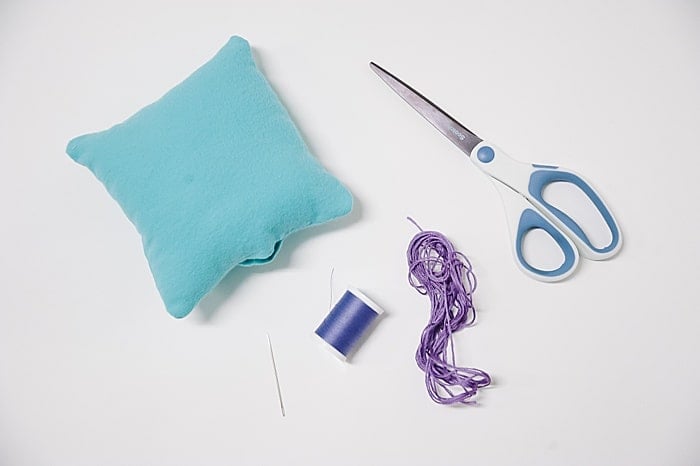
- Needle - Any needle used for hand sewing will work great. Just make sure you can thread the eye of the needle.
- Thread - Choose a thread color that closely matches the fabric you are sewing closed. (I am using embroidery thread in this tutorial ONLY to make it easier to see.)
- Scissors - A craft project staple!
NOTE: I’m using embroidery thread in this tutorial so it’s easier to see. When you’re doing the ladder stitch for your projects, you want to use thread in a color that best matches your fabric, so you have the greatest chance for the seam to actually be invisible!
How to Sew a Ladder Stitch
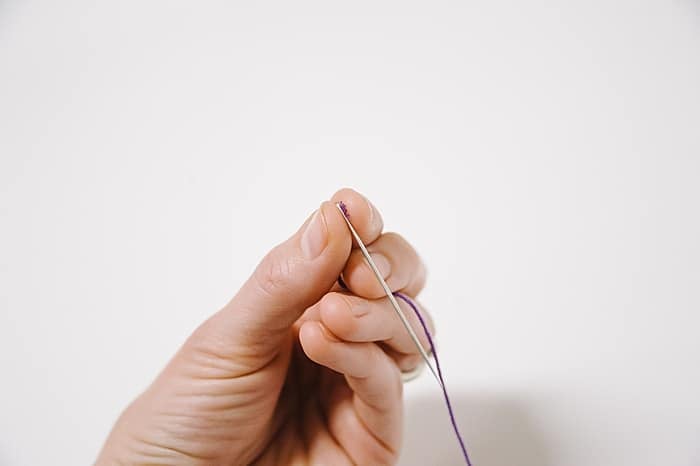
Step 1. Thread your needle.
Step 2. Tie a knot at one end.
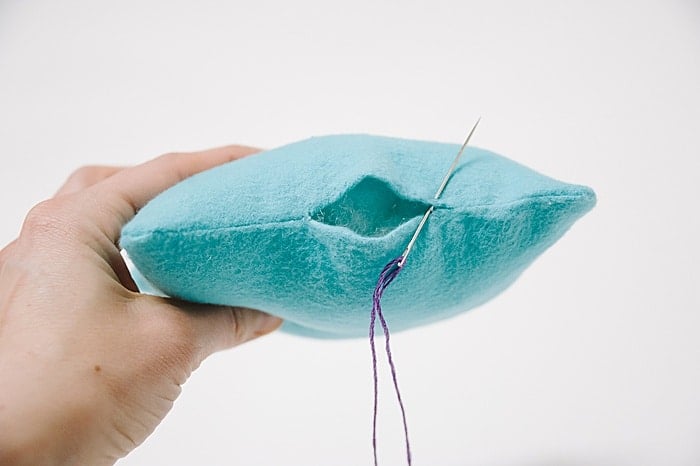
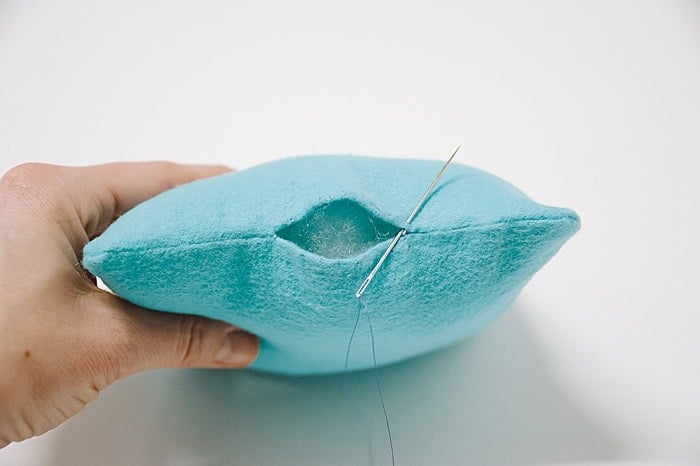
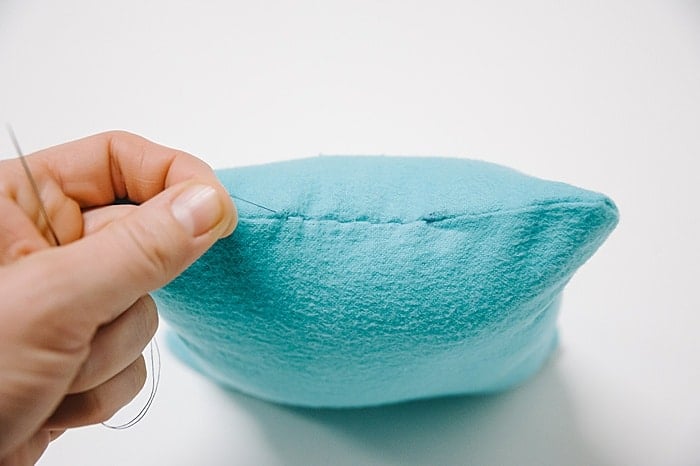
Step 3. Insert the needle on one end of the opening from the inside of the hole in the fabric.
Step 4. Pull tight so the knot is snug against the fabric.
IMPORTANT NOTE BEFORE SEWING: It’s important to note that you are going to be putting your needle into the tunnel or chamber made by the folded fabric of the seam, only going through the outer layer of fabric.
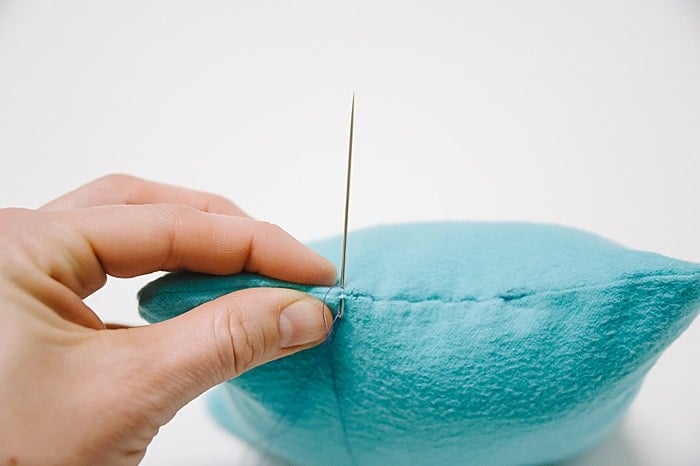
This is an example of what NOT to do; you don’t want to be able to see your needle because that means you have come out of the folded tunnel.
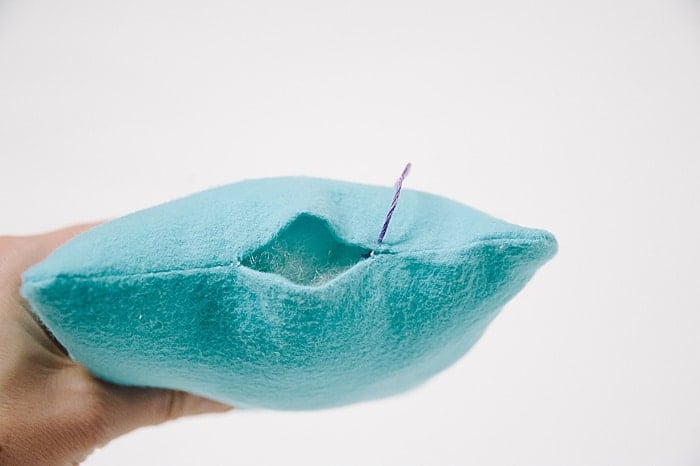
This is an example of what you DO want to do. You want to keep your needle inside the folded tunnel for each stitch.
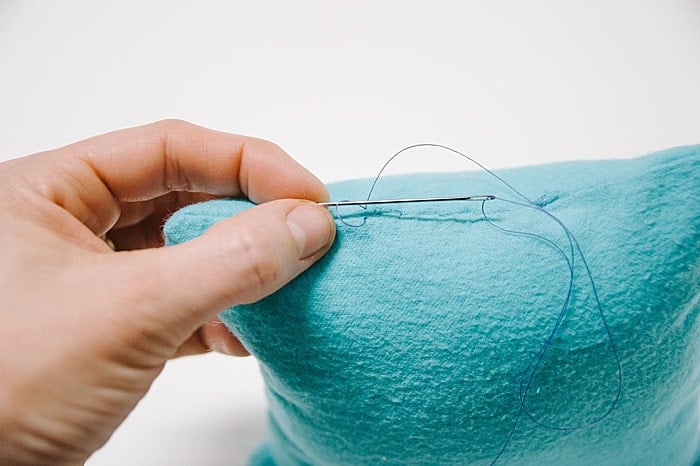
Also, don't pull too tight. You want to keep the stitches loose enough that they begin to form a visible ladder as you sew.
You will pull tight later.
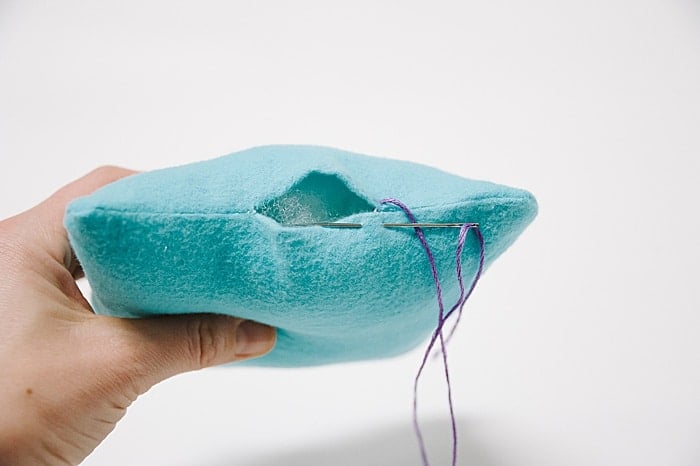
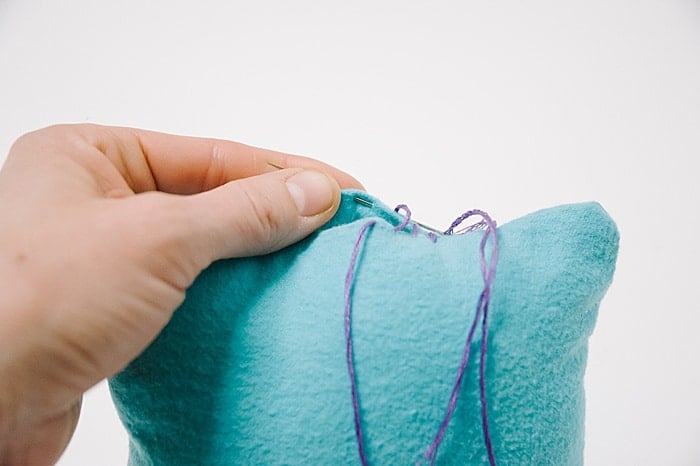
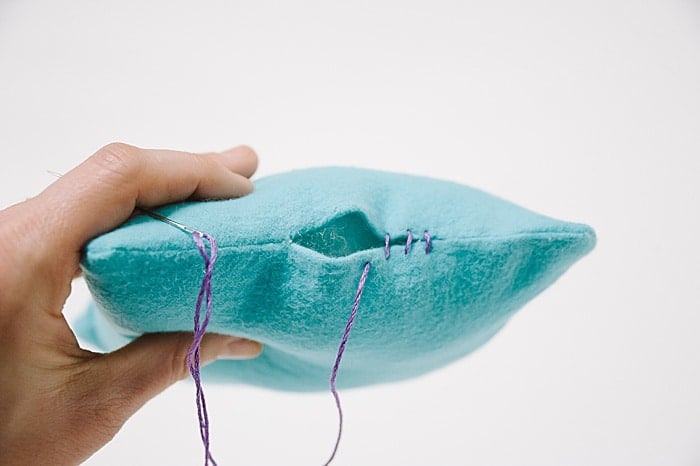
Step 5. Insert the needle in and out of the fabric directly across from the starting point.
Remember, your needle should only go through the TOP layer of folded seam fabric.

Step 6. Pull the slack out.
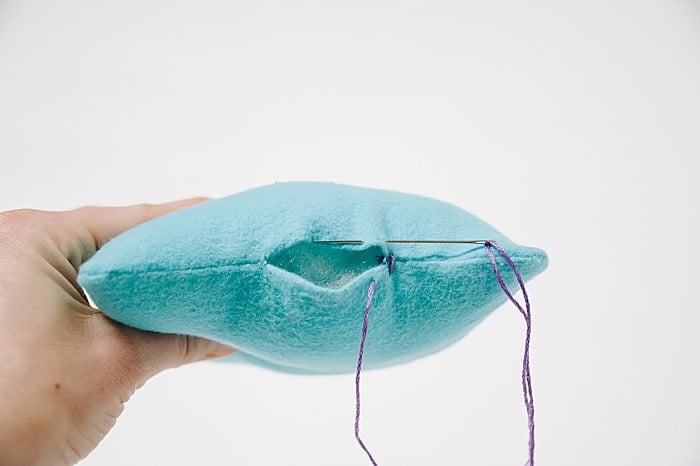
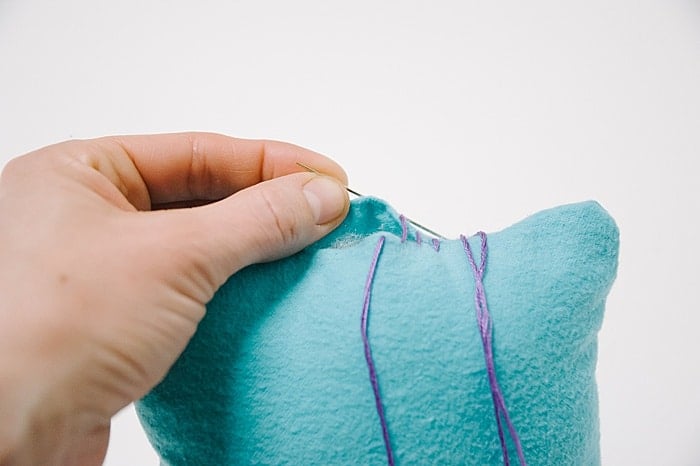
Step 7. Insert the needle across from where you are, in and out of the top layer of fabric.
Step 8. Gently pull the slack out.
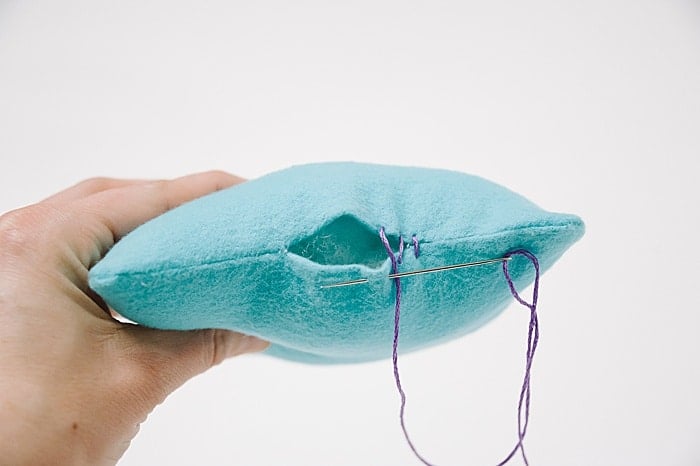
Step 9. Insert the needle across from where you are, in and out of the top layer of fabric again.
Step 10. Gently pull the slack out.
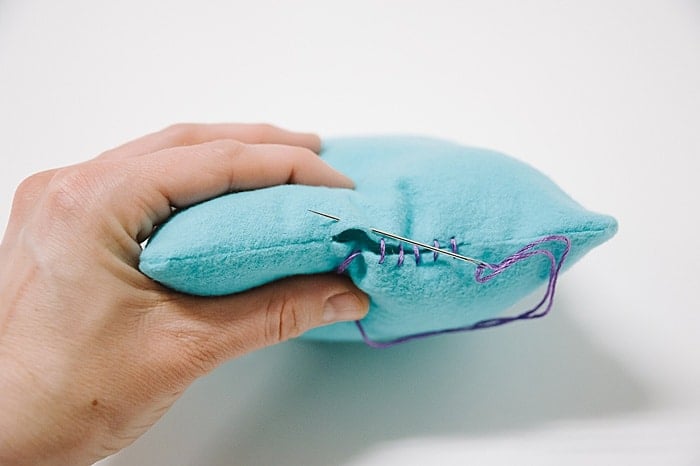
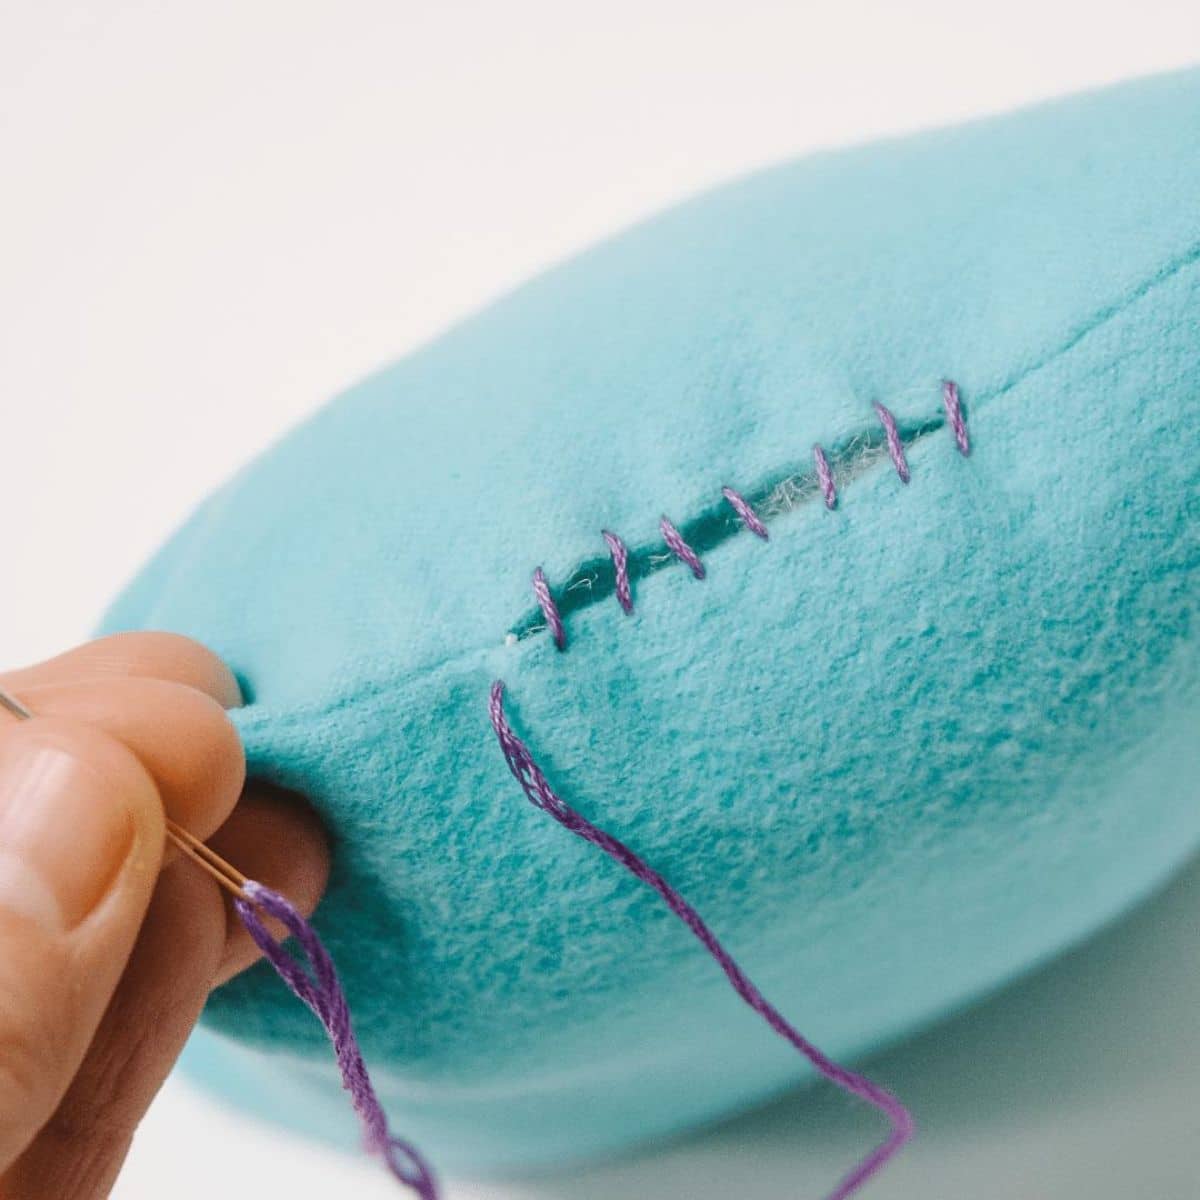
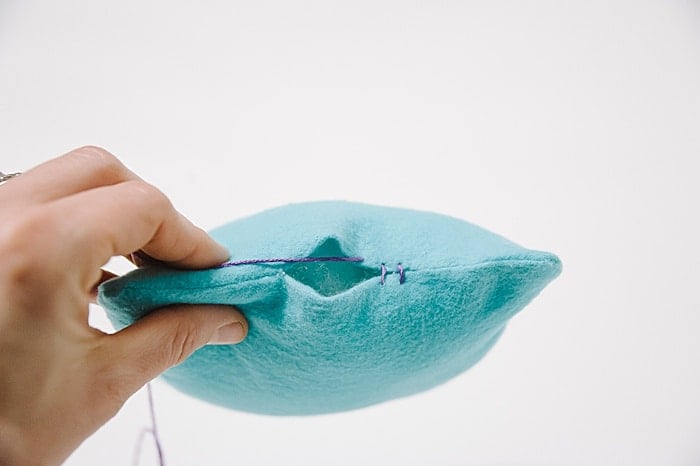
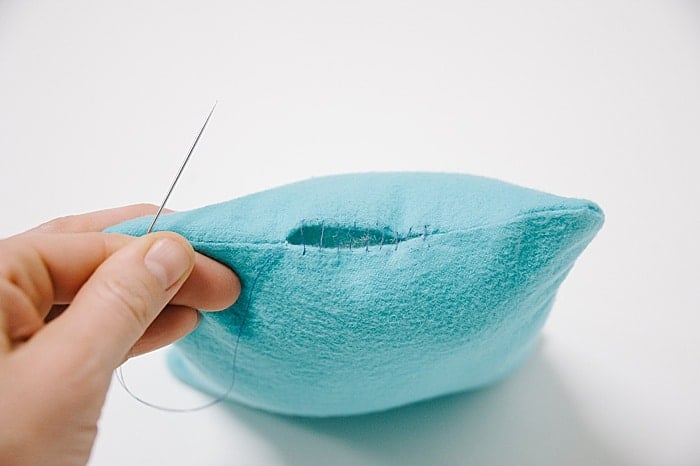
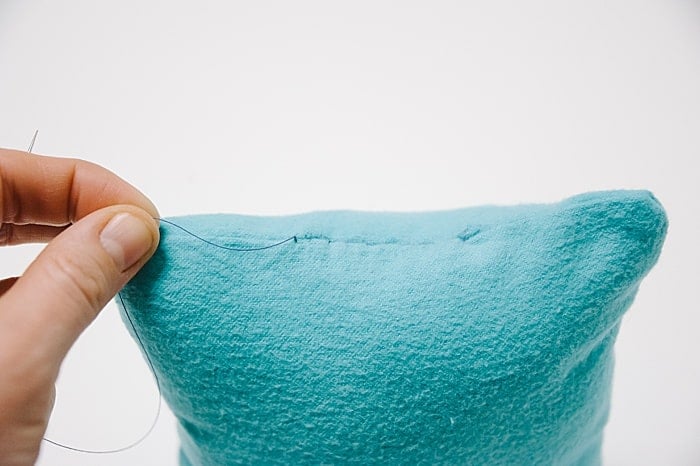
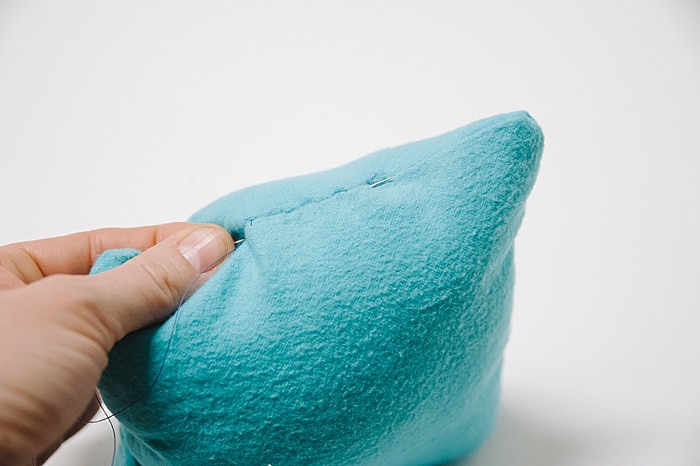
Step 11. Repeat the ladder stitch until you've done enough stitches to cover the whole length of the hole.
Step 12. You'll see a ladder of stitches form.
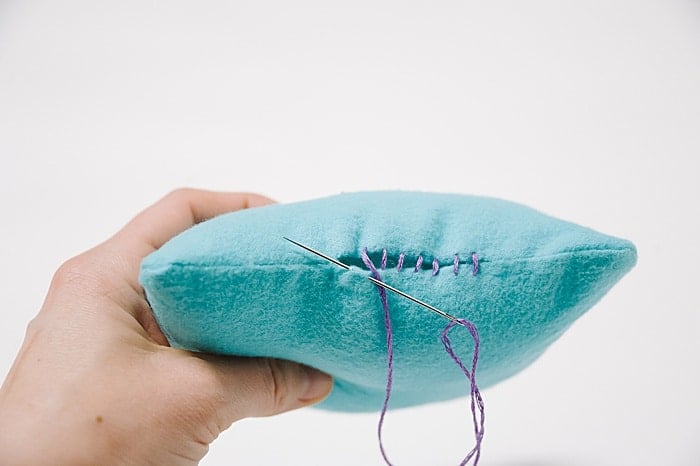
Step 13. Continue until the entire hole has been sewn with an invisible stitch.
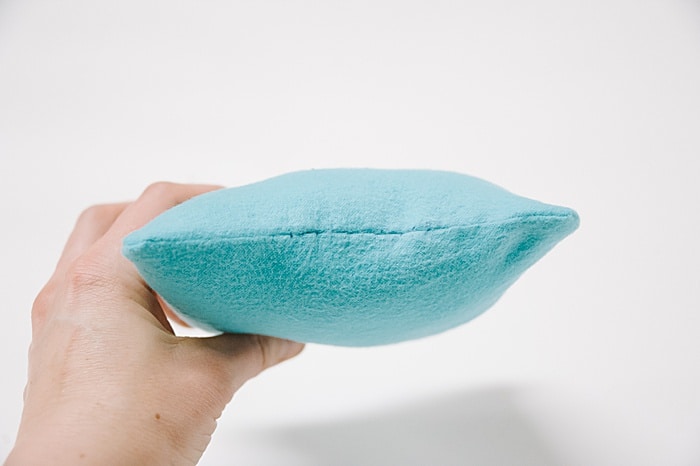
Step 14. Pull gently but firmly and watch the hole close up, and the blind stitches disappear.
Continue below to see how to knot the string and finish off the seam.
NOTE: Be careful not to pull too tight. This will cause bunching, or could even cause your string to break.
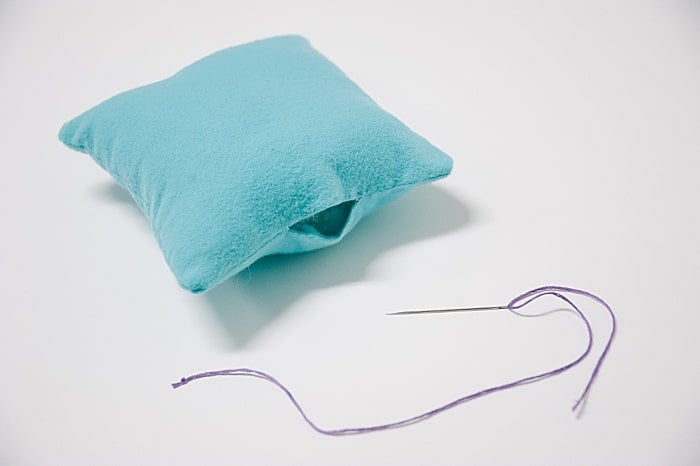
How to Sew an Invisible Stitch with a Needle and Thread
Let’s look at this process using a needle and purple thread:
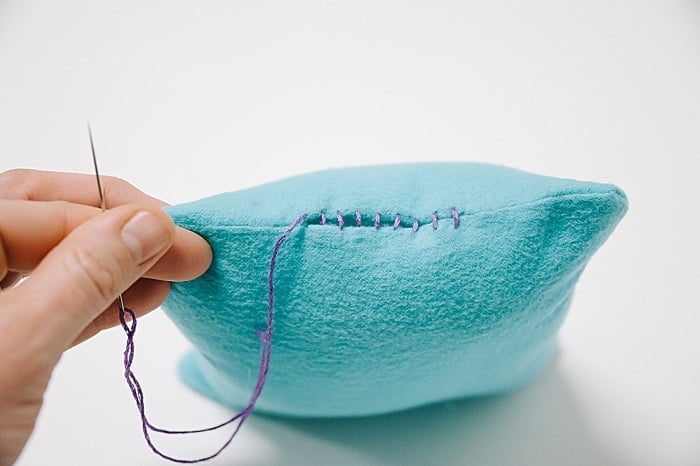
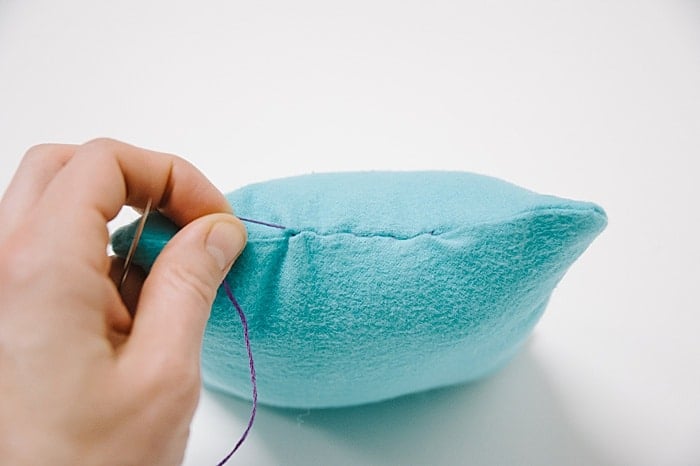
Step 15. To tie a knot at the end and finish off the seam, make a small stitch and pull most of the slack out, leaving a small loop of thread.
Step 16. Pass the needle and thread through the loop.
Step 17. Pull the slack out gently. This will form a small knot along the seam.
Repeat if necessary.
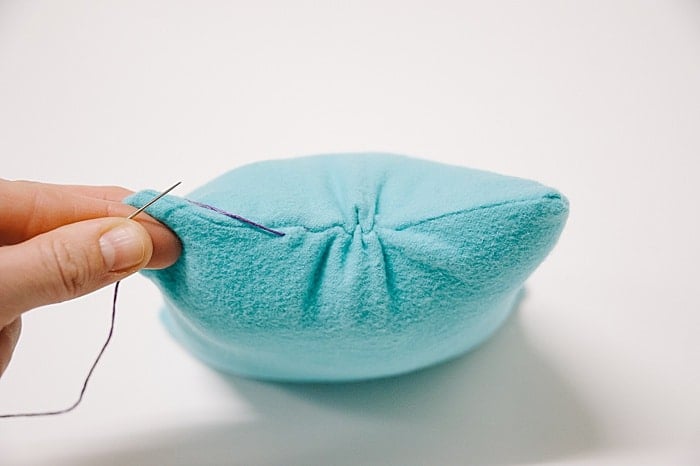
Step 18. Stick the needle back into your fabric through the seam near the knot, and out about an inch away.
Step 19. Pull the thread tight. The knot you just sewed will pull back into the seam, helping to hide it.
You can see my purple stitches, but as long as you use a thread color that matches the fabric, the stitches should be nearly invisible!
Common Questions
Sewing thread is the best type of string to use when you're trying to sew an invisible stitch because it is thin and will be the least visible.
But the best thing you can do to try to hide the stitch is to match the color of the thread as closely as possible to the fabric you're sewing. If the thread matches, it will be very hard to see when the seam is closed up.
The invisible ladder stitch is most often used to close up a hole in something like a pillow, stuffed animal, or other three-dimensional object. Anytime you want to mend or close up a hole in a seam where you don't want to see the stitching, the ladder stitch can come to your rescue!
If you are brand new to sewing, we have a tutorial showing you how to thread a needle easily and quickly.
To make threading a needle easier, make sure the needle you are using has an eye that is big enough. Some needles have the tiniest eyes which make it next to impossible to thread. You don't want a jumbo embroidery needle or anything huge, but your sewing needle should have a decent-sized eye so you can thread it without issue.
The other trick is to use a needle threader tool to make it easier. As long as the eye is large enough, the needle threader can help.
If you take a store-bought stuffed animal and look at its belly or back, chances are you will be able to see a section that looks slightly different from the rest; a section that has the back-and-forth appearance of a hidden ladder stitch.
THIS is how they were able to stuff the toy, and then sew it up without any ugly, visible seams!
Once you learn how to sew a ladder stitch, you can mend stuffed animals, sew holes in clothing, and finish off your craft projects like these patchwork stockings in a way that creates a hidden closing stitch most people will never be able to see!
It’s as close to an invisible stitch as possible!
More Fabric Crafts You'll Love


---
⭐️🧶 Did you enjoy this craft and want to see more like it? ✂️ Join our FREE email community and get inspiring craft ideas sent right to your inbox! 🧵 ⭐️
---

How to Sew a Ladder Stitch | Invisible Stitch Tutorial
Materials
- Needle
- Thread
- Scissors
Instructions
- Thread the needle.
- Tie a knot at one end.
- Insert the needle on one end of the opening from the inside of the hole in the fabric.
- Pull tight so the knot is snug against the fabric.
- It’s important to note that you are going to be putting your needle into the tunnel or chamber made by the folded fabric of the seam, only going through the outer layer of fabric.
- Insert the needle in and out of the fabric directly across from the starting point.Remember, your needle should only go through the TOP layer of folded seam fabric.
- Pull the slack out.
- Insert the needle across from where you are, in and out of the top layer of fabric.
- Gently pull the slack out.
- Insert the needle across from where you are, in and out of the top layer of fabric again.
- Gently pull the slack out.
- Repeat the ladder stitch until you've done enough stitches to cover the whole length of the hole.
- You'll see a ladder of stitches form.
- Continue until the entire hole has been sewn with an invisible stitch.
- Pull gently but firmly and watch the hole close up, and the blind stitches disappear.Continue below to see how to knot the string and finish off the seam.
- To tie a knot at the end and finish off the seam, make a small stitch and pull most of the slack out, leaving a small loop of thread.
- Pass the needle and thread through the loop.
- Pull the slack out gently. This will form a small knot along the seam.Repeat if necessary.
- Stick the needle back into your fabric through the seam near the knot, and out about an inch away.
- Pull the thread tight. The knot you just sewed will pull back into the seam, helping to hide it.You can see my purple stitches, but as long as you use a thread color that matches the fabric, the stitches should be nearly invisible!


Leave a Reply