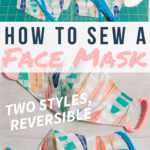
LEARN HOW TO SEW A DIY FACE MASK WITH THIS EASY, STEP-BY-STEP TUTORIAL. CHOOSE FROM TWO DIFFERENT FACE MASK STYLES (TIE BACK OR EAR LOOPS) AND GET A FREE DOWNLOADABLE PATTERN TO MAKE IT EXTRA EASY!
Who would have thought wearing a face mask would be our new normal?
It's quickly becoming obvious it's going to be that way for awhile.
With the supply of manufactured masks severely limited, people everywhere are turning to DIY face masks instead.
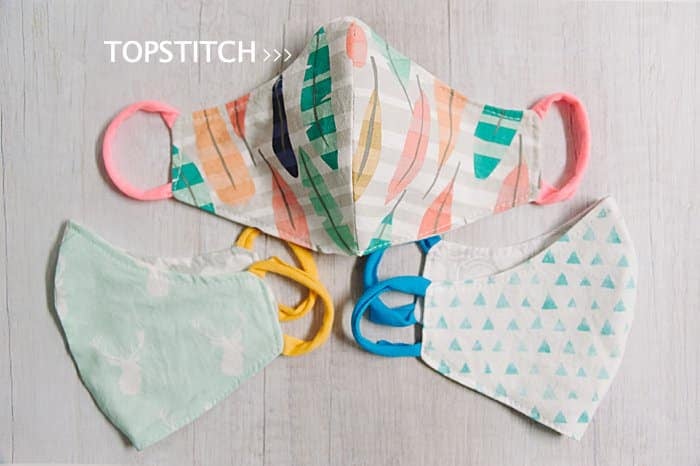
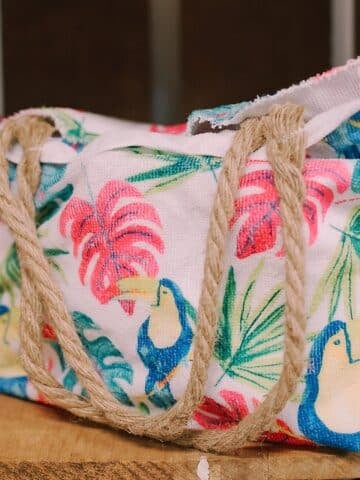
Today, we’re making two different styles of reversible fabric face masks: one version with ties that go around the head, and one version with ear loops.
No matter what your sewing skills are, you CAN sew a DIY face mask like these!
BEFORE WE GET SEWING:
- Can't sew? Here's a No-Sew Face Mask tutorial for both a no-sew tie back mask and a no-sew ear loop mask.
- Rather support a maker and buy a handmade facemask instead? There are tons available on Etsy!
- If you're feeling extra ambitious, you can whip up a DIY scrunchie in matching fabric while you're at it! If we're going to be wearing masks for the future, might as well have a little fun with it, right?
- If you're here looking for a KID'S facemask pattern, I don't have a designated kids' sized mask pattern; there's been some confusion about this. However, many people have shrunk this adult pattern before printing (try something like 80% as a starting point) or used a bigger seam allowance to make the mask smaller for kids. The most important part of making a child-sized mask is to make sure the ear loops are tight enough to make the mask tight on their face. Make the fabric mask portion a little smaller than an adult size, get the ear loops tight, and things should work out well!
Ok, let's get started!
Here’s how to sew a DIY face mask!
How to Sew a DIY Face Mask | Reversible Facemask, Two Styles
Step 1. Gather Supplies.
Supplies Needed:
- Fabric
- Ties (I am using fabric ties made from old t-shirts. You can make ties from t-shirts or any knit fabric, or use elastic, ribbon, string, or even cut-open elastic hair ties.)
- Scissors
- Rotary Cutter and Cutting Mat
- Quilt Clips or Pins - (I'm finding myself reaching for my quilt clips more often these days. I LOVE them; they're so handy!)
- Iron
- Face Mask Patterns (FREE in the Mama Makers Club resource library.)
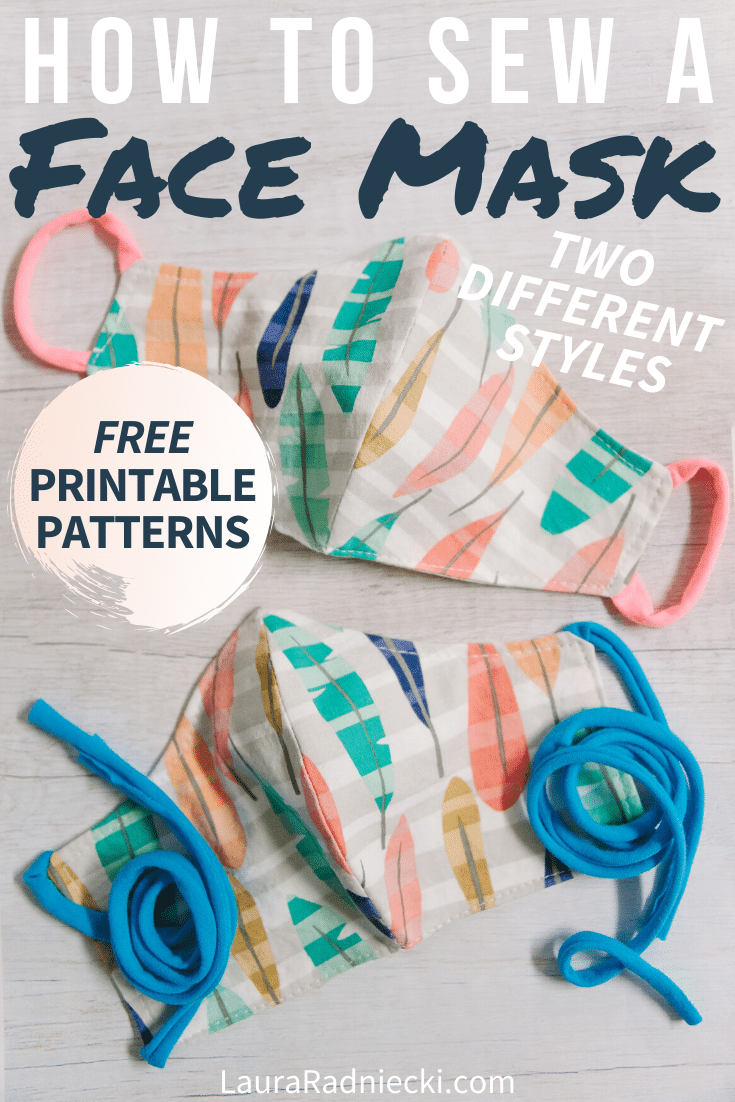
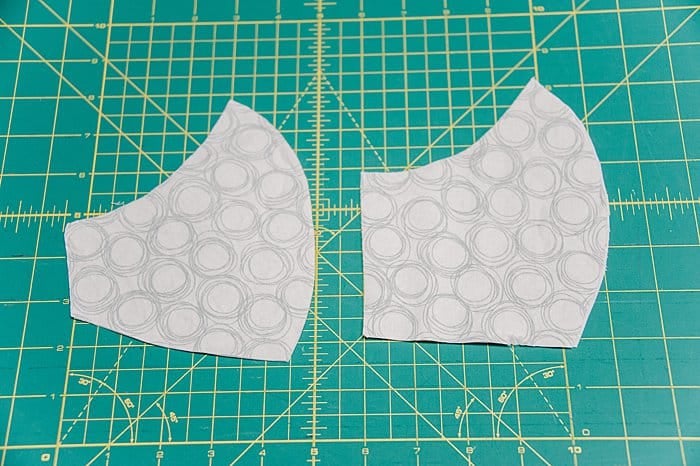
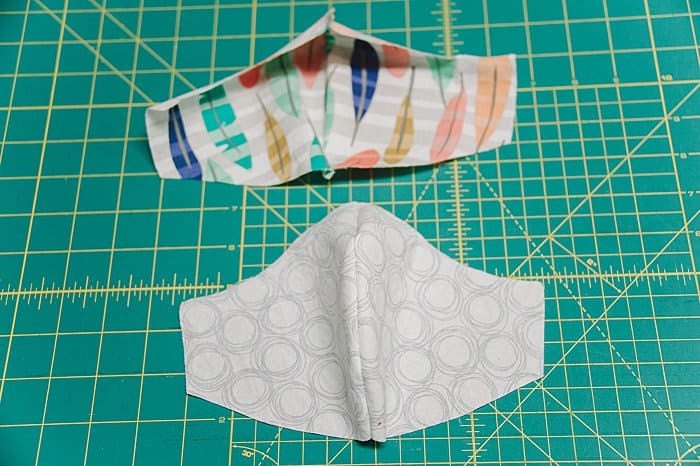
Step 2. Fold fabric, cut out fabric pieces: you need 2 OUTER fabric, and 2 INNER fabric pieces.
The first step is to determine what fabric(s) you want to use for your face masks.
It's recommended you use different fabrics for the outside vs. inside, so you are able to remember which is which. You DON'T want to accidentally put an unwashed mask on with the "contaminated" side touching your face.
(However, the best practice is to wash the mask after each use, so this really shouldn't be an issue. If you want it to be reversible and give you multiple fabric options, choose two different fabrics.)
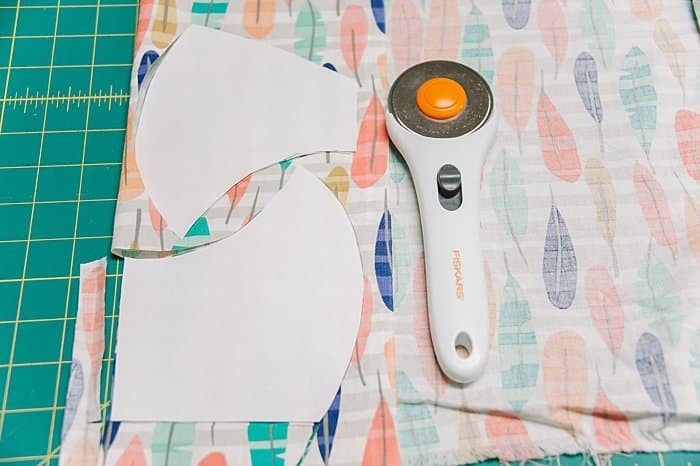
For each mask, you need FOUR pieces of fabric.
Two that will make up the outside of the mask, and two that will make up the inside.
Folding the fabric over before cutting will make it faster, and ensure the pieces are correct for assembly.
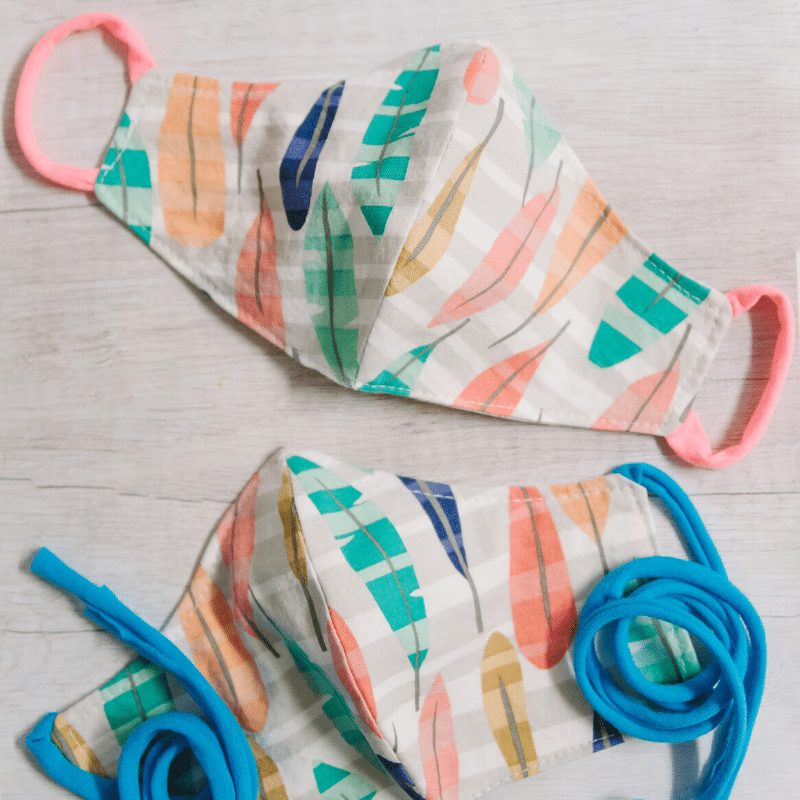
(Pictured below is the outer fabric, and I'm cutting fabric for TWO styles of masks here. The top is the ear loop style, and the bottom is the tie style.)
NOTE: (If you want to add an optional third layer for extra protection, you would need two more pieces of fabric for a total of 6.)
(Two outside fabric pieces of each mask style.)
(Two inside fabric pieces of each mask style.)
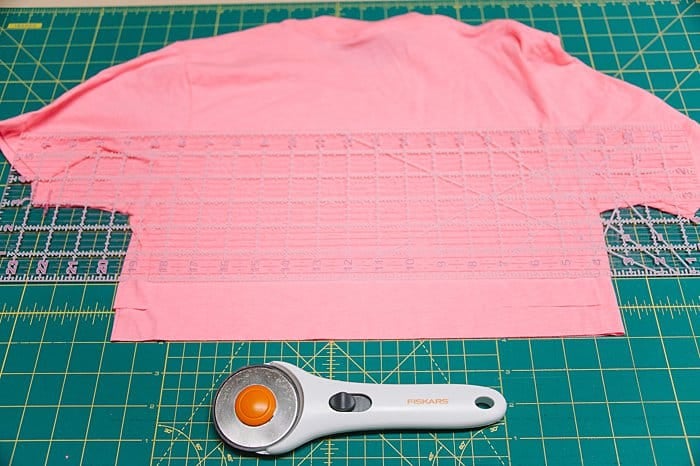
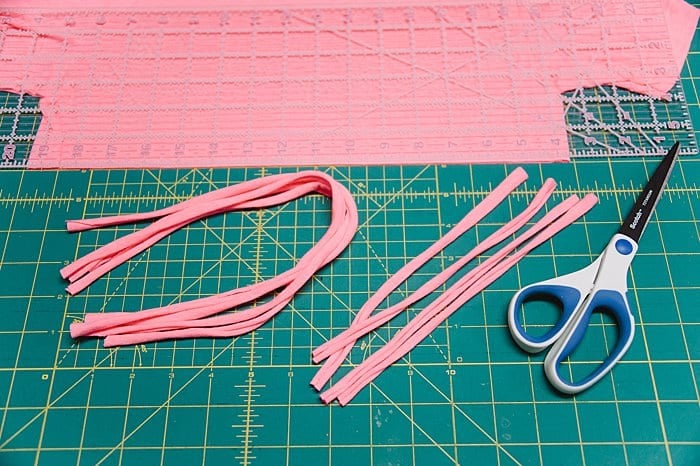
Step 3. Cut fabric ties from an old t-shirt, knit fabric, or use ribbon or elastic.
For the ties and ear loops of my face masks, I wanted them to be as comfortable as possible.
I decided to use the fabric of old t-shirts to make them.
How to Make T-Shirt Yarn Ties from Old T-Shirts
A) Cut 1" strips from a t-shirt, or from knit fabric.
B) Cut off any seams.
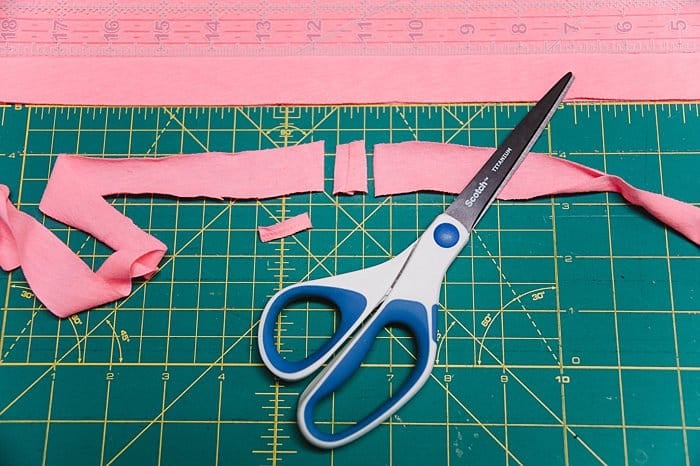
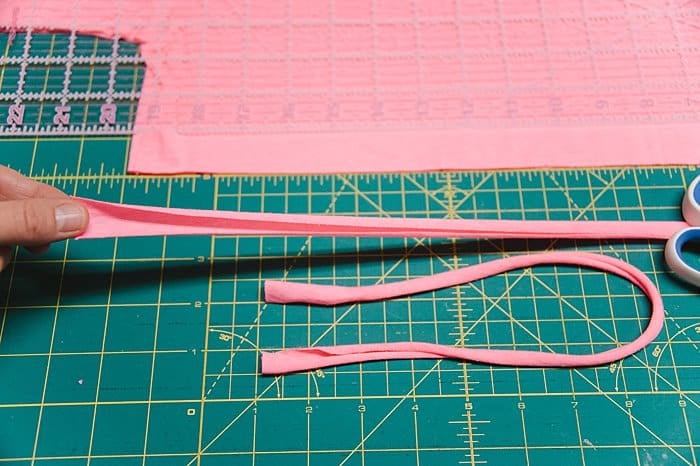
C) Pull on the 1" fabric strips to make them curl inward.
The more you pull, the tighter they will roll into themselves.
D) Repeat until you've made enough ties and ear loops for your masks.
Ties should be at least 14" long.
(The two ties that go around the top of the head will need to be longer than the two that go around the back of the neck. You can trim later; it's best to start long and shorten as you go.)
If you are going to make ear loops instead of ties, they only need to be 5-6" long.
Each DIY face mask needs:
- 2 outer fabric pieces
- 2 inner fabric pieces
- 4 ties OR 2 ear loops.
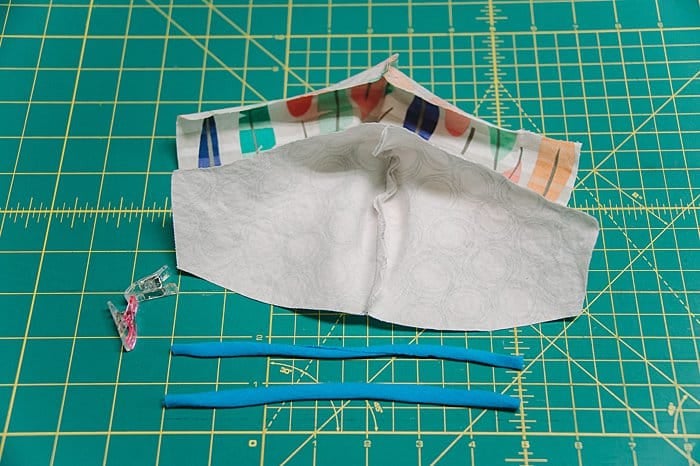
Step 4. Put fabric pieces RIGHT SIDES TOGETHER and sew along big curved edge, using ¼" seam allowance.
The next step is to stack your two outer fabric pieces on top of each other, with the right sides together.
Do the same for the two inner fabric pieces: stack them with the right sides together.
NOTE: If you try to stack with the right sides together and can't, it likely means you didn't fold your fabric in step 2. You need two opposite-shaped pieces that can be lined up with the right sides together, in order to sew the face mask layer correctly.
Using a ¼" seam allowance and backstitching at the beginning and end, sew along the big curved edge.
Repeat for both outer and inner fabric stacks.
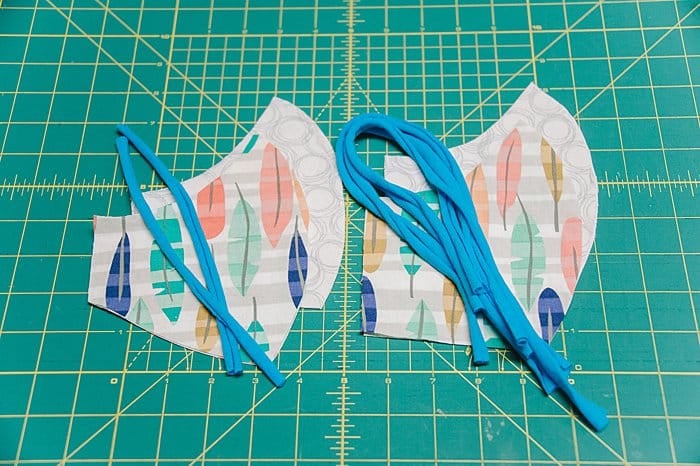
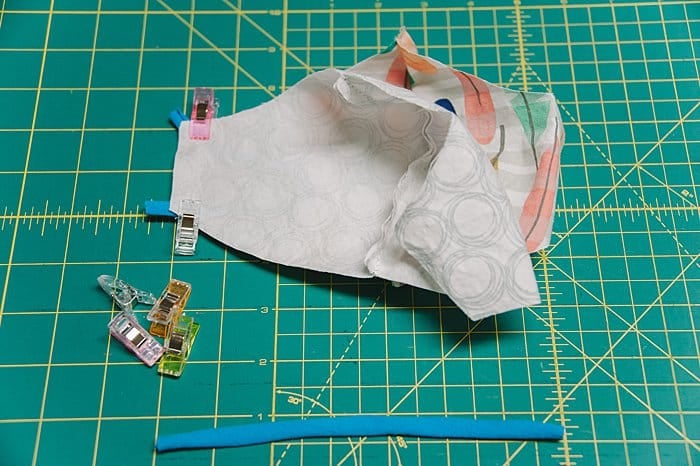
Step 5. Assemble mask pieces, and clip ties in place to prepare for sewing.
Now, you can open up the stacks and see how your facemask will begin to take shape.
It's time to assemble the mask pieces.
How to Sew a DIY Face Mask with Ear Loops
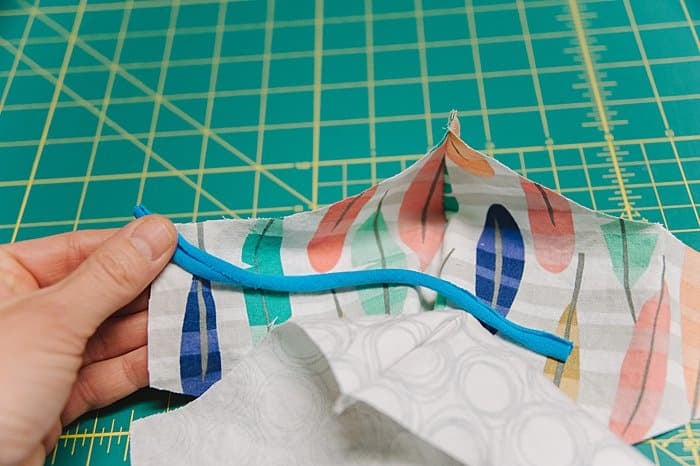
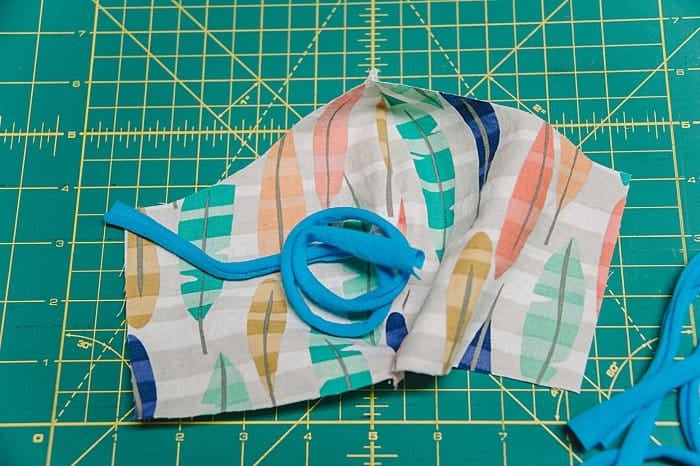
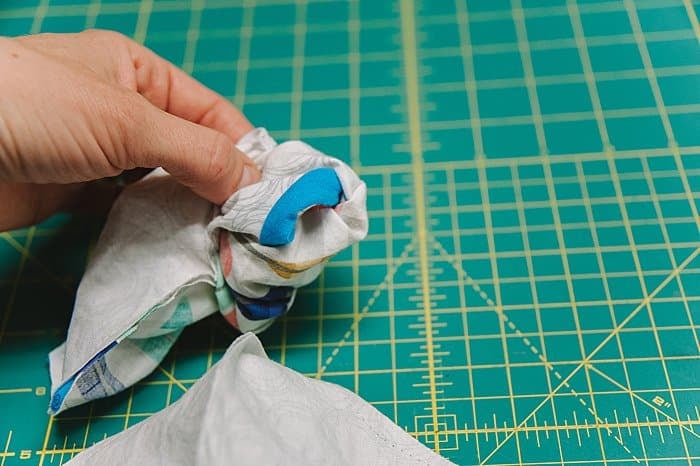
A) Make the outer fabric piece concave, like a bowl. (See the feather fabric pictured below.)
B) Make the inner fabric piece convex, so it sticks out toward you. (See the circles fabric below.)
C) Flip the inner piece over so it will fit into the outer section, as pictured below.
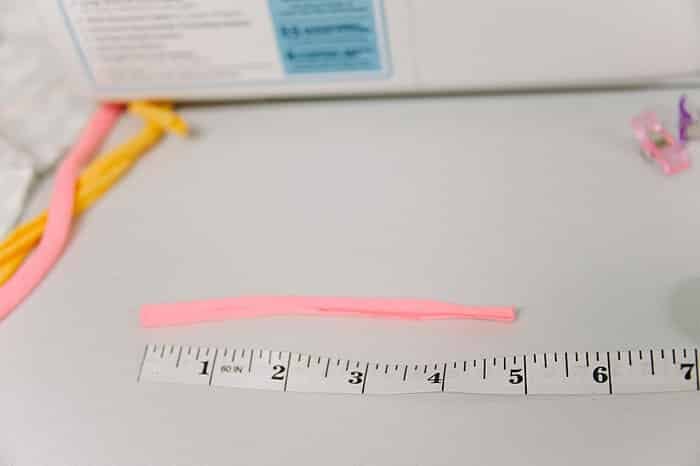
D) Gather two 5" pieces of fabric ties for the ear loops.
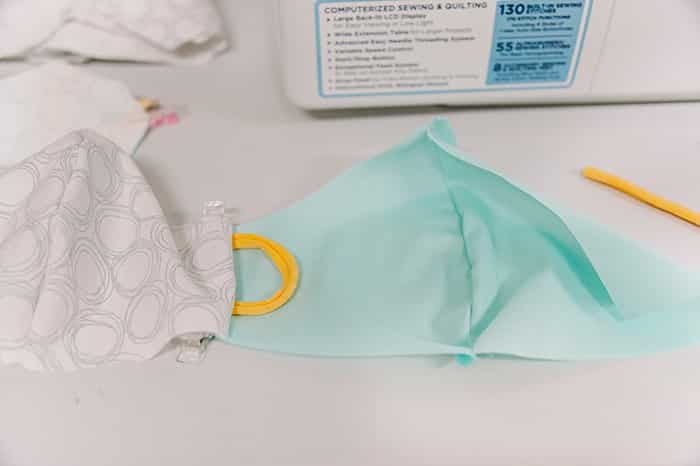
When I made my first ear loop face mask, I used ear loop ties that were way too long for me (the blue pictured above.)
I ended up having to cut the elastic and made the ear loops smaller to get it to fit me.
Using 5" pieces seems to be a good length when making ear loop facemasks.
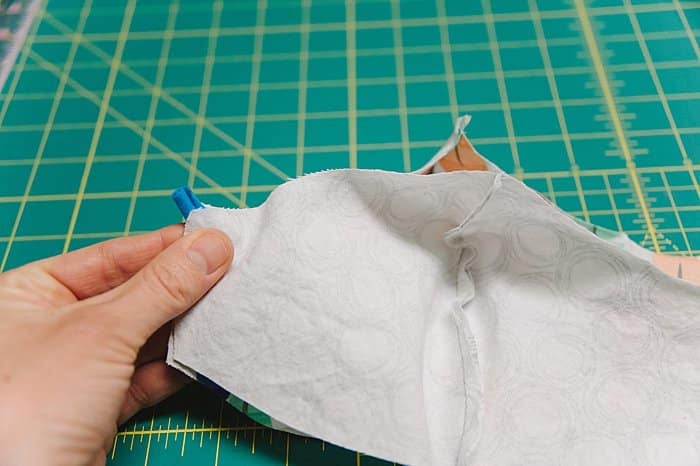
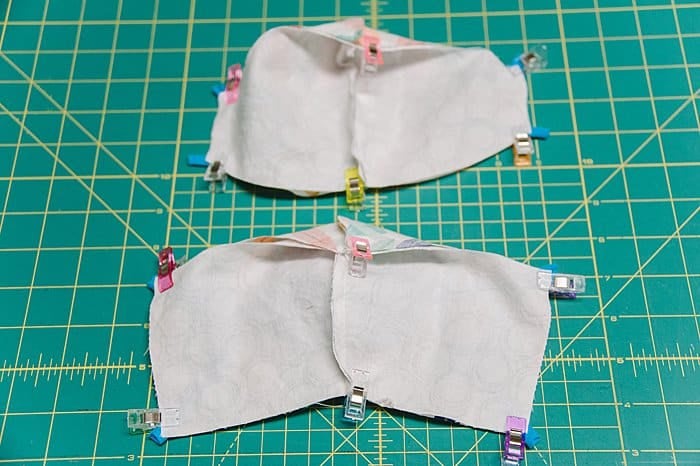
E) Position one loop end in a corner of the outer fabric of face mask.
F) Line up the inner fabric layer's corner with the loop end sandwiched in between.
Clip in place with a quilting clip (or pin.)
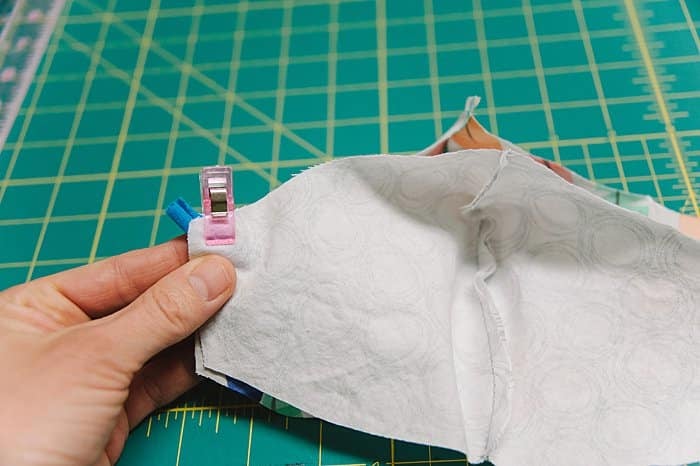
G) Secure the other loop end to the other corner as pictured below. Clip in place.

NOTE: As I sewed my face masks, I noticed it worked best to secure the loops along the edge of the face mask, as opposed to the corners like I initially thought.
In the example above with the blue loop, the TOP is coming out of the corner which is not ideal, and the BOTTOM is coming out the side which is best.
(Pictured below: yellow ties coming out the edge of the face mask makes for the easiest assembly and best fitting facemask.)
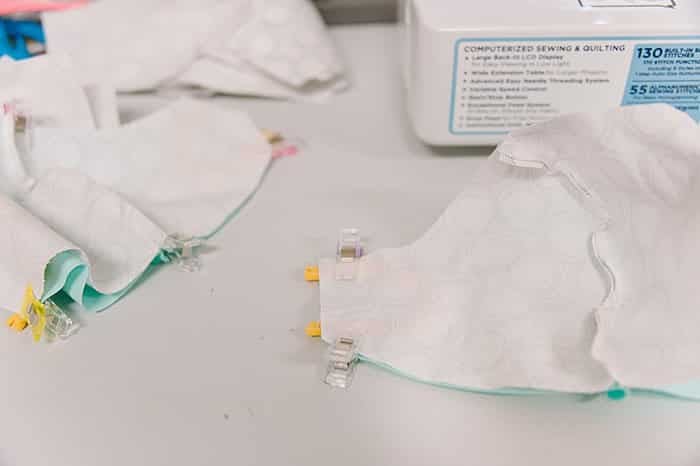
H) Repeat stacking and securing the other ear loop to other side of the face mask.

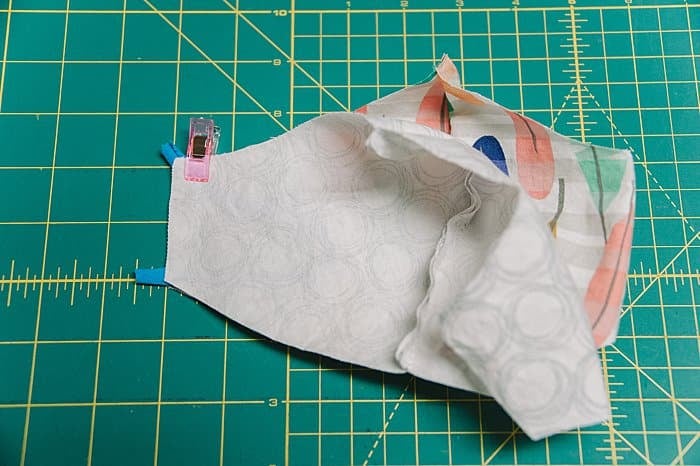
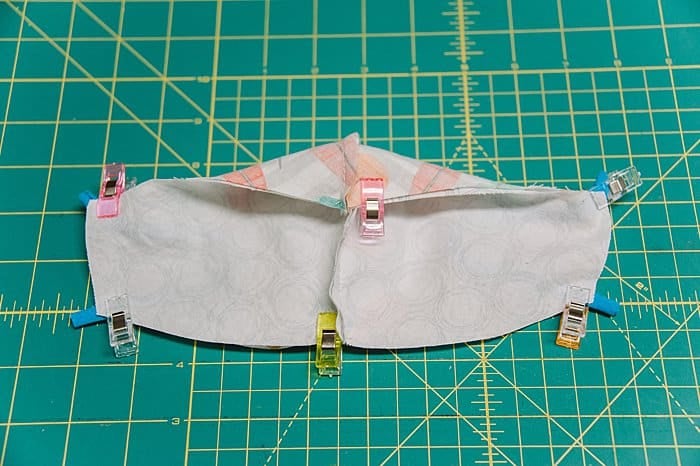
I) Line up seams of two layers at the top and bottom of the face mask, and clip at each spot to hold in place.
- - - - -
How to Sew a DIY Face Mask with Four Ties
The process of attaching the ties is the same for a face mask with four ties, except you work with each of the four ties separately.
Align one end of a tie to a corner, making sure the rest of the tie is placed in the middle of the face mask "bowl" for assembly.
Clip in place.

Repeat for all four corners, and clip the seam together at the top and bottom.
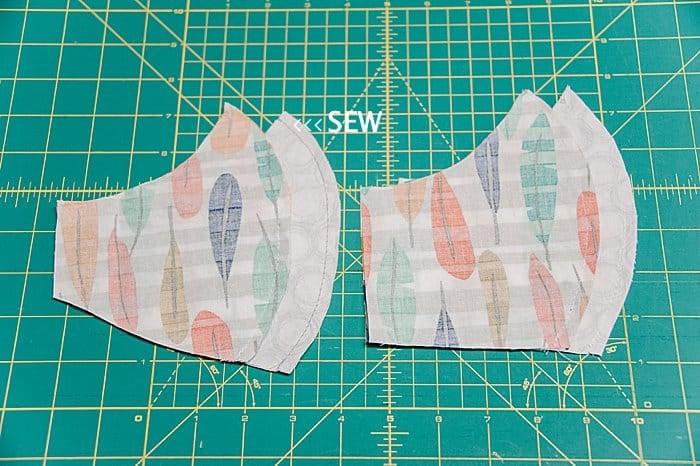
Your face masks are assembled, and ready to be sewn together!
Step 6. Sew around perimeter of the mask, except for a 1.5" turn hole at the bottom of the mask.
Along the bottom edge of the facemask, use a ⅜" seam allowance. Use a ¼" seam allowance for the rest of the mask.
Start along the bottom edge of face mask, and sew using a ⅜" seam allowance toward the bottom corner.
Move to a ¼" seam allowance for the sides and top of the face mask.
Continue with a ⅜" seam allowance when you get to the bottom edge again, and backstitch, leaving a 1.5" turning gap.
(By using a ⅜" seam allowance along the bottom of the mask, it makes it much easier to securely close up the turn hole later when you topstitch.)

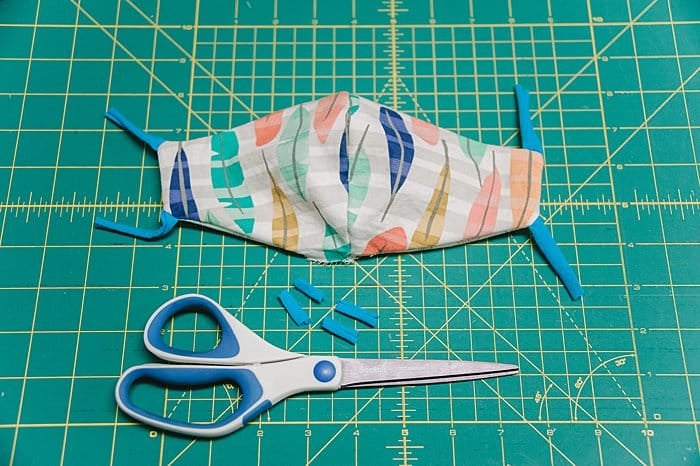
Clip any excess material from the corners, being careful not to cut too close to the stitch line.
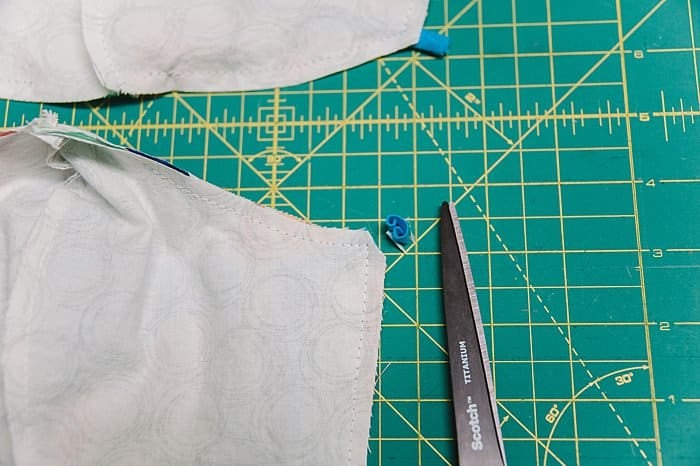
Your face mask is ready to be turned right side out through the turn hole in the bottom!
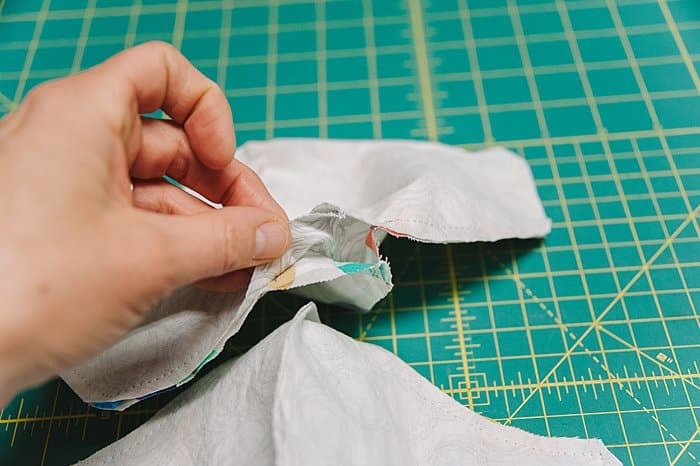
Step 6. Turn mask right side out through the 1.5" turn hole along the bottom edge of facemask.
Carefully turn the mask right side out through the 1.5" open turn hole.
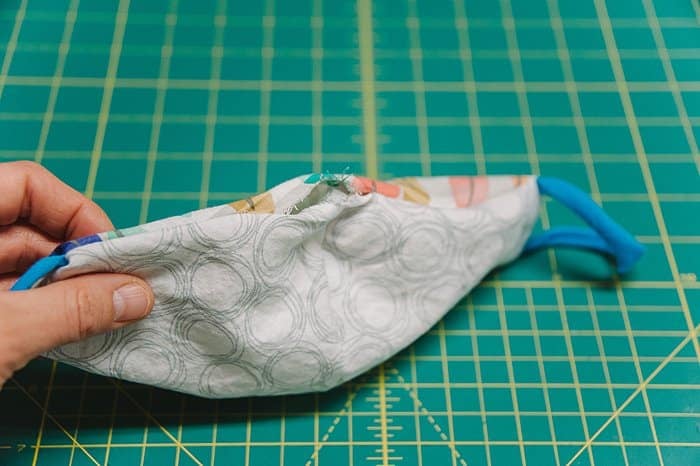

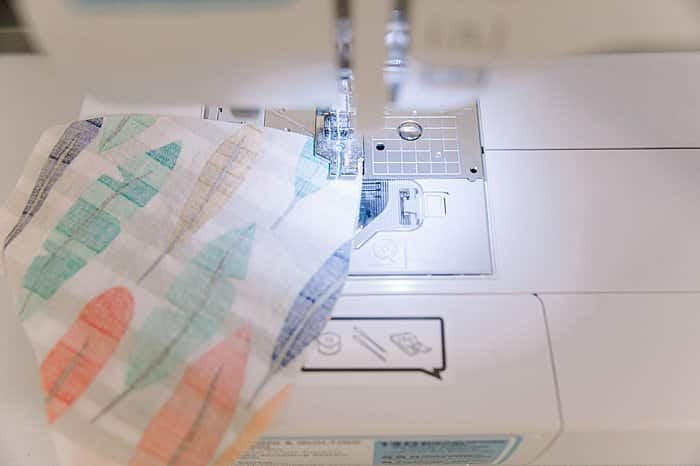
Step 6. Iron flat if desired, and top stitch around perimeter, closing up the turn hole as you go along the bottom edge.
A seam allowance of ⅛" along the bottom edge is helpful to ensure the turn hole is adequately closed and secure.
Now is a good time to iron the mask to help make topstitching a little easier, but it's not required. (I didn't iron these before topstitching.)
Topstitch around the whole mask.
As you go along the bottom edge near the open turn hole, go slow and use a ⅛" seam allowance so you can ensure you close up the hole completely and securely.
If you don't close it up completely and secure the edges of the fabric in the process, it will fray in this spot during washings.
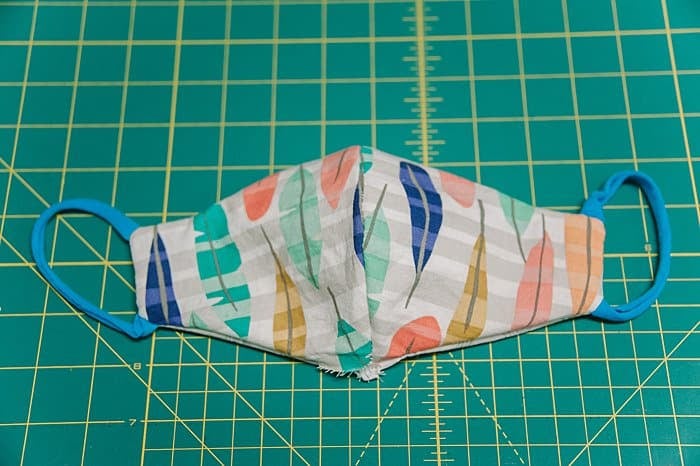
Once you finish top stitching, backstitch and clip your threads; you are DONE!
You can try the face mask on and make sure it fits properly.
If you need to do any adjustments to the elastic of the ear loops, you can clip off excess and hand or machine sew the elastic loops back together.
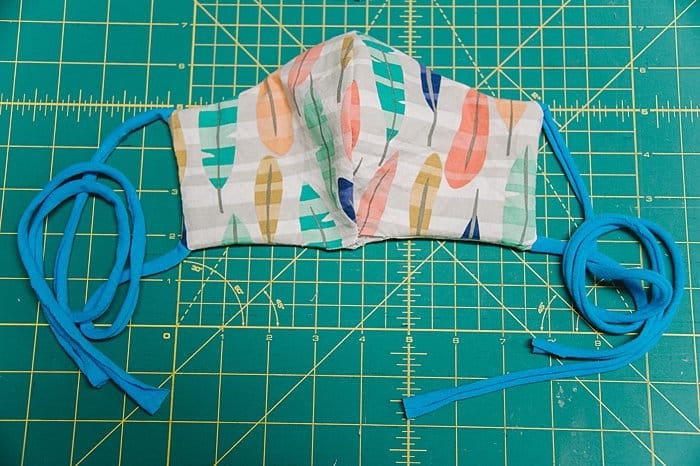
For the face mask with four ties: you can try it on and trim off any unnecessary length from the four ties.
They are both wear-ready!
Who knew we would be sewing DIY face masks with a vengeance, in an effort to defeat a viral enemy we can't see?
Whether you sew a DIY face mask for yourself or someone you know, or perhaps you make them to donate to others or even sell to earn some income, the need everywhere is huge.
With these two styles of fabric face masks, you can choose which one you'd like to make: the four tie version or the ear loop version. And you can make one in mere minutes!
Plus, you can use the fabric of your choice.
If we have to wear face coverings for the near future, we might as well make them pretty and have fun making them, right?
Happy sewing!
- - -
Save the idea for later by pinning the photo below to Pinterest!


Tanya
Hi! Thanks for this, definitely going to give it a try! I want to make 3 layer masks, do I just cut 6 pieces all the same size, and sandwich the extra layer in there?
Laura
Hi Tanya! Yes, that's right! I made some that had a lace overlay, on top of a matching solid for the front, and then a third color for the inside. I actually sewed the lace to the solid first because it had a tendency to slide around. I used as small of a seam allowance as I could. Then I continued on like usual, just with my two-piece front. Hopefully that makes enough sense for you to give it a try! Good luck!
NITA ROBINSON
I am frustrated. These masks have no sizes. Are they going to have sizes going forward? Thank you!
Laura
Hi Nita! I'm sorry you are frustrated. You are correct; this tutorial and the two mask patterns (ear loops or four ties) are one size. They are a general one size fits all adults (and older children); the way to customize the size for adults is mostly with the ear loop length; a man with a larger head might need slightly longer ear loops etc. If you are trying to make a child sized mask, people have been having luck with shrinking the pattern when printing; you could try 80% or so, depending on the age of the child. The other option people are doing is sewing with a larger seam allowance. The main way to customize the size and fit is to tweak the ear loop length, so that's the best way to make it fit smaller kids' heads etc. I hope that helps. The main reason I didn't do different sizes is because it's all a guess and a range anyway. I may work up a designated child pattern, but it's not available yet. As for older kids or teens etc, the best bet is tweaking the print size or increasing the seam allowance. Good luck! I hope that helps.
Cheryl Harris
I am trying to print instructions and it says 39 pages including ads
Do you have a straight out written pattern?
Laura
Hi Cheryl!
Ahh, I understand what you're saying. Unfortunately, no, I don't. My tutorials are so photo-focused, with explaining each step with the photos to illustrate; I don't have text-only instructions.
I'm sorry about that! Hopefully you'll be able to maybe scroll along as you're sewing. Once you do one of them, I'm certain you won't need it for the next one!
Happy sewing!
Laura
LC
Do you have a print scale to make this for kids? print @ 100% is for adults, but what scale should I print for kids 3-7?
Thank you
Laura
Hi LC! I don't have a specific print scale yet; I'm working on that since it's been asked about several times lately. My best guess would be something like 75-80%? The part that makes the most difference is the ear loops. The mask should be smaller than the adult version of course, but it's mostly the ear loops you need to get tight enough to fit a child's head. I would try printing the adult template at 75-80% and see how that works. If you try it, let me know how it fits for kids 3-7!
Nancy Kohl
Do u have the pattern for child size mask that I can download?
Laura
Hi Nancy! At this time, there is no designated child size mask. Many people have had luck either either scaling the pattern down maybe to 80% (might take a little trial and error, depending on the child's age) or sewing with a bigger seam allowance. The part that requires the most customization is the ear loop length; that's what will help it fit a child well. I hope that helps!