
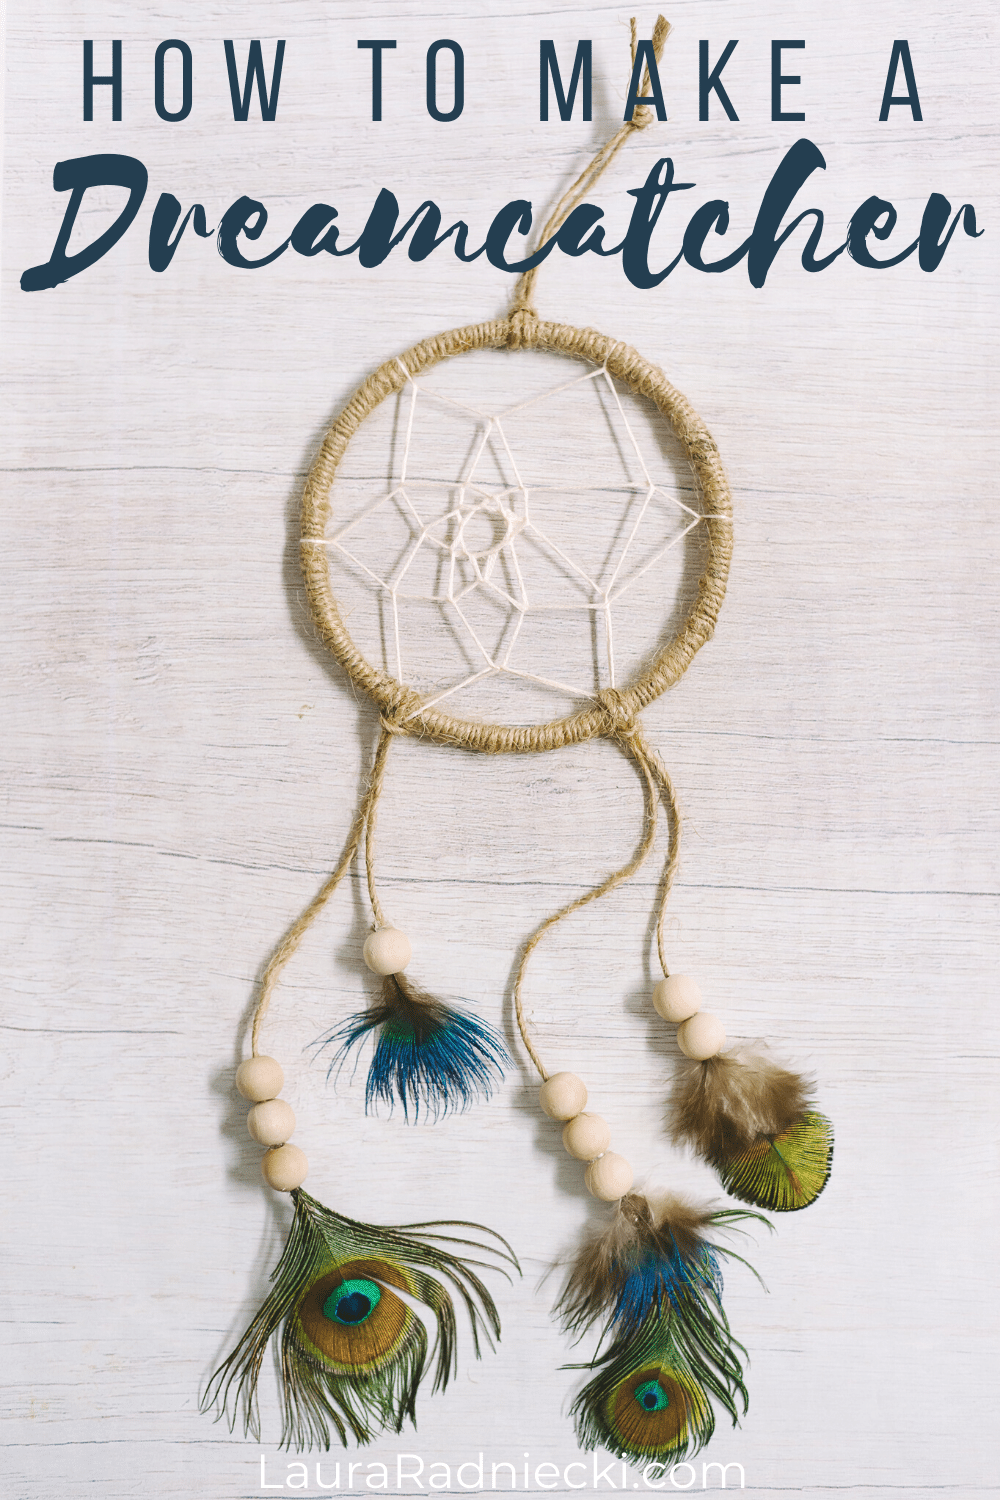
Learn how to make a dreamcatcher and add a unique design element to your home. This DIY craft tutorial for making dream catchers is for you.
I grew up making crafts with my dad.
Every year, we would look through the booklet for our County Fair’s youth craft contest, and plan out which crafts I would make that year.
I credit my love of crafts and the success of this blog largely to those summers spent making crafts to enter into the fair.
One of the projects I made 25 years ago (and I still have hanging in my house all these years later) is a dreamcatcher I made as a kid with my dad's help.
It's beautiful, simple, and meaningful; the perfect project for an adult or child alike.
Today, we’re going to learn how to make a dreamcatcher so you can make one too.
How to Make a Dreamcatcher
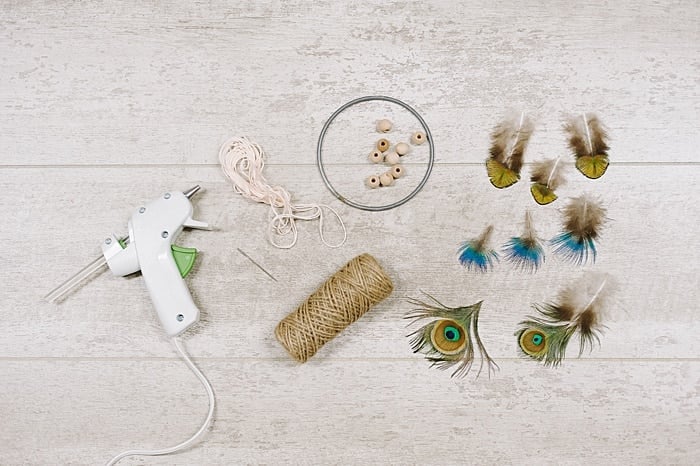
Step 1: Gather Supplies
Supplies Needed:
- Metal Hoop (or embroidery hoop)
- Twine
- Embroidery Floss or string
- Embroidery Needle
- Feathers
- Wooden Beads
- Hot Glue Gun and Glue
- Scissors
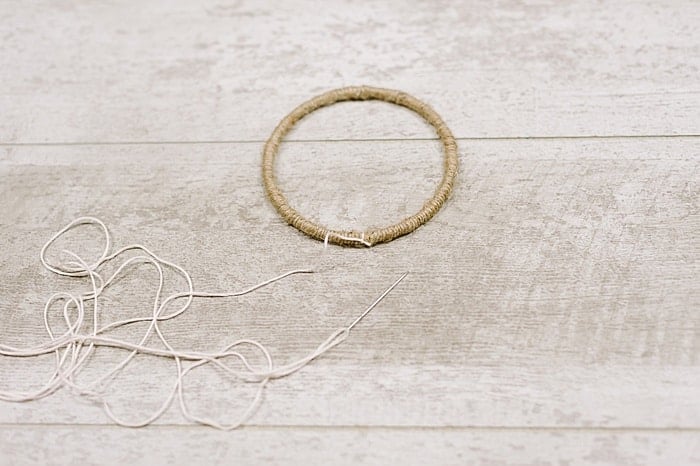
Step 2: Cut a long piece of twine.
Glue the end of the piece of twine to the hoop, and start wrapping it around the hoop.
Put a dot of hot glue every inch to help secure the twine so it doesn't unravel.
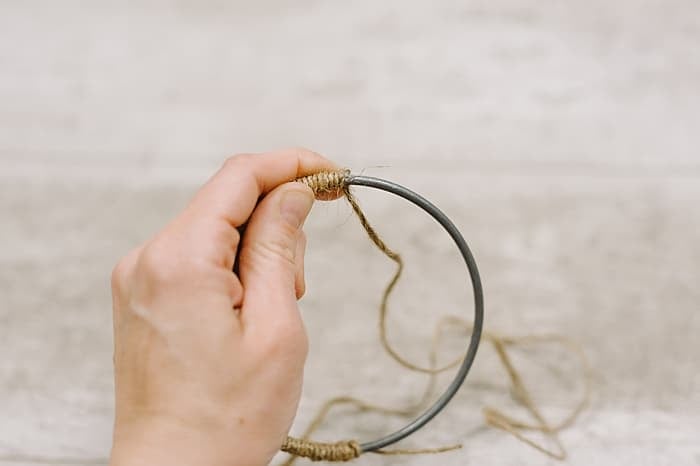
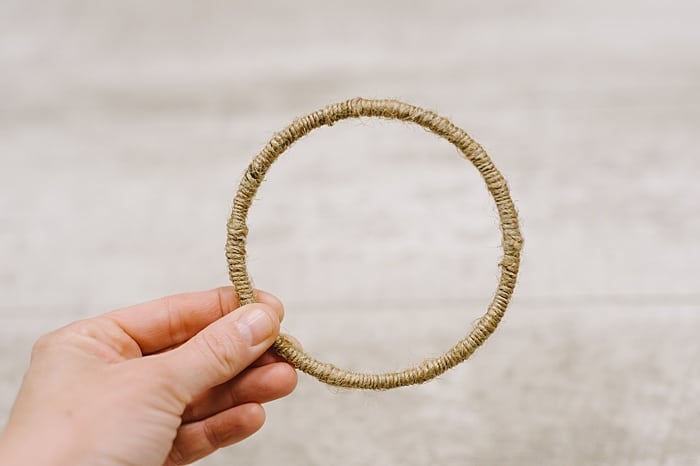
Repeat until the entire metal hoop is covered with twine. Glue to secure the end, and trim excess.
Step 3: Tie the embroidery floss string to the hoop, and using a needle, loop the string around the outer perimeter of the hoop.
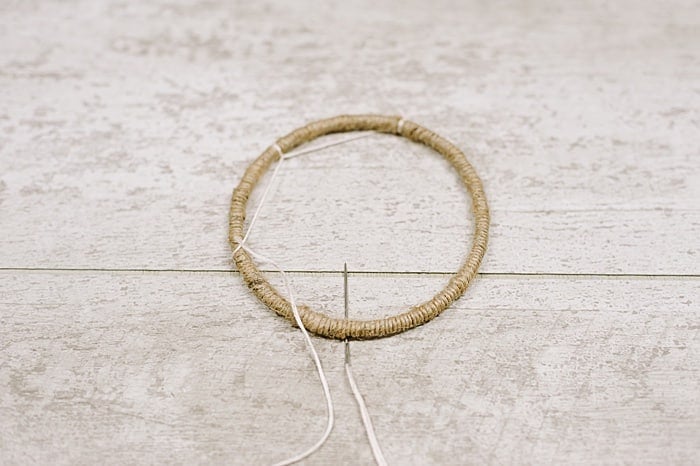
PRO TIP: In order to help anchor the floss to the hoop, you can bring your needle to the inside of the section you just added, like in the photo below.
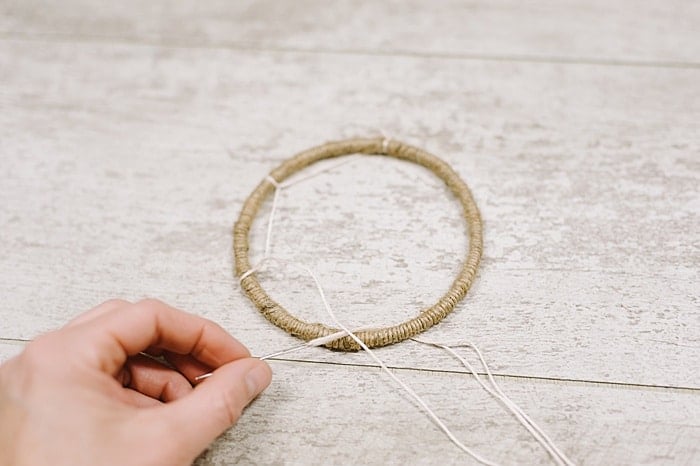
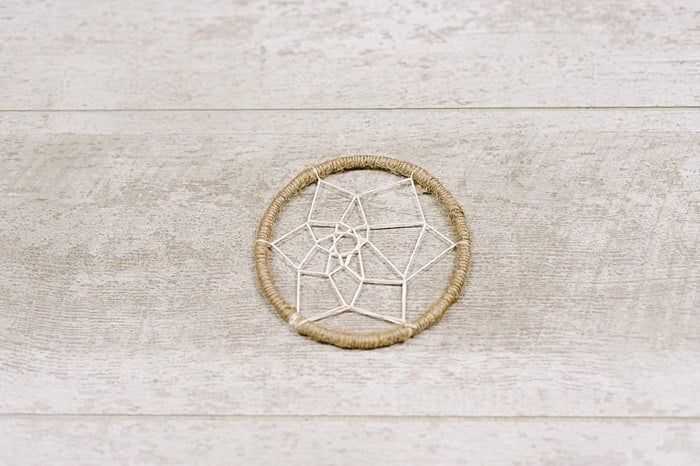
Step 4: Continue to go around the hoop again, looping in the middle of each straight section, creating a spider web with the floss.
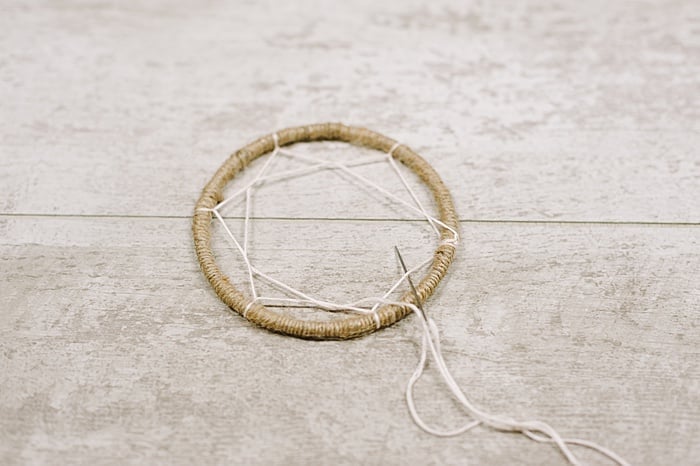
Continue all the way to the center. Tie it off when you’re finished.
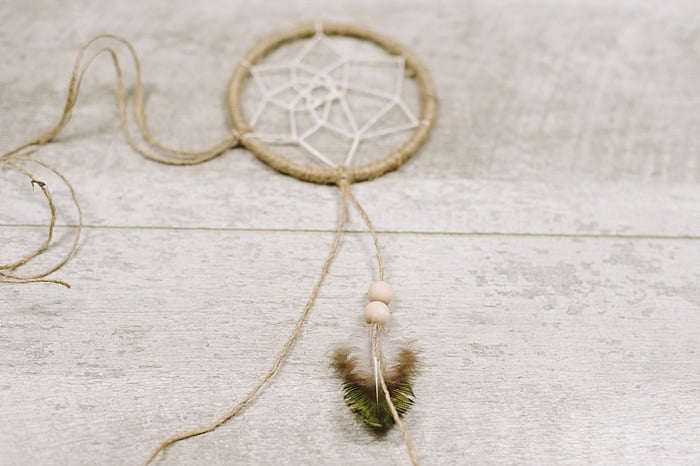
Step 5. Cut a long piece of twine. Fold it in half, and pass the loop toward the back of the hoop.
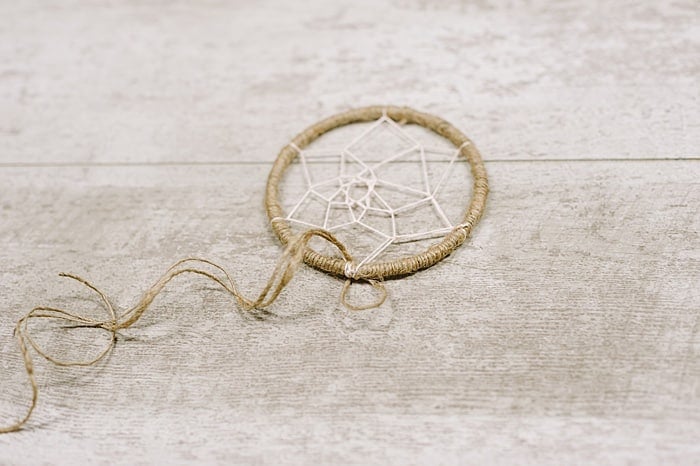
Bring the two tails through the loop and tighten, to secure the twin to the hoop.
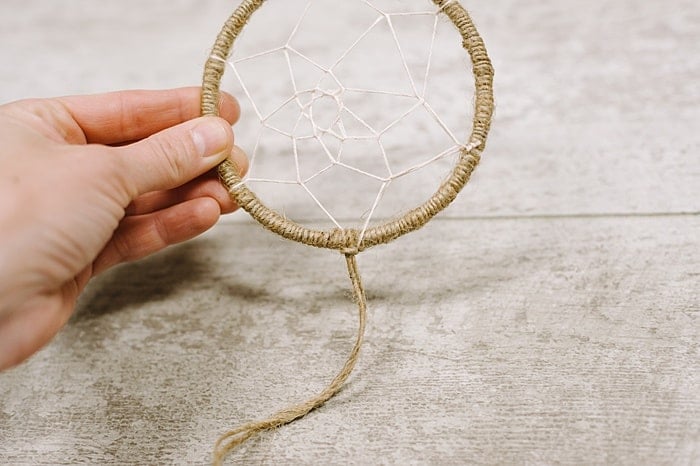
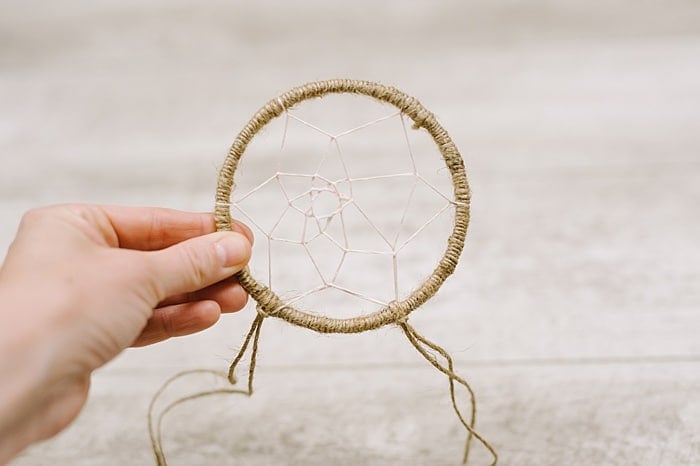
Step 6: Repeat again with a second piece of twine.
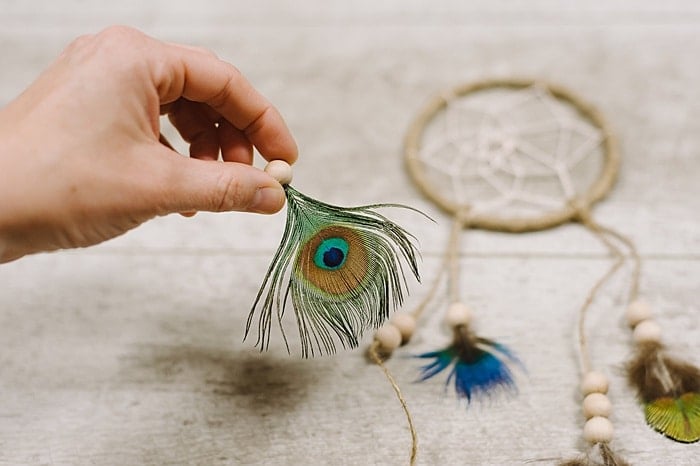
Step 7: Add wooden beads to the strings of twine. Add feathers as desired, and use a small dab of hot glue to help anchor them in place.
Stagger the lengths of each string for visual interest.
PRO TIP: You can put a tiny dab of glue onto the tip of a feather, and put the feather into a wooden bead. This will secure the feather to the bead, and then you can focus solely on adding the bead to the twine, instead of trying to secure both at the same time.
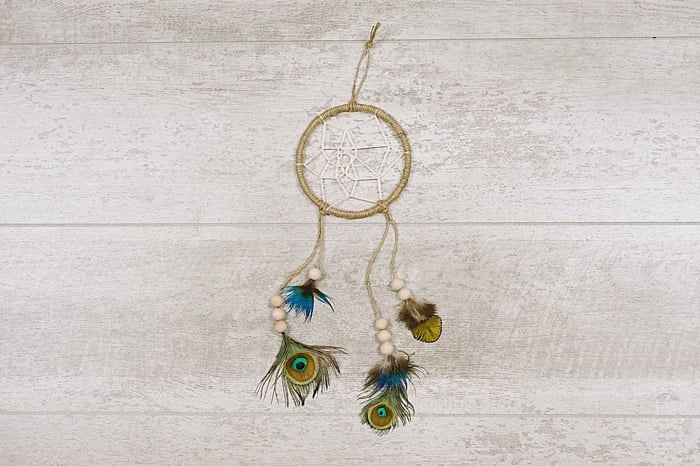
Step 8: You can hang the dreamcatcher up just like this, or you can loop a smaller piece of twine through the top to serve as a hanging string.

Step 9: Trim any excess twine and you are done! You’ve made a dreamcatcher!
Making dream catchers is a fun activity for kids and adults alike.
Choose your supplies, choose your colors, and follow this tutorial showing you how to make a dream catcher for your home.
You can even make mini ornament versions, like this doily dreamcatcher ornament or a felt ball dreamcatcher ornament.


Leave a Reply