
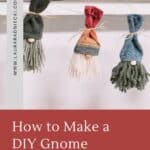
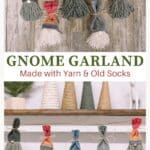


Learn how to make a DIY gnome garland for Christmas, using handmade yarn and sock gnomes, and twine. Perfect holiday decor for your mantel!

DIY yarn and sock gnomes are a fun, easy craft project to do any time, but especially for the holidays.
We made our own DIY yarn gnomes in this tutorial, and they were a huge hit.
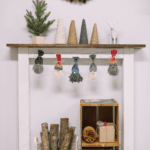
Today, we are going to take those gnomes, and turn them into a DIY gnome garland - your mantel will never be the same!
Jump to:
Why You'll Love This Craft
- Making cute yarn and sock gnomes was a super fun craft that I loved. This gives those gnomes another way to shine.
- Garlands are the best way to change up your decor for a new season or holiday.
- Kids love this project. They get a kick out of making the cute gnome people and love seeing them hanging up in the home.
Craft Supplies Needed
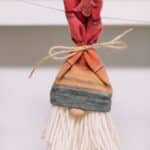
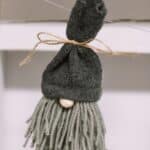
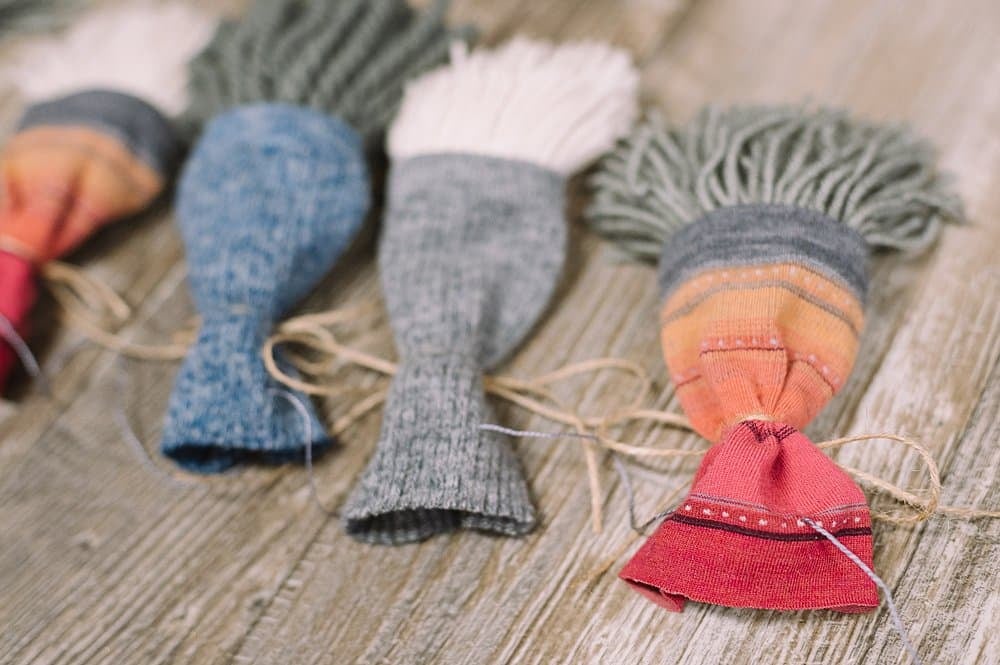
- Yarn and Sock Gnomes - Make them using this Yarn and Sock Gnome tutorial!
- Embroidery Floss - This string is small enough to thread easily through the sock fabric, and sturdy enough to hold up the garland.
- Scissors - For trimming the embroidery floss.
- Embroidery Needle - The eye needs to be big enough to pass the embroidery floss through, but the whole needle needs to be small enough to pass through the sock's fabric.
How to Make a DIY Gnome Garland
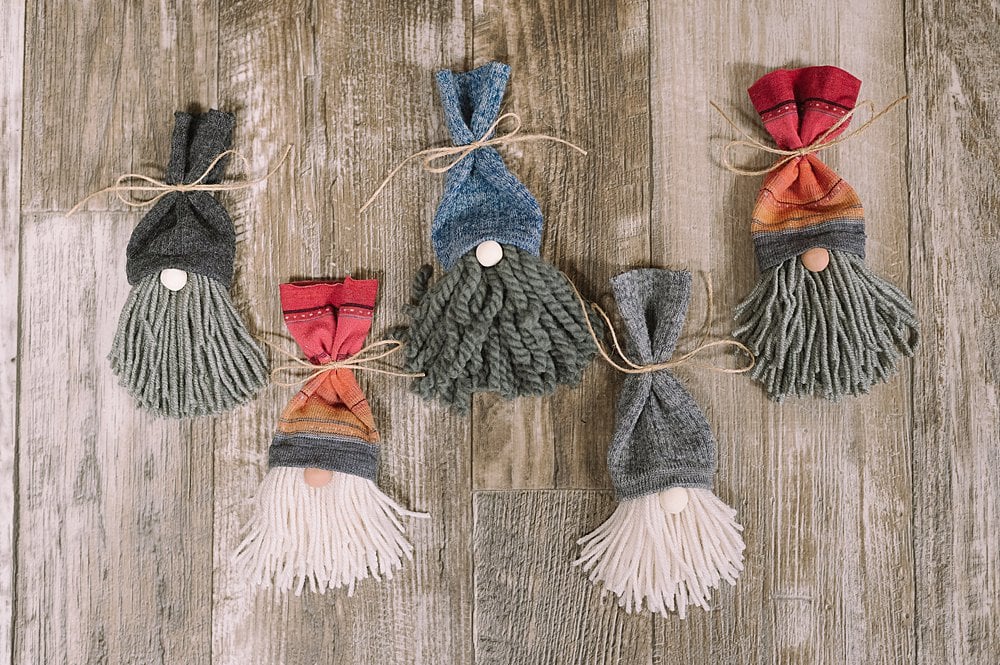
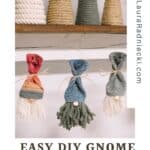
Step 1: Make enough yarn and sock gnomes to span the length of your garland, using this DIY gnome tutorial.
I made 5 gnomes for my small mantel's garland. I planned to space them out along the string.
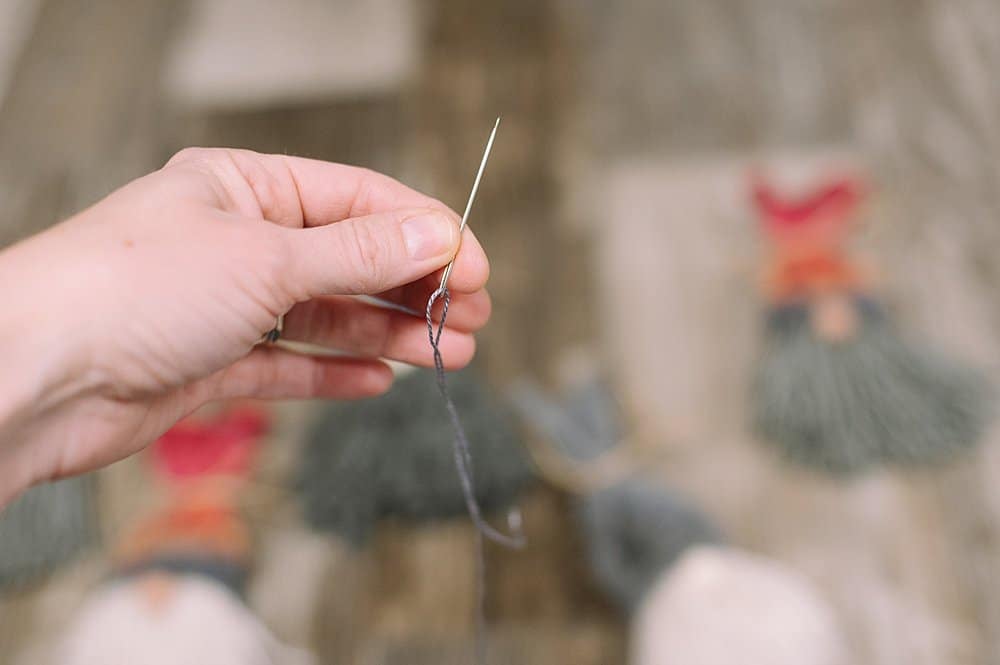
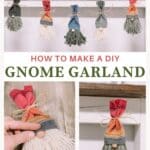
Step 2: Thread an embroidery needle with embroidery floss.
(I tried to use the thinnest twine I had, but it was still too thick to pass through the sock fabric. Embroidery thread passed through just fine, and is available in many different color options.)

Step 3: Thread the needle and embroidery floss through the backside of one gnome's hat, above the tied twine section.
Pull the embroidery floss through, bringing the hat and gnome fully onto the garland.
Step 4. Repeat for all the sock gnomes, adding them in whatever order you choose.
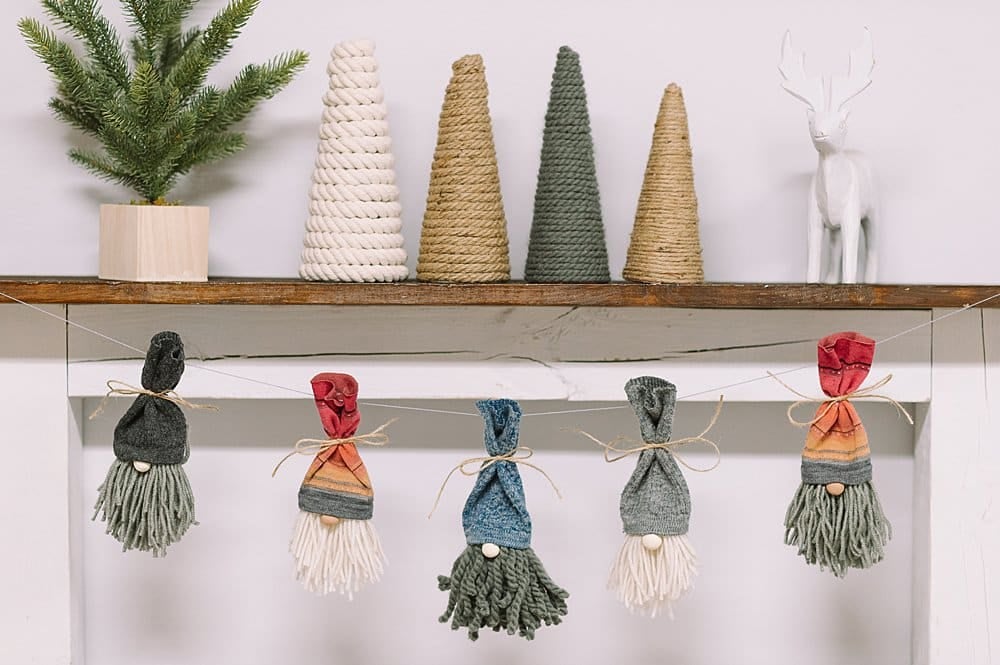
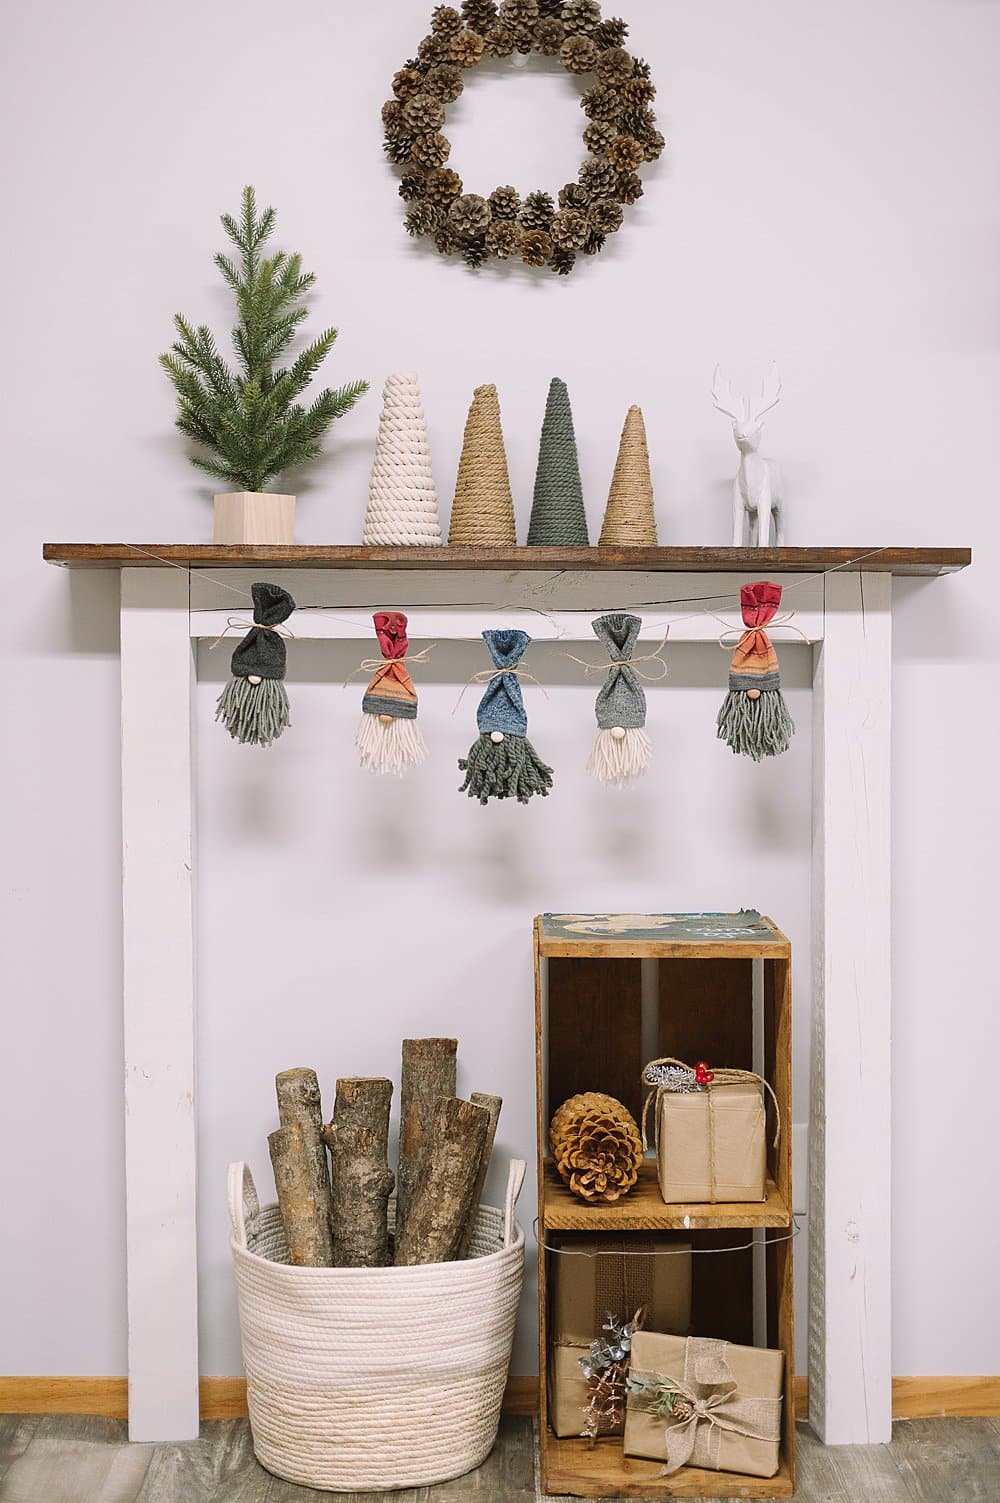
Step 5: Tie hanging loops at the ends of the embroidery floss and hang up your gnome garland!

Step 6. You can space the gnomes however far apart you'd like.
If you decide your garland should have more gnomes on it, snip one loop off the end of the garland's string, and thread more gnomes onto the garland.
Then, tie a new loop and hang!
Common Questions
On our website, we have the full craft tutorial for yarn and sock gnomes.
In anticipation of this (and other) crafts, I save my tall socks once they wear out and start getting holes in the soles. Tall, thick winter socks or fun dress socks work best for this project. If you don't have any worn-out socks, check local thrift stores to see what their options for socks are. And if you really want to go out on a limb, ask your social media friends if anyone has any worn-out tall winter socks you could use for a project.
This is up to you! You can space them as far apart or as close together as you want. You could try scooting the gnomes closer together, or leave them with some breathing room in between like we did here.
That's all there is to creating a DIY gnome garland!
Simple string yarn and sock gnomes onto embroidery floss and you've got a unique and fun garland for your mantel that everyone will ask about.
More Christmas Crafts You'll Love


---
⭐️🧶 Did you enjoy this craft and want to see more like it? ✂️ Join our FREE email community and get inspiring craft ideas sent right to your inbox! 🧵 ⭐️
---

How to Make a DIY Gnome Garland
Materials
- Yarn and Sock Gnomes (Made with this yarn and sock gnome tutorial!)
- Embroidery Floss
- Scissors
- Embroidery Needle
Instructions
- Make enough yarn and sock gnomes to span the length of your garland, using this DIY gnome tutorial.I made 5 gnomes for my small mantel's garland. I planned to space them out along the string.
- Thread an embroidery needle with embroidery floss.(I tried to use the thinnest twine I had, but it was still too thick to pass through the sock fabric. Embroidery thread passed through just fine, and is available in many different color options.)
- Thread the needle and embroidery floss through the backside of one gnome's hat, above the tied twine section.Pull the embroidery floss through, bringing the hat and gnome fully onto the garland.
- Repeat for all the sock gnomes, adding them in whatever order you choose.
- Tie hanging loops at the ends of the embroidery floss and hang up your gnome garland!
- You can space the gnomes however far apart you'd like.If you decide your garland should have more gnomes on it, snip one loop off the end of the garland's string, and thread more gnomes onto the garland.Then, tie a new loop and hang!
Notes
- Look for old socks in your drawer that have holes in the soles. Otherwise, look for socks at thrift stores!
- Pick an embroidery floss color that compliments the colors of your gnomes. I picked a neutral gray for the floss color.
- The gnomes can be spaced close together or further apart, depending on the look you are going for.


Leave a Reply