• Skip to main content
  • Skip to primary sidebar
Laura Radniecki
menu icon
go to homepage
  • Fall
  • Craft Index
  • Library
  • Shop
  • Writing
    • Facebook
    • Instagram
    • Pinterest
    • YouTube
  • subscribe
    search icon
    Homepage link
    • Fall
    • Craft Index
    • Library
    • Shop
    • Writing
    • Facebook
    • Instagram
    • Pinterest
    • YouTube
  • ×
    Home » Pom Poms

    How to Make a Pom Pom with a Fork | Pom Pom Fork Method Tutorial

    May 13, 2020 | Updated Sep 10, 2022 | By Laura | This post may contain affiliate links | Leave a Comment

    • Facebook
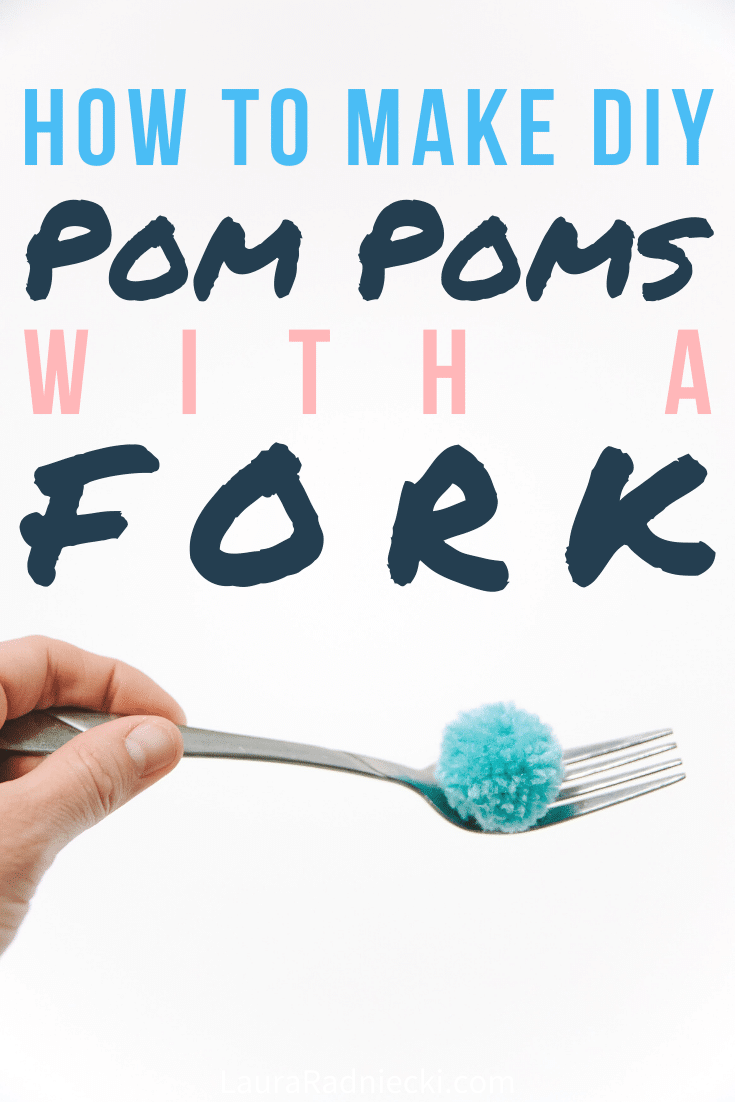
    How to Make a Pom Pom with a Fork _ Pom Pom Fork Method Tutorial

    HERE'S A STEP-BY-STEP TUTORIAL FOR THE POM POM FORK METHOD; SHOWING EXACTLY HOW TO MAKE THE PERFECT POM POM USING A FORK, YARN, AND SCISSORS!

    Pom poms are addicting to make and can be used in a ton of different craft projects.

    We've made a beautiful pom pom Christmas ornament, and we've combined small yarn pom poms with toilet paper rolls to make ice cream cones, and even turned those into an ice cream cone garland.

    There are pom pom makers you can buy to help you make pom poms of varying sizes, but my preferred method is to make pom poms with my hand!

    The hard part with the method of using your own hand to make a yarn wrapped pom pom is you can't make them very small. Even using just two fingers doesn't give you a pom pom small enough to be used in most jewelry-making.

    So today, we are exploring the pom pom fork method!

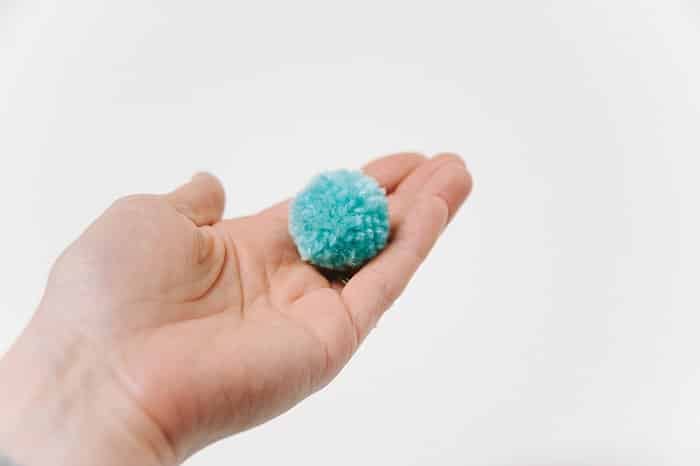
    It's a way of making pom poms using a fork from your kitchen, and results in small, perfect pom poms.

    Here’s how to do it!
    How to Make a Pom Pom with a Fork _ Pom Pom Fork Method Tutorial

    How to Make a Pom Pom with a Fork | Pom Pom Fork Method Tutorial

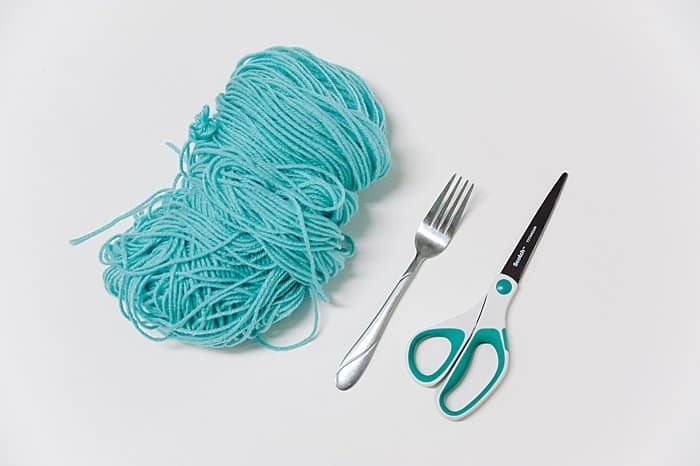
    Step 1. Gather Supplies.

    Supplies Needed:

    • Yarn or String
    • A Fork
    • Scissors

    how to make a pom pom with a fork and yarn

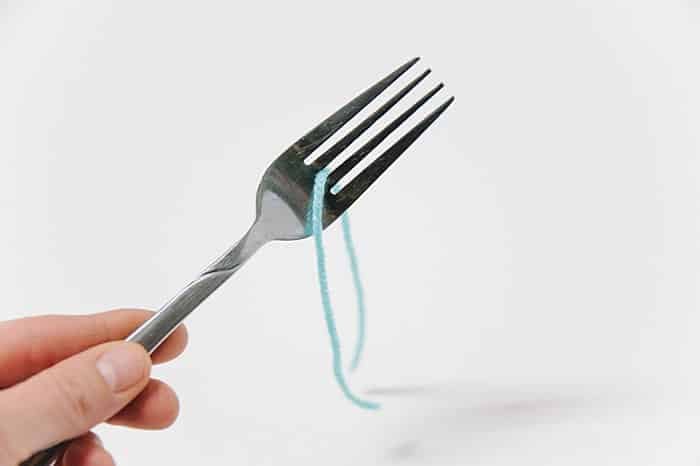
    Step 2. Cut an 8" section of yarn and slide it onto the middle of the fork.

    Cut an 8" section of yarn.

    This will be the piece you use later to tie around your whole pom pom to keep it together.

    Slide the piece of yarn into the middle section of the fork.

    You'll leave it there during the next step.
    how to make a pom pom with a fork and yarn step by step

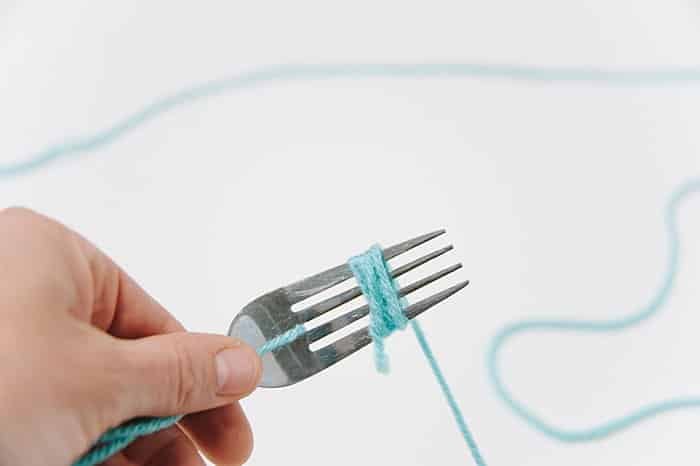
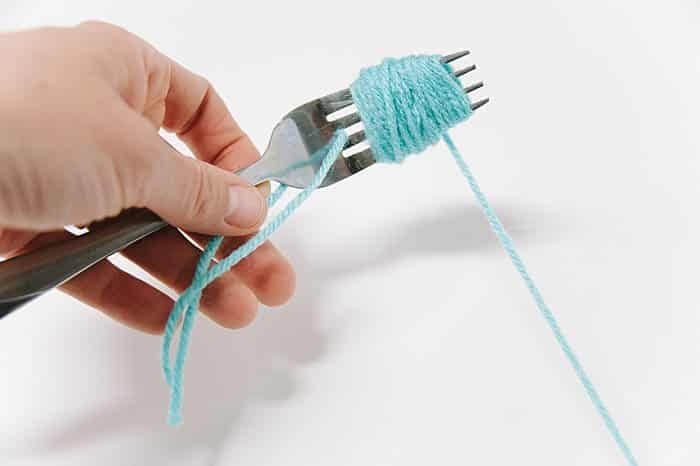
    Step 3. Wrap yarn around fork 50 times.

    As you hold the fork, try to also hold the 8" piece of yarn out of the way as pictured below.

    Next, begin wrapping the yarn tightly around the fork.

    The number of times you wrap will determine how dense your pom pom will be, and the type of yarn also impacts how much you need to wrap.

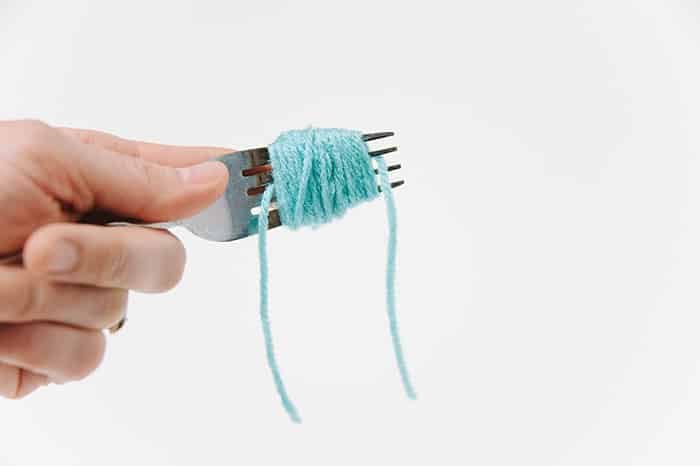
    This is cheap, average yarn (which works great for making pom poms!) and I found the sweet spot is wrapping 50 times around the fork to get a nice, dense pom pom.
    how to make a pom pom with a fork step by step

    how to make a pom pom with a fork and yarn step by step with photos

    Once you've wrapped 50 times (wrap more times if your yarn is thinner, or less if it's thicker), cut the yarn ball free.
    diy pom pom using fork

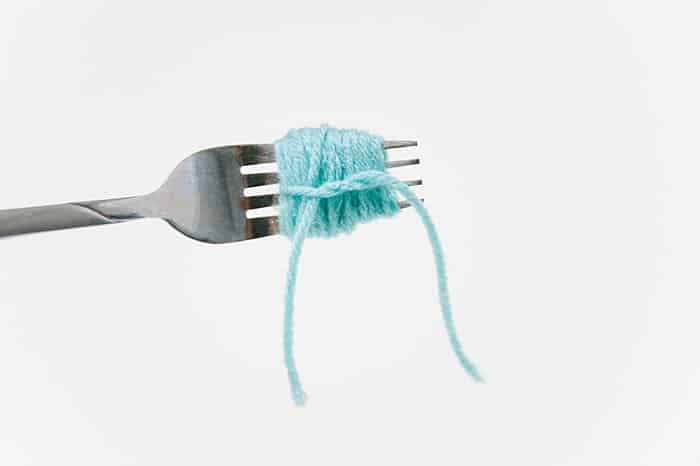
    Step 4. Tie the 8" section of yarn around the wrapped yarn bundle to secure.

    You're going to take the 8" section of yarn you've been holding out of the way, and use it to secure the wrapped yarn bundle.

    This is the key to a tight, secure pom pom.

    Bring the 8" section of yarn to the front of the fork and begin to tie a knot.
    diy pom pom with a fork step by step

    This is what the back looks like when you begin to tie your knot.
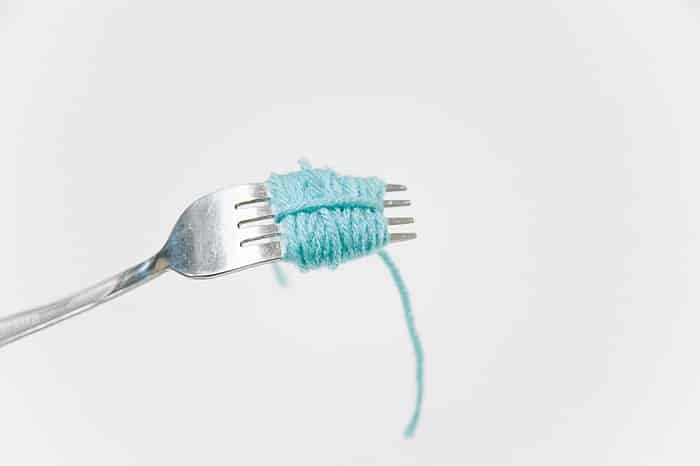
    diy mini pom poms fork

    You want to tie a TIGHT knot.

    The tighter you get it, the better your pom pom will be in the end.

    Tie the string as tight as you can and knot it to secure.
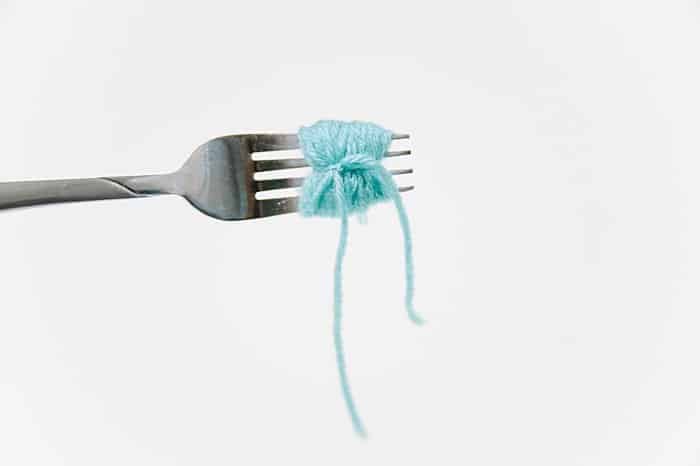
    diy mini pom poms fork

    Once it's secure, slide the yarn bundle off of the fork.
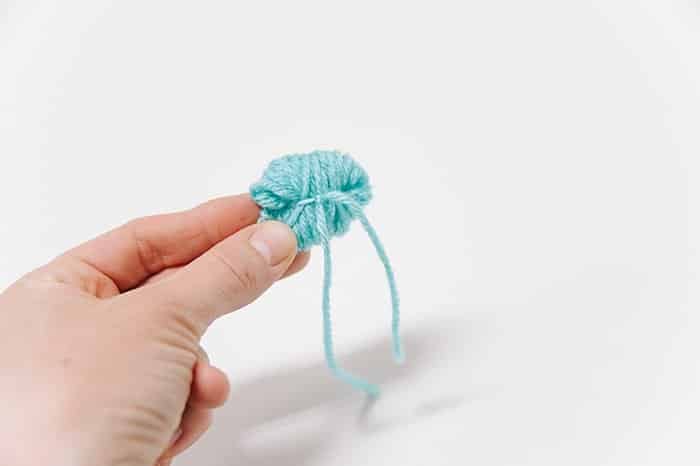
    diy pom pom using fork

    Step 5. Check knot tightness. Tie again on other side of the bundle, if needed.

    Sometimes I'm able to get a really tight knot and my pom pom bundle feels very secure at this point.

    Other times, I haven't been able to get all the slack out when I tie my knot, and the bundle still feels loose.

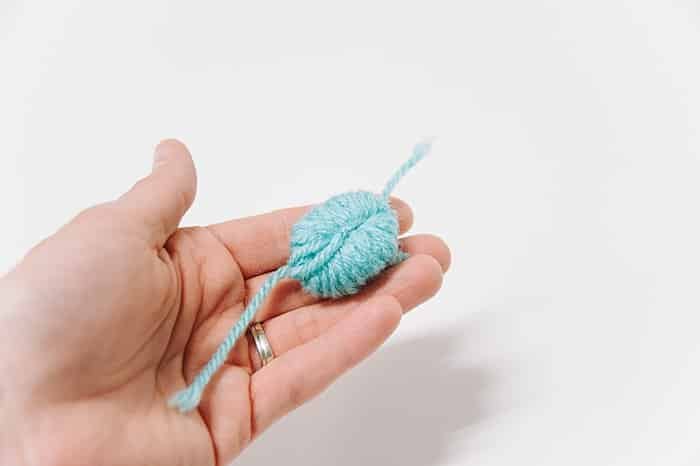
    If there's too much slack in the bundle, like pictured below, flip the bundle over to the back, wrap the two ends around and repeat the tying/knotting process again on the back side.
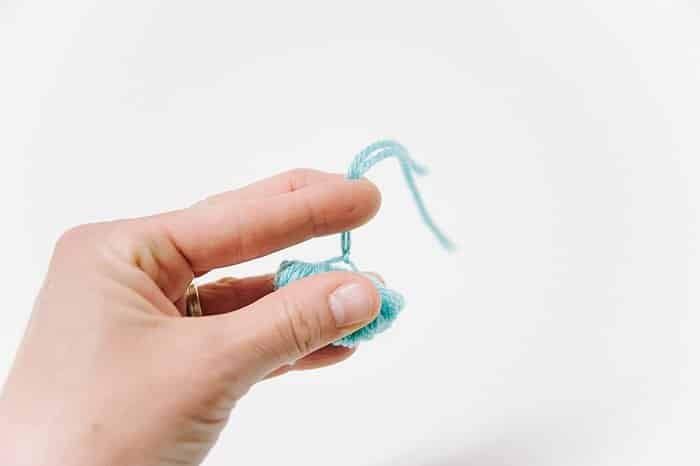
    How to Make a Pom Pom with a Fork | Pom Pom Fork Method Tutorial

    diy pom pom with fork

    Tying another knot on the backside further secures the pom bundle, and usually does the trick so it's extra secure and ready for the next step!

    Step 6. Cut yarn loops free and trim into a ball.

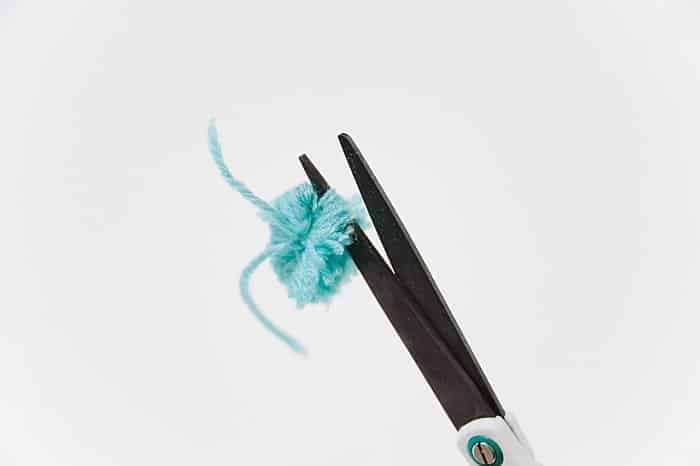
    Using a sharp scissors, slowly begin to cut the loops of yarn around the edge of the pom pom free.

    There are many layers, so start on the outside and work inward.

    Continue to cut until every loop of yarn is free.
    diy yarn pom pom with fork

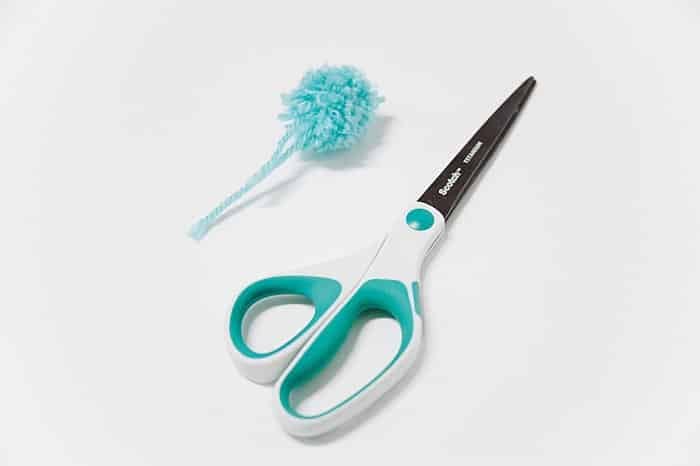
    You'll end up with a straggly, weird-looking pom pom once all the loops are cut.
    diy yarn pom pom with fork

    Next, trim the scraggly pom pom and shape it into a ball!

    diy pom pom using fork

    how to make a diy pom pom using fork

    Continue to trim until you're happy with your ball-shaped pom pom.

    You are done!

    how to make diy pom poms with a fork

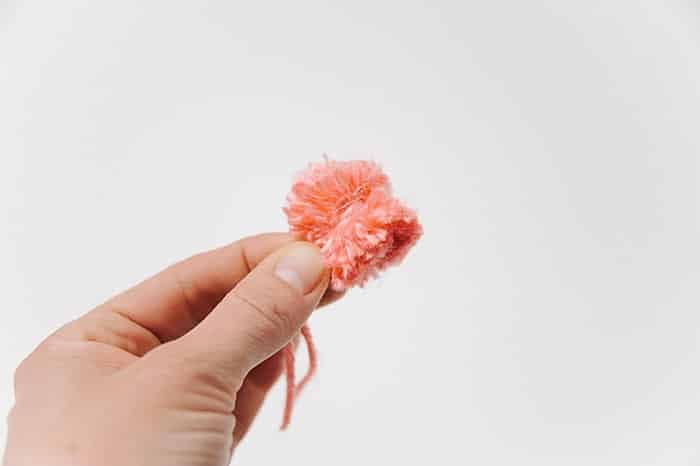
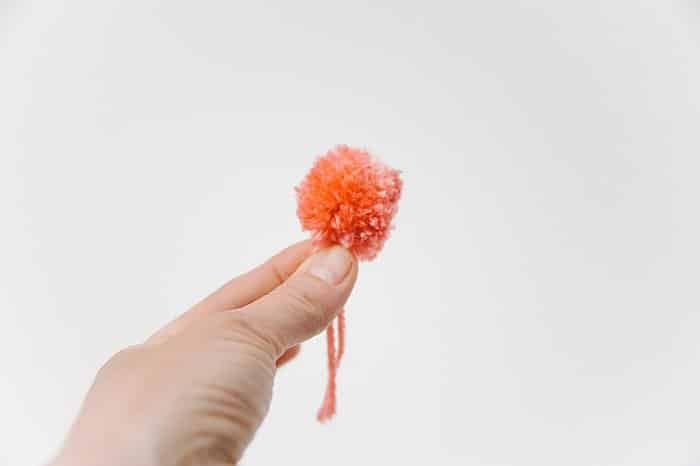
    If you find some pom poms not turning into a nice ball, you can use a little hot glue to close up any major gaps. 

    This sometimes happens with fine yarn; it happened often for me with this soft, fine pink yarn.

    In order to make the pink poms work better, I used hot glue to close up the gaps and make them look more like a ball.
    how to fix a weird looking pom pom

    fix a bad pom pom

    NOTE: Depending on what you plan to do or make with the pom poms, sometimes it can be helpful to leave the two longer tie strings, instead of cutting them off. You can use them to tie the pom pom onto a headband or a garland etc.

    But if you are using the pom pom for something like jewelry, you don't need those tie strings and can cut them off like I did here.

    These tiny yarn pom poms can also be used in this pom-pom letter project instead of store-bought pom poms!
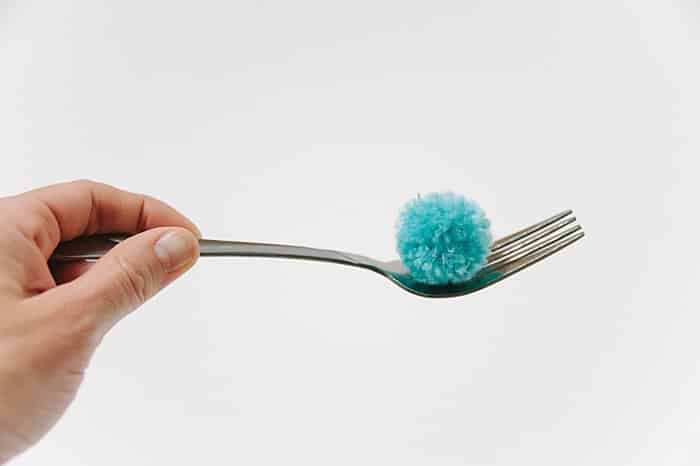
    how to make diy pom poms with a fork

    It's amazing that something simple like yarn and a fork can make something so cute!

    It's so fast and easy to make a pom pom with a fork; it takes less than three minutes per pom.

    You'll be able to whip up a dozen in no time!

    - - -

    Save the idea for later by pinning the photo below to Pinterest!
    How to Make a Pom Pom with a Fork _ Pom Pom Fork Method Tutorial

    More Easy Pom Pom Crafts

    • How to make a pom pom letter.
      How to Make a Pom Pom Letter R
    • Craft Mini Pompom Pinecone Trees effortlessly with our step-by-step guide. Elevate your holiday decor with these charming DIY decorations!
      How to Make Mini Pompom Pinecone Trees
    • Unleash your holiday creativity! Learn how to craft a stunning DIY Giant Pinecone Christmas Tree adorned with pompoms. Get ready to spread festive cheer!
      DIY Giant Pinecone Christmas Tree with Pompoms
    • Craft your own festive Pom Pom Pinecone Christmas Trees with our simple guide! Elevate your holiday decor this season.
      DIY Pom Pom Pinecone Christmas Trees

    About Laura

    Laura Radniecki is a crafter, writer, and photographer from small-town Minnesota. A lifelong maker, she shares easy step-by-step craft tutorials. She's a wife to her high school sweetheart, mama to their son and daughter, dog mama to their 2 brother + sister toy poodles, and a part-time RV snowbird in Florida.

    Reader Interactions

    Leave a Reply Cancel reply

    Your email address will not be published. Required fields are marked *

    Recipe Rating


    Primary Sidebar

    Hi, I'm Laura Radniecki!

    I’m here to help you make easy crafts! Around here, you’ll find step-by-step craft tutorials that remove the guesswork, and are easy, fast, and fun. If you are a busy crafter, you are in the right place!

    (I also write when I'm inspired, and share my thoughts on my life + our world here too.)

    .

    More about me →

    Fall Crafts

    • How to make a beeswax dipped leaf garland.
      How to Make a Beeswax Leaf Garland
    • A Halloween wreath made with burlap ribbon with black and orange polka dots on it.
      How to Make a Burlap Halloween Wreath
    • How to Preserve Fall Leaves with Beeswax.
      How to Preserve Fall Leaves with Beeswax
    • Fall earrings made with felt ball pumpkins.
      How to Make Felt Ball Pumpkin Earrings
    • A look at using Matte vs Gloss Mod Podge to preserve fall leaves.
      A Look at Matte vs Gloss Mod Podge Fall Leaves
    • A wooden bowl with plaster easter eggs in it. The plastic eggs are wrapped in yarn and twine to look like DIY acorns.
      DIY Fall Acorns using Yarn-Wrapped Plastic Easter Eggs

    Popular Crafts

    • Purple and red paper cones made with construction paper, laying with a scissors on a table top.
      How to Make a Cone Out of Paper
    • Yellow DIY cornhole bag and scrabble tiles that say "game on".
      How to Make Cornhole Bags
    • Photo showing a wreath made out of jute rope hanging on a wall above a shelf with a plant on it.
      How to Make a Jute Wreath
    • How to Make a Pacifier Clip
      How to Make a Pacifier Clip
    • Learn how to make yarn tassels in this DIY tassel tutorial, showing two methods - one by hand and one using cardboard for making tassels.
      How to Make Yarn Tassels
    • Pinecones laying on a whitewashed wooden surface.
      How to Prepare Pine Cones for Crafts

    Footer

    ↑ back to top

    About

    • About Me
    • Shop
    • Privacy Policy
    • Accessibility

    Newsletter

    • Get craft tutorials, DIY project inspiration, and a first look at anything new by joining our email list. - Sign Up!

    Contact

    • Contact

    As an Amazon Associate, I earn from qualifying purchases.

    Copyright © 2026 Laura Radniecki