• Skip to main content
  • Skip to primary sidebar
Laura Radniecki
menu icon
go to homepage
  • Fall
  • Craft Index
  • Library
  • Shop
  • Writing
    • Facebook
    • Instagram
    • Pinterest
    • YouTube
  • subscribe
    search icon
    Homepage link
    • Fall
    • Craft Index
    • Library
    • Shop
    • Writing
    • Facebook
    • Instagram
    • Pinterest
    • YouTube
  • ×
    Home » Ornaments

    Day 25: How to Make a Button Christmas Tree Ornament | The 30 Days of Ornaments Project

    Nov 25, 2019 | Updated Sep 10, 2022 | By Laura | This post may contain affiliate links | Leave a Comment

    • Facebook
    Day 25_ How to Make a Button Christmas Tree Ornament _ The 30 Days of Ornaments Project (1)

    Buttons are one of those items that are often overlooked, but hold amazing craft potential!

    Years ago, I bought a large jar of miscellaneous upcycled buttons. The jar included hundreds of buttons in all sizes, shapes, and colors, and I have used them in numerous projects over the years.

    We’re on Day 25 of The 30 Days of Ornaments Project, where we are making 30 handmade ornaments in 30 days.

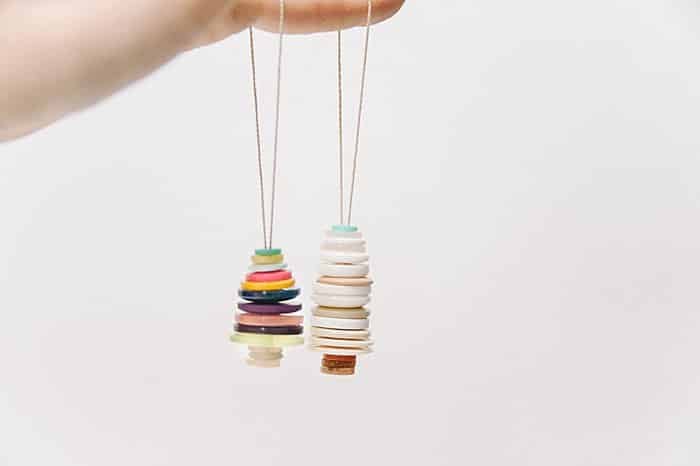
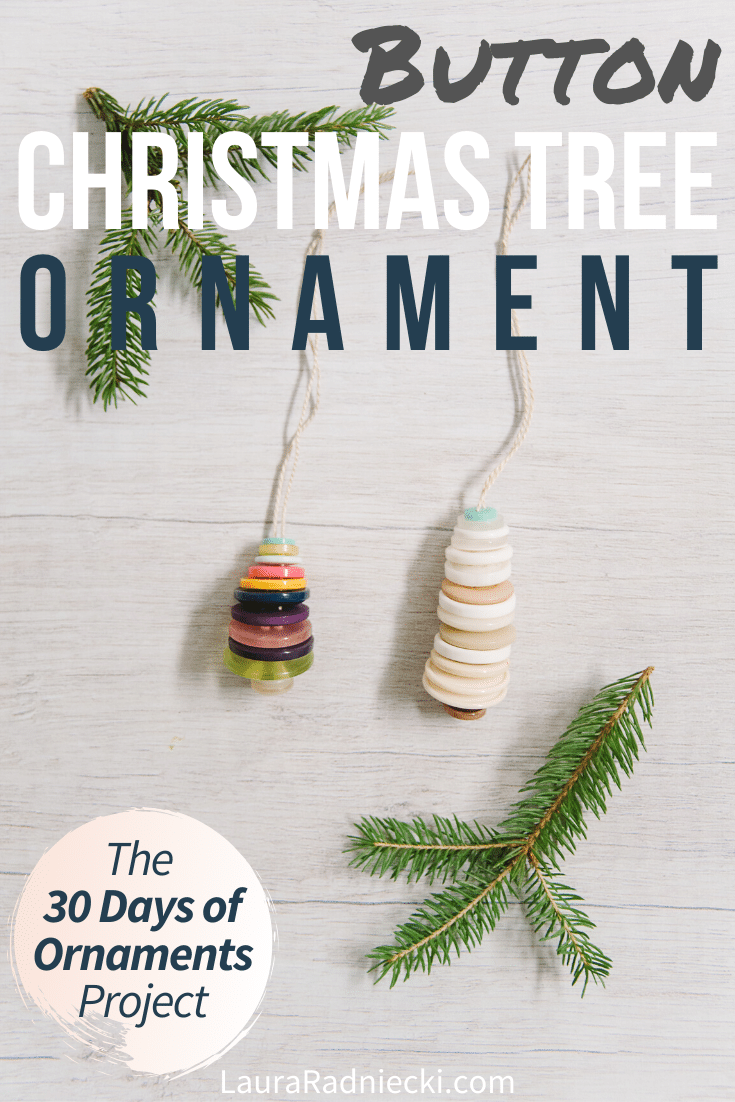
    Today, we are going to use varying sizes of buttons and thread them onto embroidery floss to create the cutest little DIY button Christmas tree ornaments ever!
    Day 25_ How to Make a Button Christmas Tree Ornament _ The 30 Days of Ornaments Project (1)

    Here is how to make a DIY button Christmas ornament!

    Day 25: How to Make a Button Christmas Tree Ornament

    DIY Button Christmas Ornament

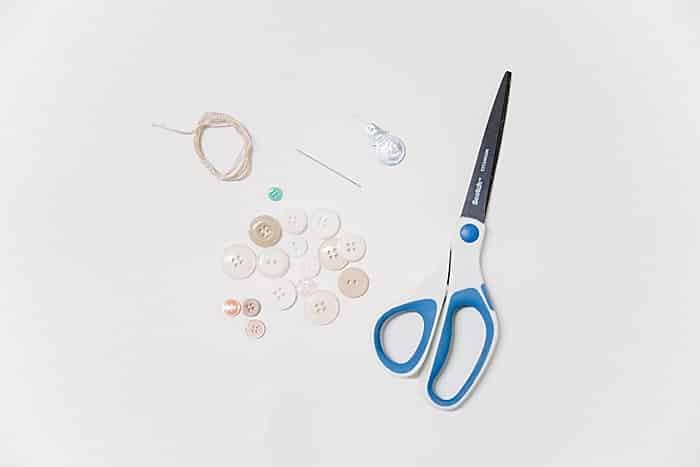
    Step 1. Gather supplies.

    Supplies needed:

    • Buttons
    • Embroidery Floss
    • Embroidery Needle
    • Needle Threader
    • Scissors

    Day 25_ How to Make a Button Christmas Tree Ornament _ The 30 Days of Ornaments Project

    Day 25_ How to Make a Button Christmas Tree Ornament _ The 30 Days of Ornaments Project

    Step 2. Cut a section of embroidery floss at least 18" long.

    Step 3. Thread needle with embroidery floss, using the needle threader if needed.

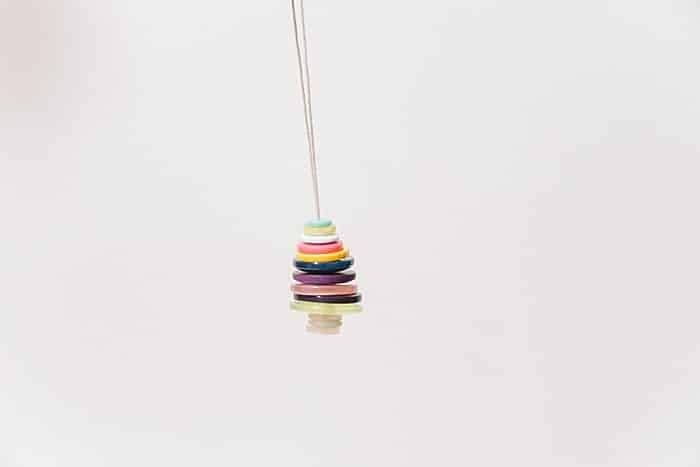
    Step 4. Determine the order you want your buttons to go in, to create the look of a Christmas tree. I used three small buttons for a tree truck, and then stacked my buttons from biggest to smallest to create a tapered tree shape.

    Step 5. Start at the top of your button stack, and thread the buttons onto the needle and embroidery floss in order.
    Day 25_ How to Make a Button Christmas Tree Ornament _ The 30 Days of Ornaments Project (1)

    Step 6. Once you get to the bottom button, thread the needle back up through the other hole (or the diagonal hole if there are 4 holes) and keep going through all of the buttons until you are back up through the top button.

    Step 7. Tie the embroidery floss to create a hanging string, and trim excess.

    Step 8. Inspect the DIY button Christmas tree ornament and hang!

    Day 25_ How to Make a Button Christmas Tree Ornament _ The 30 Days of Ornaments Project (1)

    These button tree ornaments are the CUTEST. I love the multi-colored version I made, as well as the more elegant white and cream version.

    I think these could be used as gift wrap embellishments as well, and maybe even turned into a Christmas garland if you made a bunch of little button trees.

    They would look lovely on a Christmas tree, paired with a wooden bead garland, or wood bead ornaments.

    Let's put those miscellaneous buttons to good use!
    Day 25_ How to Make a Button Christmas Tree Ornament _ The 30 Days of Ornaments Project (1)

    . . . . . . .

    More Easy DIY Ornaments

    • How to make a memory heart ornament.
      How to Make a Memory Heart Ornament
    • How to Make a Keepsake Memory Ornament with Fabric and Hoop.
      How to Make a Keepsake Memory Ornament with Fabric and Hoop
    • How to make toilet paper roll flower ornaments.
      How to Make Toilet Paper Flower Ornaments
    • How to make a salt dough heart.
      How to Make a Salt Dough Heart

    About Laura

    Laura Radniecki is a crafter, writer, and photographer from small-town Minnesota. A lifelong maker, she shares easy step-by-step craft tutorials. She's a wife to her high school sweetheart, mama to their son and daughter, dog mama to their 2 brother + sister toy poodles, and a part-time RV snowbird in Florida.

    Reader Interactions

    Leave a Reply Cancel reply

    Your email address will not be published. Required fields are marked *

    Recipe Rating


    Primary Sidebar

    Hi, I'm Laura Radniecki!

    I’m here to help you make easy crafts! Around here, you’ll find step-by-step craft tutorials that remove the guesswork, and are easy, fast, and fun. If you are a busy crafter, you are in the right place!

    (I also write when I'm inspired, and share my thoughts on my life + our world here too.)

    .

    More about me →

    Fall Crafts

    • How to make a beeswax dipped leaf garland.
      How to Make a Beeswax Leaf Garland
    • A Halloween wreath made with burlap ribbon with black and orange polka dots on it.
      How to Make a Burlap Halloween Wreath
    • How to Preserve Fall Leaves with Beeswax.
      How to Preserve Fall Leaves with Beeswax
    • Fall earrings made with felt ball pumpkins.
      How to Make Felt Ball Pumpkin Earrings
    • A look at using Matte vs Gloss Mod Podge to preserve fall leaves.
      A Look at Matte vs Gloss Mod Podge Fall Leaves
    • A wooden bowl with plaster easter eggs in it. The plastic eggs are wrapped in yarn and twine to look like DIY acorns.
      DIY Fall Acorns using Yarn-Wrapped Plastic Easter Eggs

    Popular Crafts

    • Purple and red paper cones made with construction paper, laying with a scissors on a table top.
      How to Make a Cone Out of Paper
    • Yellow DIY cornhole bag and scrabble tiles that say "game on".
      How to Make Cornhole Bags
    • Photo showing a wreath made out of jute rope hanging on a wall above a shelf with a plant on it.
      How to Make a Jute Wreath
    • How to Make a Pacifier Clip
      How to Make a Pacifier Clip
    • Learn how to make yarn tassels in this DIY tassel tutorial, showing two methods - one by hand and one using cardboard for making tassels.
      How to Make Yarn Tassels
    • Pinecones laying on a whitewashed wooden surface.
      How to Prepare Pine Cones for Crafts

    Footer

    ↑ back to top

    About

    • About Me
    • Shop
    • Privacy Policy
    • Accessibility

    Newsletter

    • Get craft tutorials, DIY project inspiration, and a first look at anything new by joining our email list. - Sign Up!

    Contact

    • Contact

    As an Amazon Associate, I earn from qualifying purchases.

    Copyright © 2026 Laura Radniecki