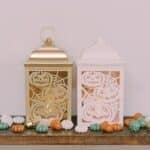
How to Make DIY Halloween Lanterns
Learn how to make DIY Halloween lanterns in this step-by-step tutorial, using plastic lanterns from the Dollar Tree! Spice up your Halloween decor by spray painting lanterns in the colors of your choice (check out that gold!)
Materials
- Plastic Lanterns
- Spray Paint (spray primer and spray paint, both rated for plastic.)
Instructions
- Remove the tops of the lanterns and the tea lights, so you're ready to prime and paint.
- Prime the inside of the lanterns with a spray primer designed for plastic.For best results, especially when trying to cover colorful items with light-colored paint, use a separate primer followed by spray paint.If you're repainting a light item, or using dark colored spray paint, you might be able to use a combo primer and paint All-in-One, if you want to.
- Prime the outside of the lanterns and tops.
- Paint the inside of the lanterns with your color of choice!This metallic gold color is a favorite around here.It's great for painting sea shells, spray painting pine cones, making gold acorns, and just about anything else you can think of!
- Spray paint the outside of the lantern and the top.
- Once the paint is dry, put the tea lights back in place and the tops of the lanterns back on.
Notes
- For best results, use a separate spray primer and spray paint, making sure both are rated for use on plastic. If you are using a dark colored spray paint, or covering something that is light in color, you could use a two-in-one primer and paint product. But if your item is dark or colorful (like these orange lanterns!) or you are using a light color spray paint, you'll want to make sure you get the best primer coverage as a base.
- Use multiple light coats, letting the paint dry for the appropriate time in between. (Make sure you read the can as different types and brands have different recommendations!)
- Get ready to be hooked, and want to spray paint everything! It's so fun to watch something get a spray paint makeover; you'll be looking around you for what else you can spray paint!