How to Make a DIY Photo Canvas
Canvas photos are a home staple in everything from gallery walls to book shelves, and for good reason. They're beautiful! But what's even better? A simple DIY photo canvas that you can make with your own two hands!
Materials
- Canvas
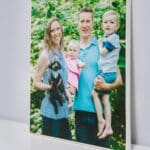
- Photo
- Scissors or Paper Cutter
- Mod Podge (Matte or Glossy)
- Foam Brush (I used a 1 inch brush)
- Clear Acrylic Sealer
- Hot Glue Gun and Twine
Instructions
- If you are repurposing an existing canvas print, paint it white. You want to start with a clean slate.
- Trim your photo so it's just slightly smaller than the size of your canvas. You can use scissors or a paper cutter to do this.
- Apply a layer of Mod Podge to the front of the canvas using a foam brush.Lay your photo down onto the canvas, and position it so it's centered and flat. Let it dry.
- Brush a layer of Mod Podge on top of the photo using long vertical brush strokes.Make sure to cover the edges where the photo and canvas meet so the photo will completely adhere to the canvas background. Let dry.
- Once dry, apply a second Mod Podge layer to the photo. Go in the opposite direction this time (horizontal brush strokes for my second coat.) Let dry.
- Brush a third layer of Mod Podge onto the top of the canvas using vertical brush strokes. Let dry.
- Spray the dry canvas with clear acrylic sealer to remove some of the tackiness Mod Podge often leaves, and to seal and protect your new canvas.
- Hot glue a piece of twine with knots on both ends to the back of the canvas to make an easy hanging string.
Notes
- Some visible brush strokes are normal on your finished canvas. To minimize them, try a wider foam brush, and spray with clear acrylic sealer once it's dry.
- If you don't have an old canvas, you can use a piece of wood as the backing for your DIY photo print!