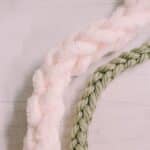
How to Make a DIY Finger Knit Garland with Chunky Yarn
Learn how to make a stylish DIY Finger Knit Garland with chunky yarn in this easy step-by-step craft tutorial. Create a cozy and trendy home decor piece effortlessly with just yarn and your hand!
Materials
- Chunky Yarn
- Scissors
- Your Hand
Instructions
- Start by pinching the tail end of a skein of yarn between your thumb and the base of your pointer finger.Wrap the yarn over the front of the base of your pointer finger, as pictured, and behind the base of your middle finger.
- Then bring the yarn around your middle finger and wrap it in front of the middle finger, and behind the pointer finger.At this point, you should have one piece of yarn visible on the front of each of your two fingers.
- Wrap the yarn around the front of the pointer finger again, and behind the middle finger again.
- Come around the outside of the middle finger and bring the yarn in front of the middle finger once again, and behind the pointer finger.Now, you will have two sections of yarn on the front of each of the two fingers, as pictured below.
- Carefully lift the bottom section of yarn up, over the top section and off of the finger, for each of the two fingers.
- Once you do this, you'll have one section of yarn on each finger.
- Repeat the wrapping procedure, bringing the yarn around to the front of the pointer finger, back behind the middle finger, around the outside to the front of the middle finger, and back behind the pointer again.(The motion is like a figure 8 around the fingers.)
- Once you have two sections of yarn on each finger again, take the bottom section closest to the base of each finger and lift it up and over the top section, and off of your fingertip.Repeat for both fingers.You'll be left with one section on each finger again.You can push the yarn down to the base of your fingers as you go. It has a tendency to ride up as you continue to finger-knit.
- Repeat this process - wrap a figure 8 around the fingers to add a second section of yarn to each finger. Lift the bottom section up over the one above it and off of the finger tip.Each time you do this, you are adding another "stitch" to your finger knit yarn garland.You can carefully pull the yarn tail end of the garland as you go, and the stitches will tighten up.Continue to add to the garland until it is as long as you want it to be.
- Cut the yarn, leaving an 8"+ tail.It should be in between your two fingers, laying behind your hand.Carefully move the yarn tail to the front side, in between your two fingers.
- Slip the end of the yarn tail under the section of yarn on one of your fingers and pull through.Then slip the yarn underneath the section on your second finger and pull tight.
- As you pull the yarn tail tight, you can slip both loops of yarn off of your finger tips.Pull the yarn tail tight, and the garland will tighten and finish itself off.
Notes
- You can buy yarn at big box stores, craft stores, specialty yarn shops, or online.
- This method of finger knitting works well for chunky yarn because it only uses two fingers (or can accommodate the chunkiest of yarn by using four fingers and pretending they are "two"). You can also finger knit using four fingers which works better for medium weight yarn. (This is the type of finger-knitting I learned in the 90's from my grandma!)
- Chunky yarn garlands work great for the mantel or hanging on the wall. Medium weight yarn makes finger-knit garlands that would work for wrapping around a Christmas tree.
